The Science behind Chladni Plates, showing resonance and sound through 2-dimensional shapes
Merub Rehman
James Fowler High School
Grade 12
Presentation
Problem
Sound and vibration, two unique concepts of acoustics (a branch of physics), can be visibly viewed through experiments like the Chladni plates and cymatics. Napoleon Bonaparte was so impressed by the work done by Ernest Chladni that he said, 'This Spaniard had made sound visible.' The patterns created on the Chladni plates have helped scientists understand the concepts of standing waves, resonance, frequency, and how objects vibrate. While the fundamental principles behind the patterns on these plates are known, it is still not figured out why the particles migrate, especially towards the nodes. Controlling multiple or large objects on the plate and determining non-symmetrical or non-uniform patterns is difficult and highly inefficient.
In this project, I will be investigating how the change in frequencies of the Chladni plate affects the patterns created on the plate that show resonance and vibrating particles. I will also investigate the idea of cymatics and the Chladni law, as well as other mathematical and physics concepts that come into play. To demonstrate this, I will be referring to the Chladni plates and creating mini experiments to display the idea.
Figure 1: A Chladni plate setup showing sand patterns at resonance

Method
Chladni Plate Experiment Setup
- A thin metal plate (20 cm x 20 cm) is placed on the center of the vibration generator.
- Connect the vibration generator to the signal generator.
- Sprinkle sand or salt on the thin plate.
- As a result, various patterns will be formed from resonant frequencies. and the nodal and anti-nodal lines can be viewed.
- They can be repeated on other shaped plates to compare the patterns.
Procedure
To carry this out, you should start at low frequency (around 100 Hz) and slowly increase to see the patterns. The vibration source can be a signal generator, speaker, or a violin string. The frequency can range from 100 Hz to 2000 Hz. The frequencies can be repeated 3 times or more until the natural frequency of the plate or object is met. Lastly, a safety tip: the ears should be protected. Higher frequencies can be very loud, so keep the amplitude low to also avoid salt or sand flying off.
DIY Chaldni Plate Experiment
Materials used:
- Cylindrical container
- Speaker or Phone (frequency generator)
- Sand or salt
- Saran wrap
Figure 1: Image of the experiment
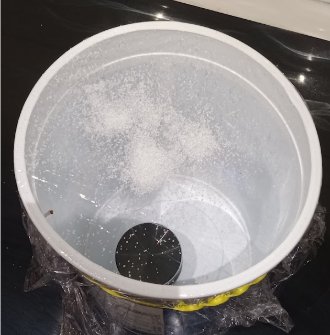 It's a container with a mini Bluetooth speaker. The container is covered with a Saran warp, and salt is sprinkled on it.
How is it carried out?
The speaker or phone is placed under or inside the container, and salt is sprinkled on the Saran Wrap. The frequency is generated, and at different frequencies, different patterns are created. This experiment is similar to that of the actual Chladni plate but has many sources of error, which disrupt the system and result in different results. Those sources of error include:
- Uneven wrap tension resulted in distorted patterns as a result of poor vibration transfer
- Too much salt caused disrupted nodal lines
- The container's resonance caused interference with the natural frequency of the wrap
- The wrap material was not very rigid or solid like a metal and resulted in smudged nodes
Quick Fix Tips: Use less salt and stretch the wrap tightly.
Research
History of the Chladni Plates
Leonardo Da Vinci and Galileo both noticed particles as a result of the vibrations on the instrument board but could not figure out how or why. Then came Ernest Florens Friedrich Chladni, who conducted in-depth investigations on the Chladni figures. He was born in Wittenberg in 1756 and was forced to earn a degree in law by his father. But after his father passed away, he was free and could now explore his interests in science. Chladni was interested in the concepts of sound and vibration and was later inspired by George Christoph Lichtenberg, who conducted experiments by sprinkling powders on the surfaces of electrified resin cakes to see different patterns. He scattered sand on the rods and plates he had, and using his musician's ear (earphones that block loud stage noises and help the musicians hear themselves), he could recognize the changes in frequencies. As a result, he noticed that different frequencies followed unique patterns. Hence, the results of the Chladni plates were published by Ernst Chladni (German physicist and musician) in 1787. Later, for his description of the vibrations, he earned the name 'the father of acoustics.'
How do Chladni plates work?
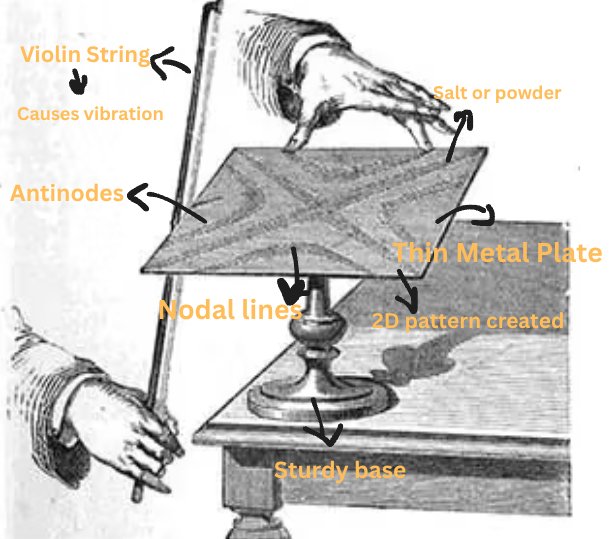
Figure 1: Standing waves on a Vibrating Square Plate
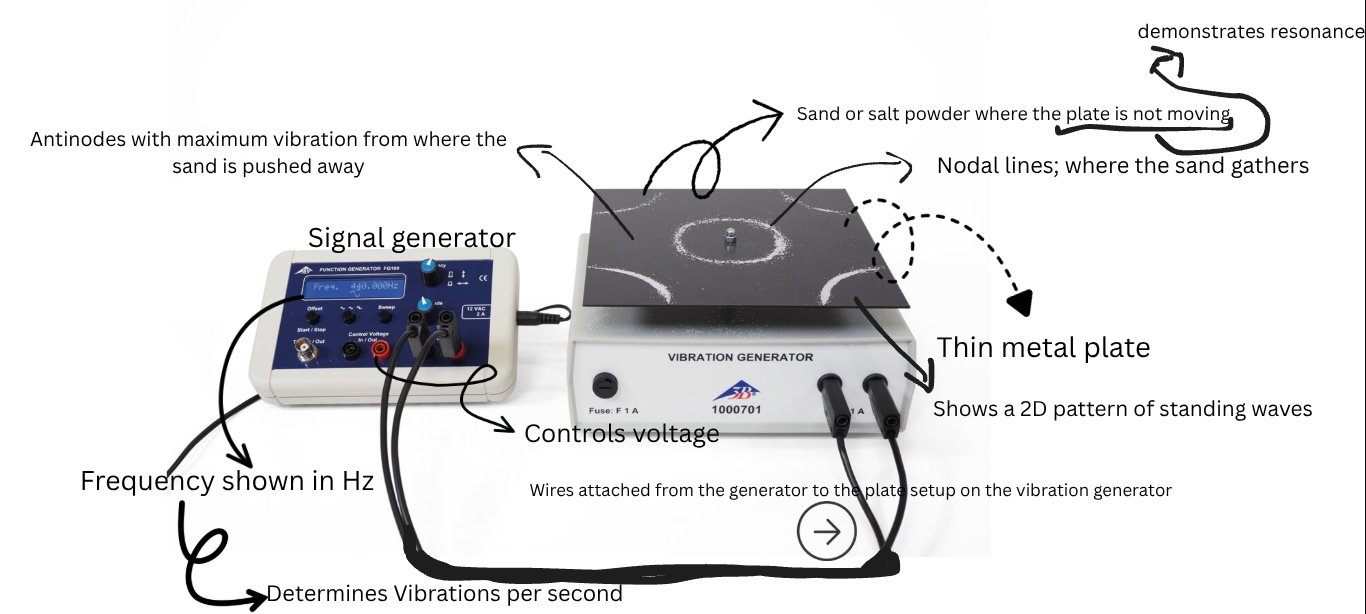
Figure 2: Chladni Plate setup without the generator
 The Chladni plate, which is a thin metal plate placed on a vibration generator or speaker, is attached to a signal generator that allows the plate to experience different frequencies. As the frequency increases, the sand sprinkled on the plate moves closer, creating more places where the plate remains unaffected. But as the frequency decreases, the sand on the plate moves further and creates unique patterns, showing fewer places that are unaffected. The places where the sand gathers are called the nodal lines, where the sand gathers and the place is unaffected. But the places that have no or little sand are the black spots on the plate called the "anti-nodes." Those are the spots that face frequency. Hence, the standing waves travel through the metal as they create unique asymmetrical and symmetrical shapes, allowing us to visualize sound.
What is the physics behind their significance?
The physics behind Chladni plates is all about the standing waves that form on the surface of the plate. Other main ideas or physics concepts include resonance, sound waves, and frequency. Moreover, Chaldni plates are an example of cymatics, as it is the study of visible sound and vibration. The physics concepts are discussed in depth below.
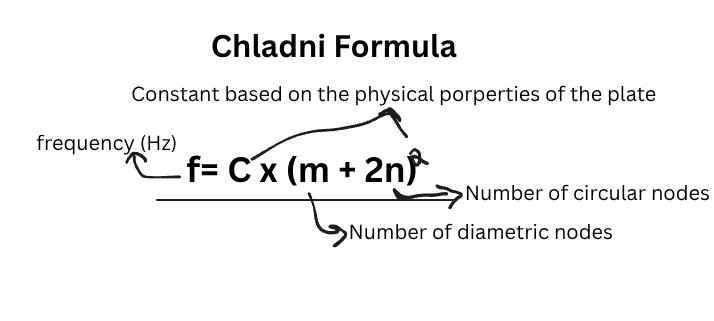
Resonance is when the frequency of sound matches the natural frequency of the plate, which makes it vibrate strongly as it increases the amplitude of the vibrations. Some examples of resonance include acoustics, electrical, and other mechanical things. Acoustics is when sound is transmitted into liquids, gases, and solids through vibration, sound waves, and ultrasound. It's like when someone sings near a wine glass, and when it hits the right note, it shatters. An electrical example is when a radio or a guitar is tuned to a specific frequency. While mechanical examples are like when a child is pushed on a swing and goes higher. These examples show how resonance allows various things to match their natural frequency to the object's frequency. When it comes to the Chladni plates, the frequencies must be resonant in order to allow the nodes to move and to create patterns. These frequencies are generated from the violin string, but now since we have signal generators, they come from the generator. The patterns are only created when the frequencies being generated align with the plate's resonant frequency; as a result, various patterns are created, depending on the frequencies. The natural frequencies at which objects prefer to vibrate are called the modes of vibration, which are characterized by the nodal lines (where the plate doesn't move) and anti-nodes (where the plate moves). At most frequencies, these nodes do not move or create patterns, but when the natural frequency is found, the patterns can be seen. Furthermore, to find the correct natural frequency, the speaker or generator can be played at different frequencies. The Chladni formula can be used to determine the frequency of the circular and square plates. This law was made by Ernst Chladni, which helped him analyze many musical instruments as well. The formula shows 2n, which was determined after many experiments and shows that the nodes raise the frequency twice as much as the diameter lines. One ring (circular node) had 2 diameter lines. The formula is also squared because more nodes mean there is more vibration energy. For instance, a pattern with 1 ring has a frequency of 4C, similar to the 2 diameter lines (m=2). But the main idea behind this formula is to show that more nodes = higher frequency and complex patterns.
Figure 3: The Chladni Formula labelled
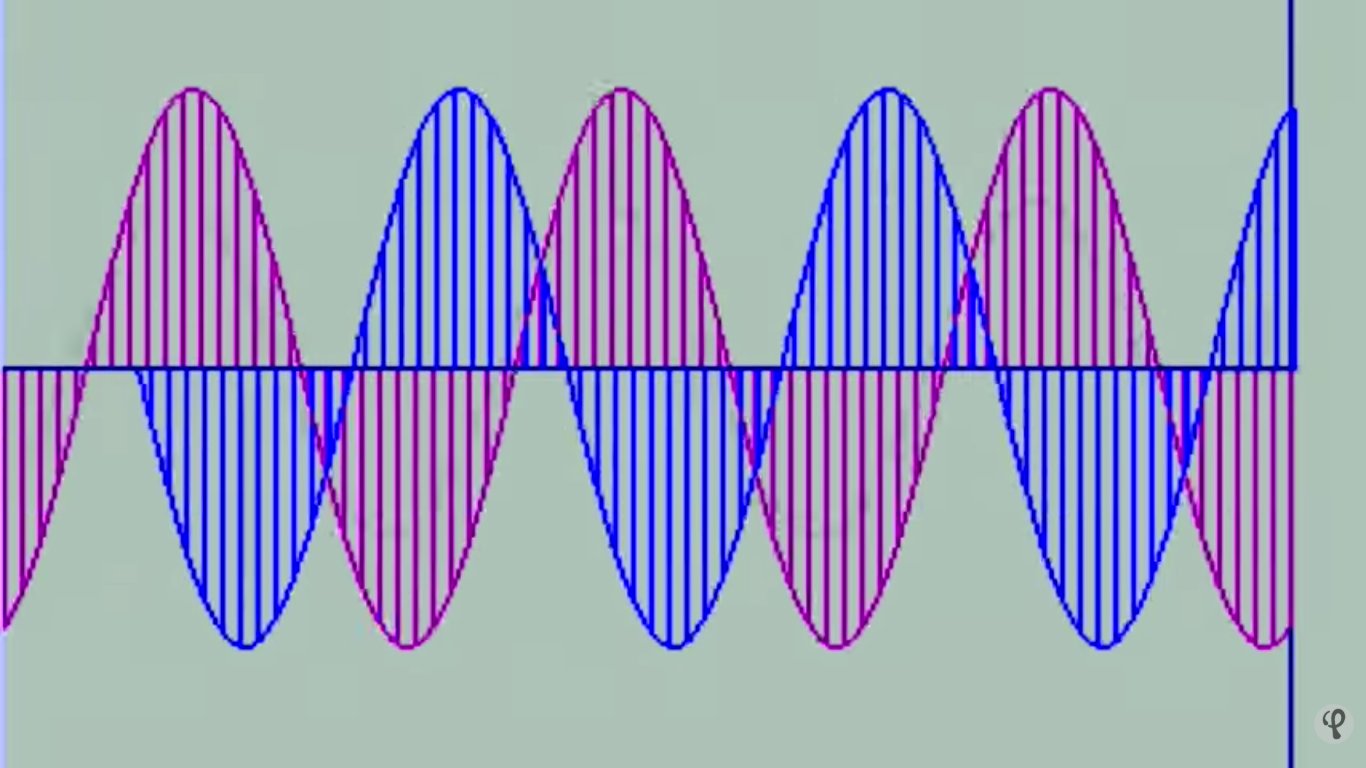
Standing waves create various wave patterns when two waves with the same frequency and amplitude move in different directions. There is no propagation, which means the standing waves do not move along the medium and the amplitude does not change. These waves can be seen in musical instruments like the violin string and vibrations in the flute. It's called a standing wave because it's stationary; whatever pattern is being created through the waves is being reflected in the same shape, hence subtracting the coming waves with the reflected ones. Hence, this is shown on the Chladni plate through the nodes. The fixed nodes are where the waves have been cancelled, and so nothing is seen, but on the antinodes, the waves add up, and it can be seen. So, the sand from the antinodes moves away and forms nodes. This is why the antinodes are where the area is affected by the vibrations and the nodes are where the plate remain unaffected by the vibrations.
Figure 4: Shows standing waves cancelling with the reflected waves
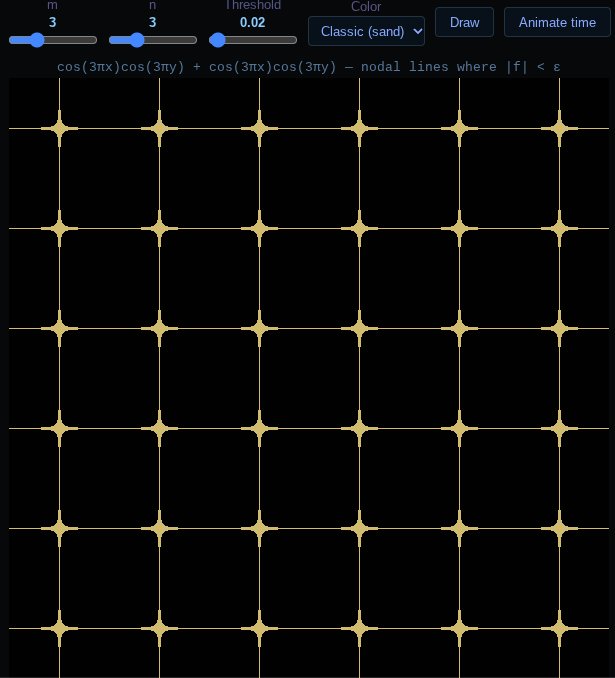
Sound waves are travelling waves that travel through a medium like the air, water, or solids. The waves travel in the same direction as the air particles to create regions where the particles are together, called compression, and places where the particles are further apart, called refraction. The Chaldni plates are known to be plates that help us visualize sound. But it's only done with the help of the standing waves. Sound waves are the input, which are generated at the center of the plate from the speaker or the bow. From there the sound waves spread on the plate, but they are invisible, and we don't see them. We can only see the plate shaking from the vibrations created by the sound waves. During resonance, they turn into standing waves, allowing us to visualize sound through those unique patterns. Some math can be used to demonstrate this; the sound wave equation is f(x,y) = a sin(π n x) sin(π m y) + b sin(π m x) sin(π n y). On a simulator, the m and n show the number of nodal lines. "m" means more vertical lines, while "n" is for more horizontal lines. 'a' and 'b' make the first and second patterns stronger. These things can be changed to see how they affect the shape created on the Chladni plate.
Figure 5: Simple pattern created on the plate
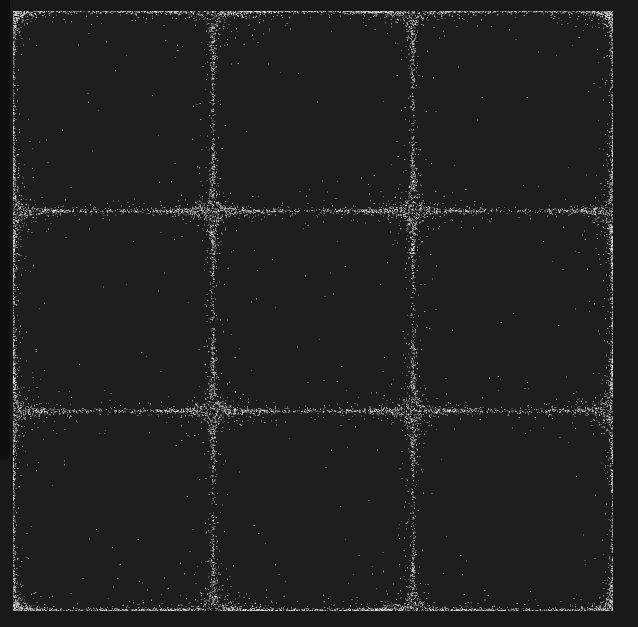 This occurs when the sound shakes the plate at the right frequency; standing waves form and create a unique pattern. The simulation allows us to change the number of nodal lines and the patterns. This was how the wave equation numbers were used: m=3, n=3, a=4, b=0. Hence, this pattern shows how the sound wave equation can be used to create unique patterns by playing around with the number of nodal lines (horizontal and vertical), and it helps us understand the concept of sound and standing waves.
Figure 6: Shows a more complex pattern
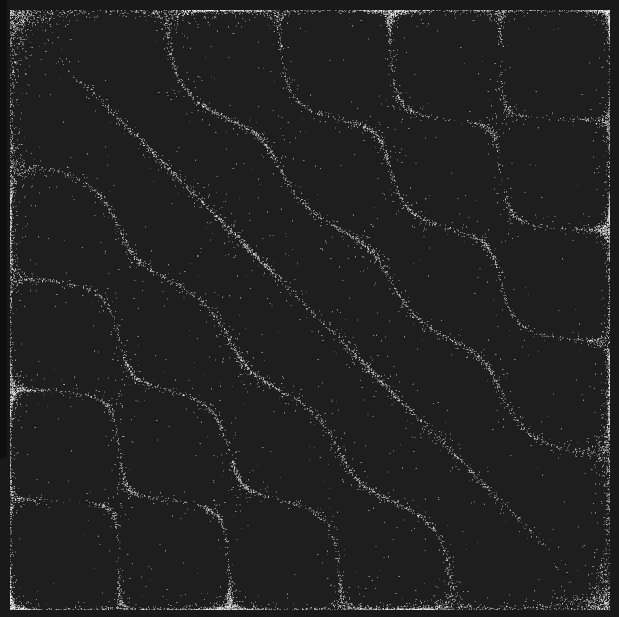 This image shows us that more complex patterns can also be created, which tells us that waves travel in all directions. So, as more complex patterns are created, curved lines are formed on the plate edges.
How do different frequencies create different patterns?
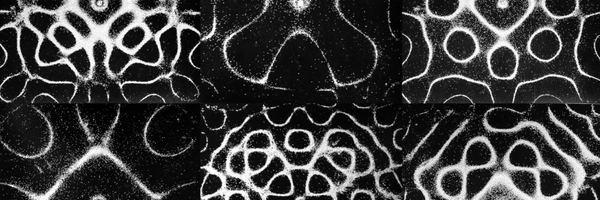
As we already discussed, vibrations on the Chladni plates are created when the natural frequency meets the frequency of the object. Each natural frequency creates its own standing wave patterns. But the question is, how do we see different patterns or shapes if we are always trying to meet the natural frequency to create the patterns? That's because each object has various natural frequencies, so as those different natural frequencies are met, unique patterns are created. At low frequencies, we have less vibration happening, which means there are fewer nodes, and so we have simpler shapes being created. But at high frequencies, we have more vibration, which results in more complicated patterns with curved and straight lines. Below are some images that show how as frequency increases, more and more complex patterns are being created.
Note: These images are taken from a website.
Figure 7: Frequency -->107 Hz , n=1 (nodal line is 1)
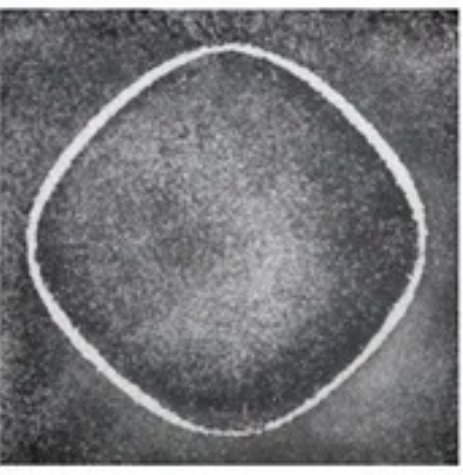
Figure 8: Frequency --> 283Hz, n=1,2
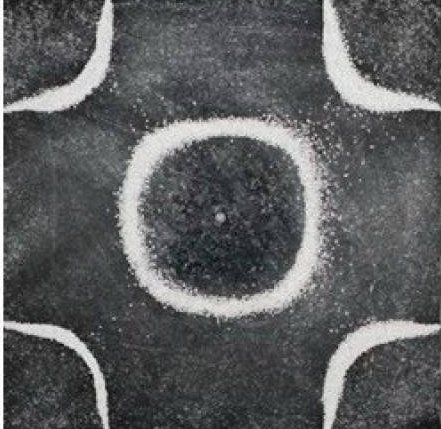
Figure 9: frequency -->511Hz, n=1,2
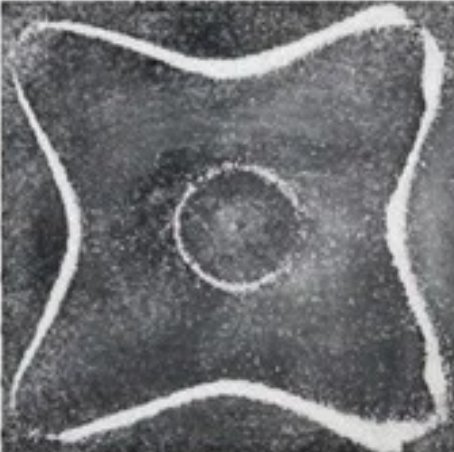
Figure 10: frequency --> 744Hz, n=1,2
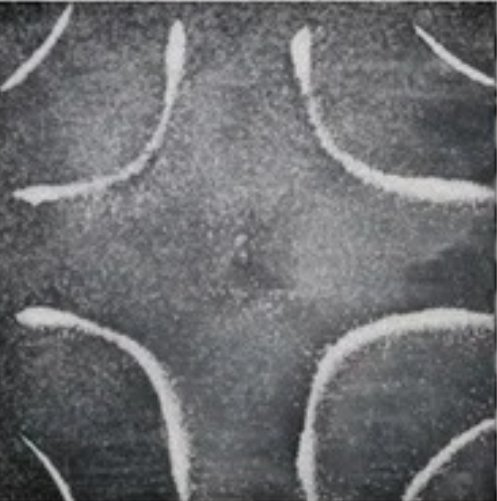
Figure 11: Frequency -->1181Hz, n=1,2,3
 These images also show how higher frequencies have shorter wavelengths while lower frequencies have longer wavelengths, which means that more nodal lines can fit on the plate as the frequencies increase. The Chladni formula also proves this, as simple patterns are created when there are fewer horizontal and vertical nodes (e.g., m=1, n=0); there is low frequency. But when there are more horizontal and vertical lines (e.g., m=3, n=2), there is a higher frequency.
How do different-shaped plates create unique and complex patterns?
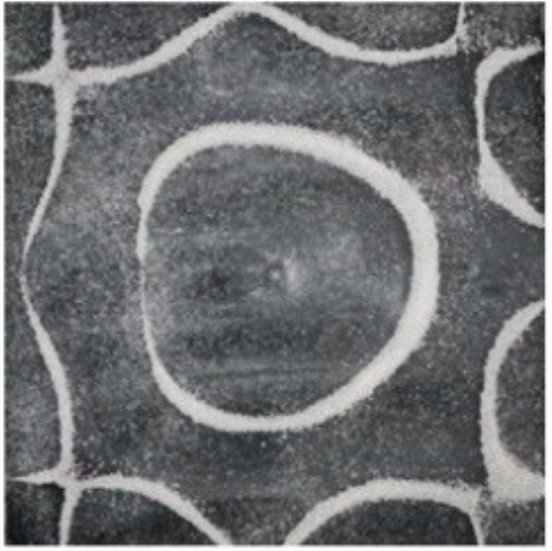
The Chladni Plate does not only come in square or circular shapes but also triangular, pentagonal, and oval shapes which create completely different standing waves as the particles from the edges are forced to reflect differently.
Figure 12: Circular shpaed plate at 616 Hz
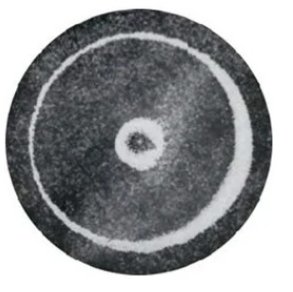 On this circular shape, waves bounce off symmterically and create straight diamters wtih concetric rings.
Figure 13: Sqaure shaped plate with 592 Hz
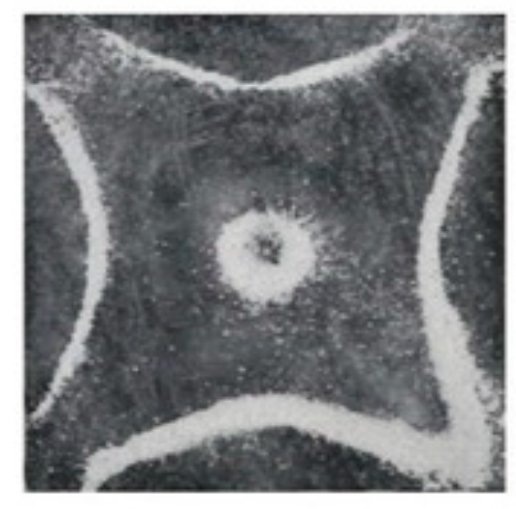 Sqaure shape has waves that bounce off straight edegs and create straight and diagonal lines that soemtimes bend at the corners.
Figure 14: Triangle shaped plate with 426 Hz
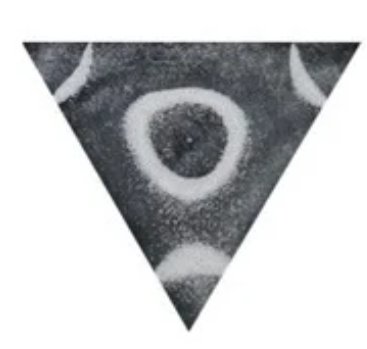 Waves bounce off form the 3 sharp edges. There are patterns with 3 -fold symmetry.
Figure 15: Pentagonal Plate with 1071 Hz
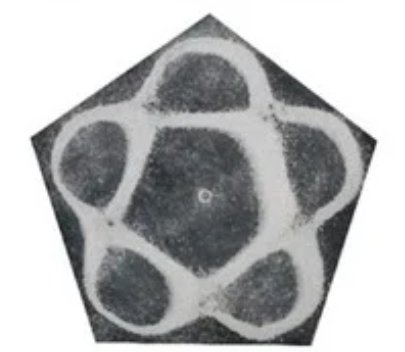 Waves bounce off from all 5 sides. There are patterns wiht 5-fold symmetry.
As a result, the significane of different shapes of the plate is that different boundary conditions = different shapes and mathematical solutions for standing waves. The shpae and the size of the plate determine how the sound waves will be reflected, interfere, and show the standing waves.
Data
Table 1: Metal Chladni Plate (patterns)
| Frequency (Hz) | Pattern Shape | Nodal Lines | Wavelength |
|---|---|---|---|
| 117 | Single Lines | 1 Vertical, 1 Horizontal | Long |
| 283 | Parallel Lines | 2 Vertical, 0 Horizontal | Medium |
| 511 | Cross pattern | 2 Vertical, 1 Horizontal | Short |
| 744 | Diagonal lines and a curve | 2 Vertical, 2 Horizontal | Shorter |
| 1181 | 3-fold symmetry | 3 Vertical, 3 Horizontal | Shortest |
Below are images of these frequencies taken from a simulator:
Figure 1: Frequency at 117 Hz
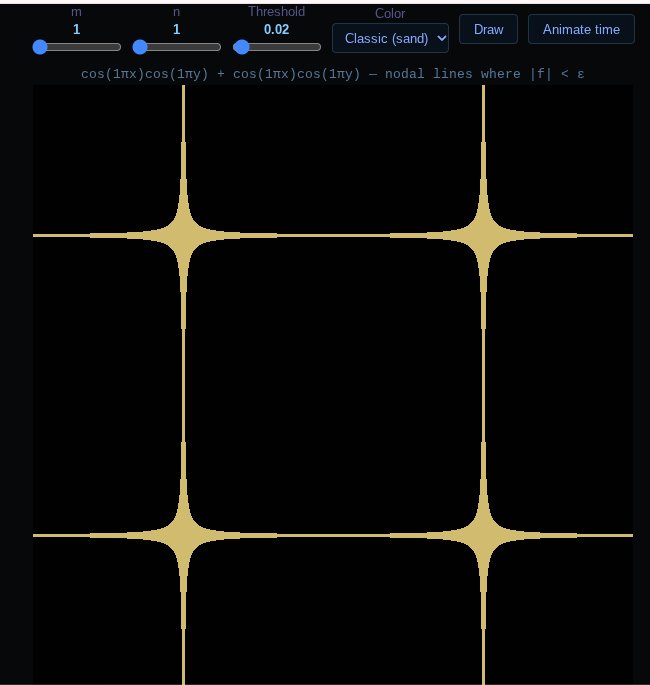
Figure 2: Frequency at 283 Hz

Figure 3: Frequency at 511 Hz
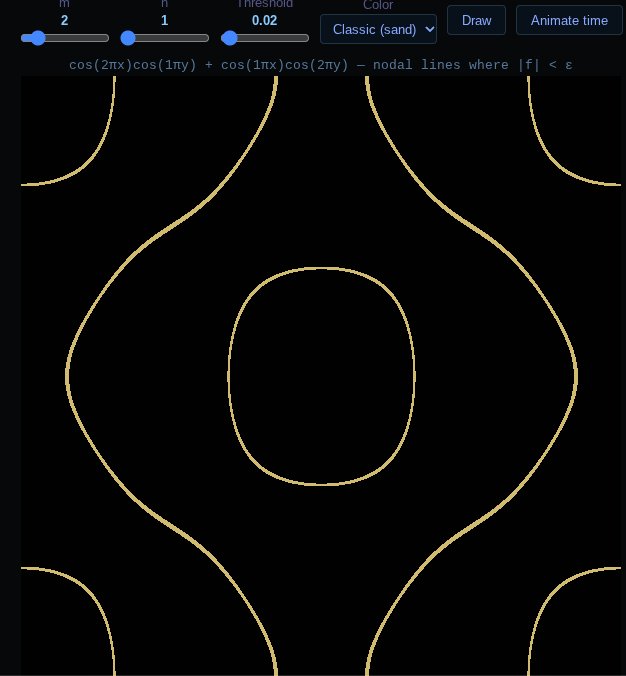
Figure 4: Frequency at 744 Hz
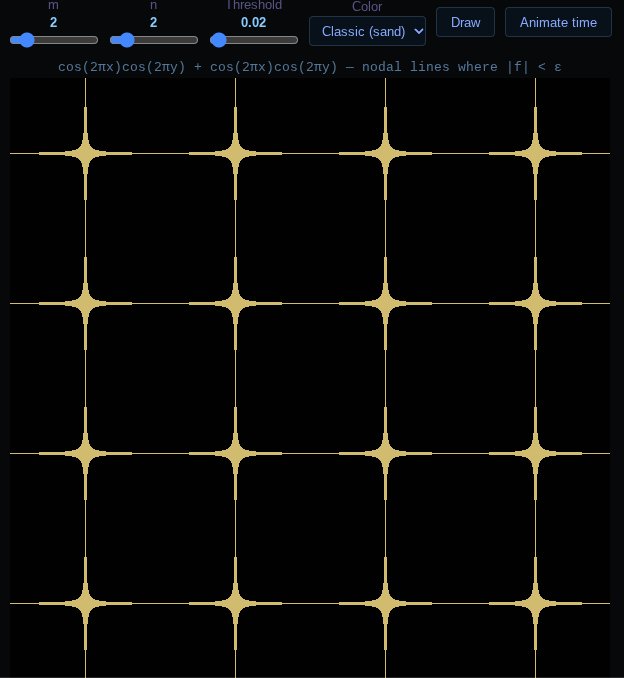
Figure 4: frequency at 1181 Hz
Conclusion
In conclusion, the work done by Ernest Chladni (the father of acoustics) helps us visualize sound through the study of cymatics. By sprinkling sand or salt on the Chladni Plate using a signal generator, we can see how sound waves turn into standing waves during resonance and create unique patterns on the thin metal plate. Those unique symmetrical and asymmetrical patterns are created when the frequency being generated from the speaker, violin string, or signal generator meets the natural frequency of the plate. The patterns created as a result show nodal lines (vertical and horizontal lines). Areas where the sand gathers are called the nodes, where the area is unaffected. But the places where the plate is vibrating are called anti-nodes, and those areas are affected. Furthermore, the Chladni formula and the wave equations demonstrate that the higher the frequency, the more nodal lines there will be, resulting in more complex patterns. Ultimately, the Chladni Plates prove that sound can be visually seen through vibrations that turn waves into patterns.
Citations
- https://sciencedemonstrations.fas.harvard.edu/presentations/chladni-plates
- https://www.whipplemuseum.cam.ac.uk/explore-whipple-collections/acoustics/ernst-chladni-physicist-musician-and-musical-instrument-maker#:~:text=Chladni%20plates%2C%20invented%20by%20the,occur%20in%20two%2Ddimensional%20objects.
- https://www.comsol.com/blogs/how-do-chladni-plates-make-it-possible-to-visualize-sound
- https://nervoussquirrel.com/chladni_plates.html
- https://www.aps.org/apsnews/2017/07/first-experiments-chladni-figuress
- https://en.wikipedia.org/wiki/Ernst_Chladni
- https://www.3bscientific.com/us/experiment-chladni-figures-115-v-5060-hz-8001124-ue1070100-115,p_1409_32525.html
- https://www.youtube.com/watch?v=T04iLhJsars&t=92s
- https://www.youtube.com/watch?v=wYoxOJDrZzw
- https://web.physics.ucsb.edu/~lecturedemonstrations/Composer/Pages/44.45.html
- https://pettaboy.github.io/cymaticssimulator_chladni
- https://www.mdpi.com/1099-4300/26/3/264
- https://dataphys.org/list/chladni-plates/
- https://pmc.ncbi.nlm.nih.gov/articles/PMC10969725/#sec4-entropy-26-00264%20---for%20hsapes
- https://iris.joshua-becker.com/lab/cymatics-chladni/
Acknowledgement
I acknowledge the help and support I got from my coordinator, Ms. Malhi. She helped me throughout my project; she kept me on track by having meetings every week and guiding us through things we didn't quite understand. I am also grateful to my school's science department, who gave us feedback on our projects.