
Water: Time to Come Clean
Grade 5
Presentation
No video provided
Hypothesis
If we pour dirty water with contaminants through filter materials then the water will come out clean because the filter materials with remove all of the contaminants
Research
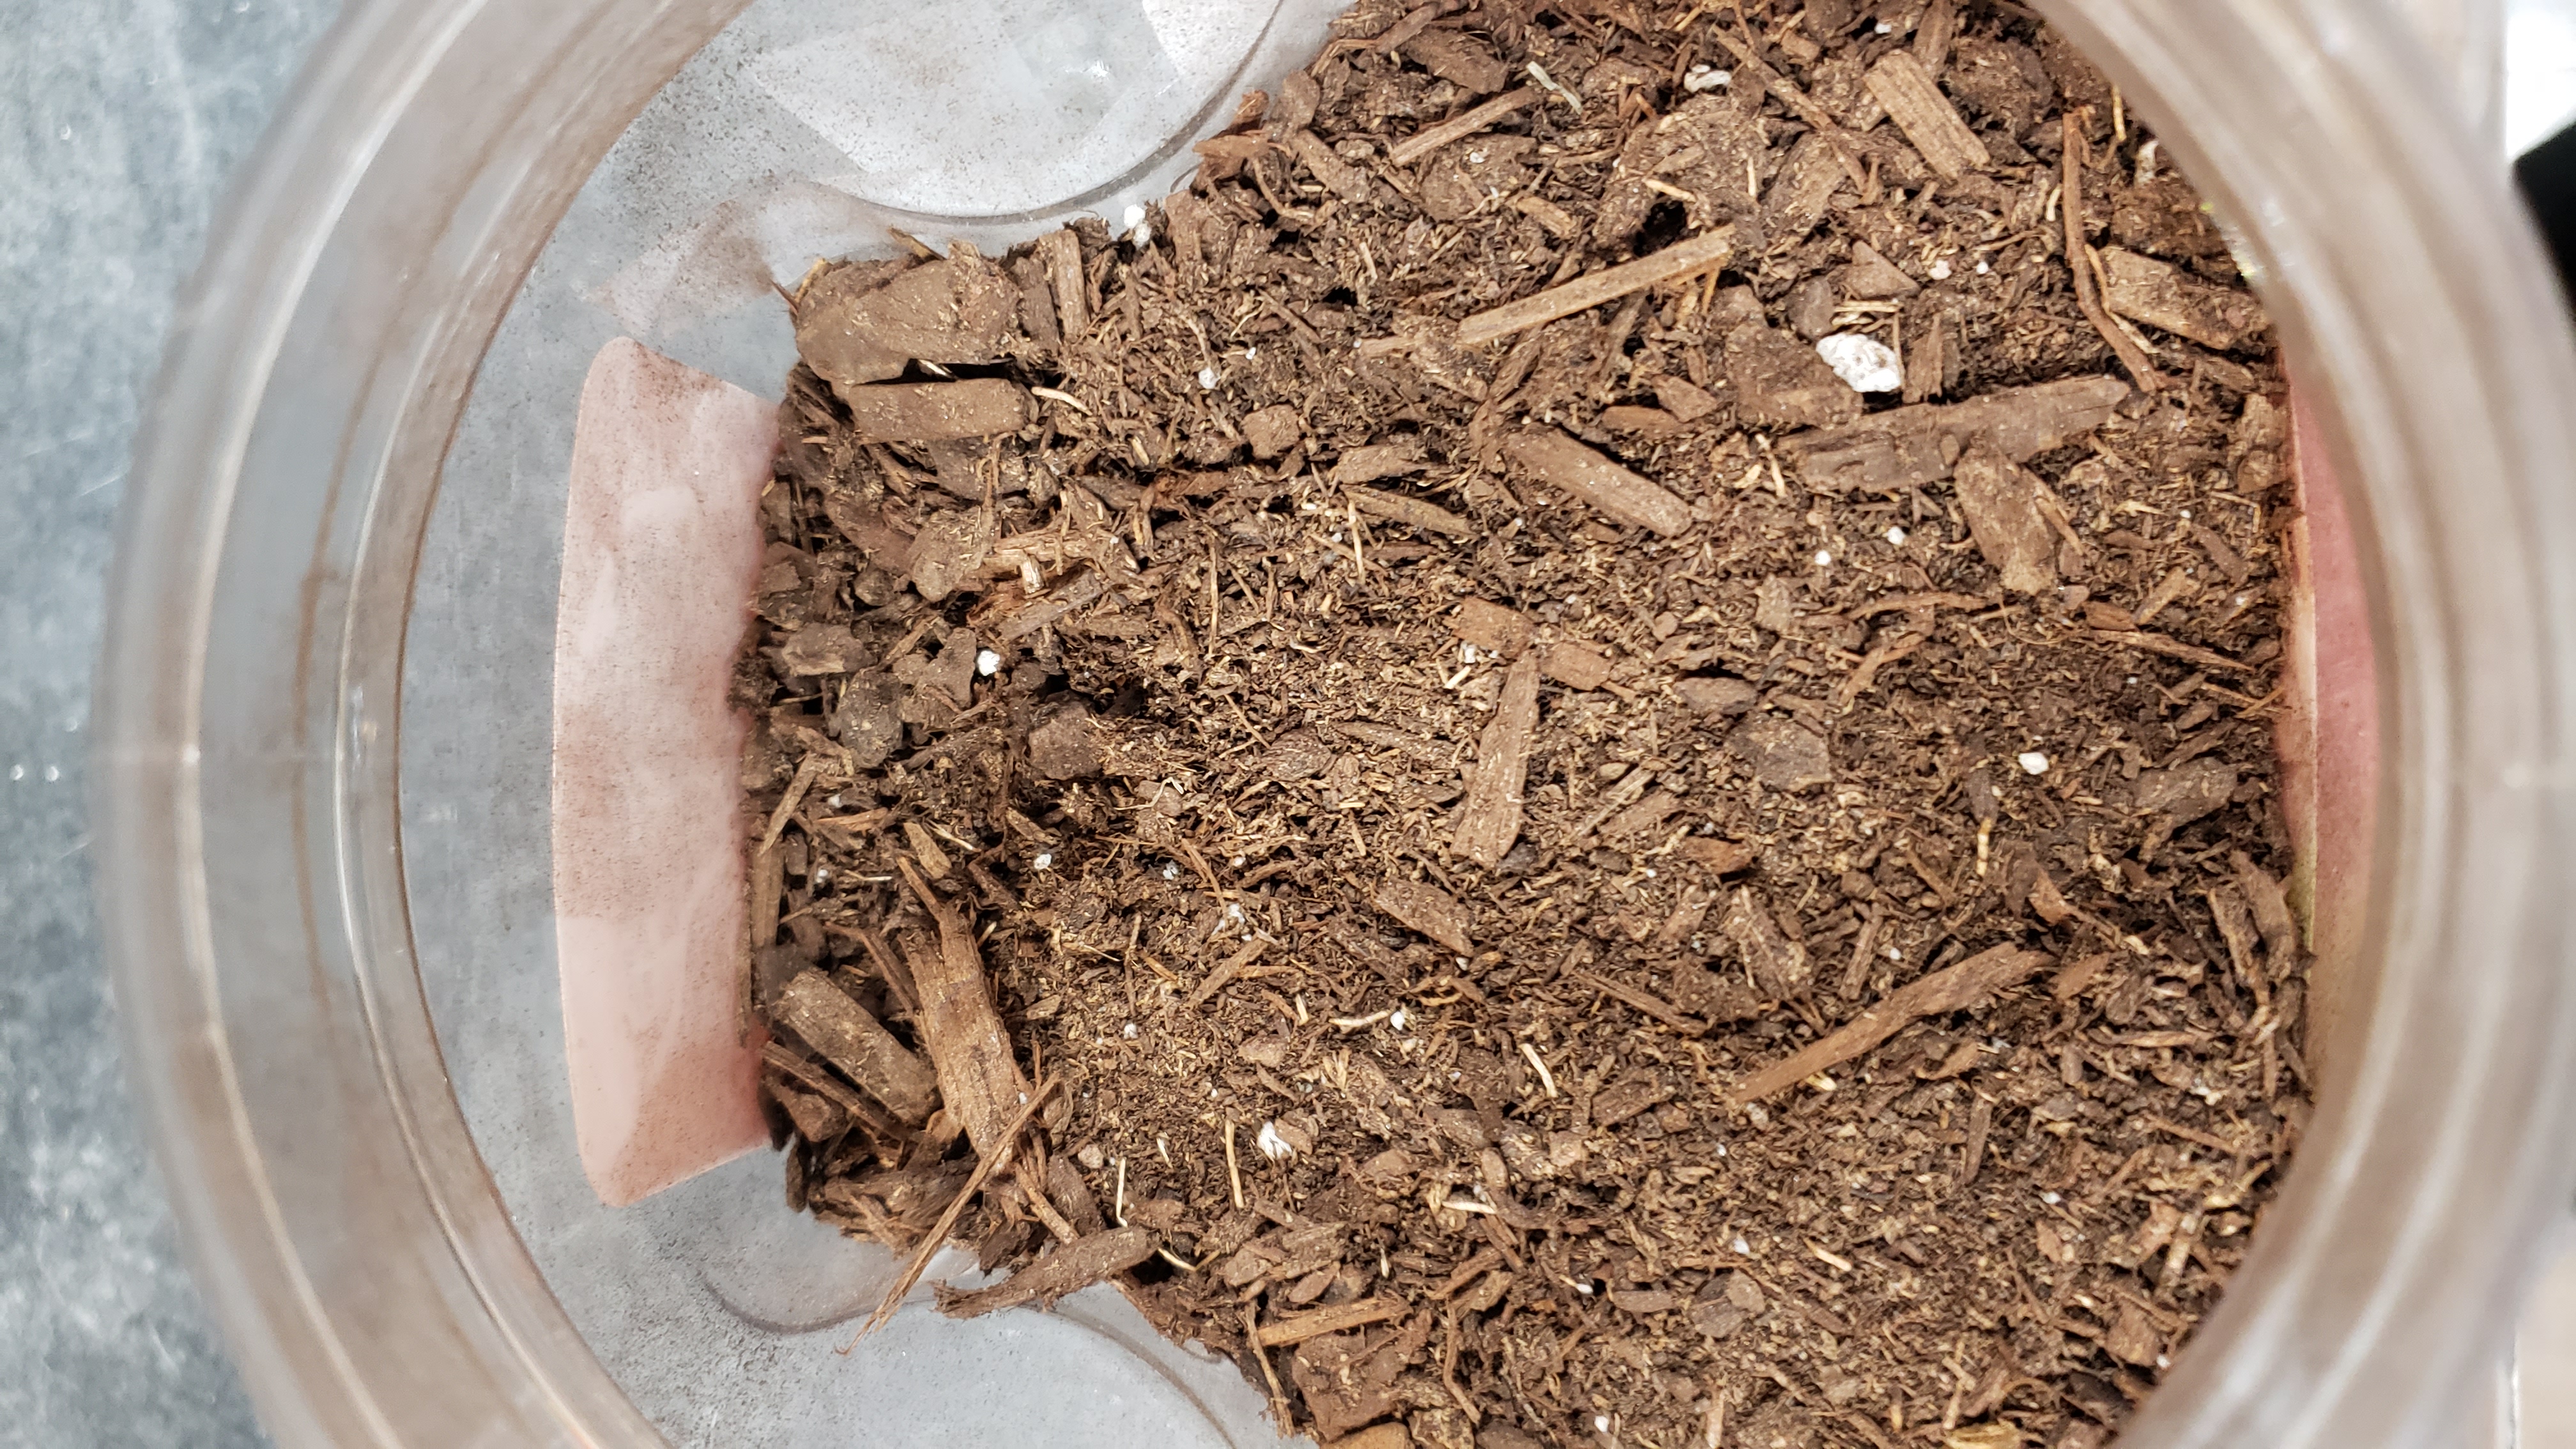
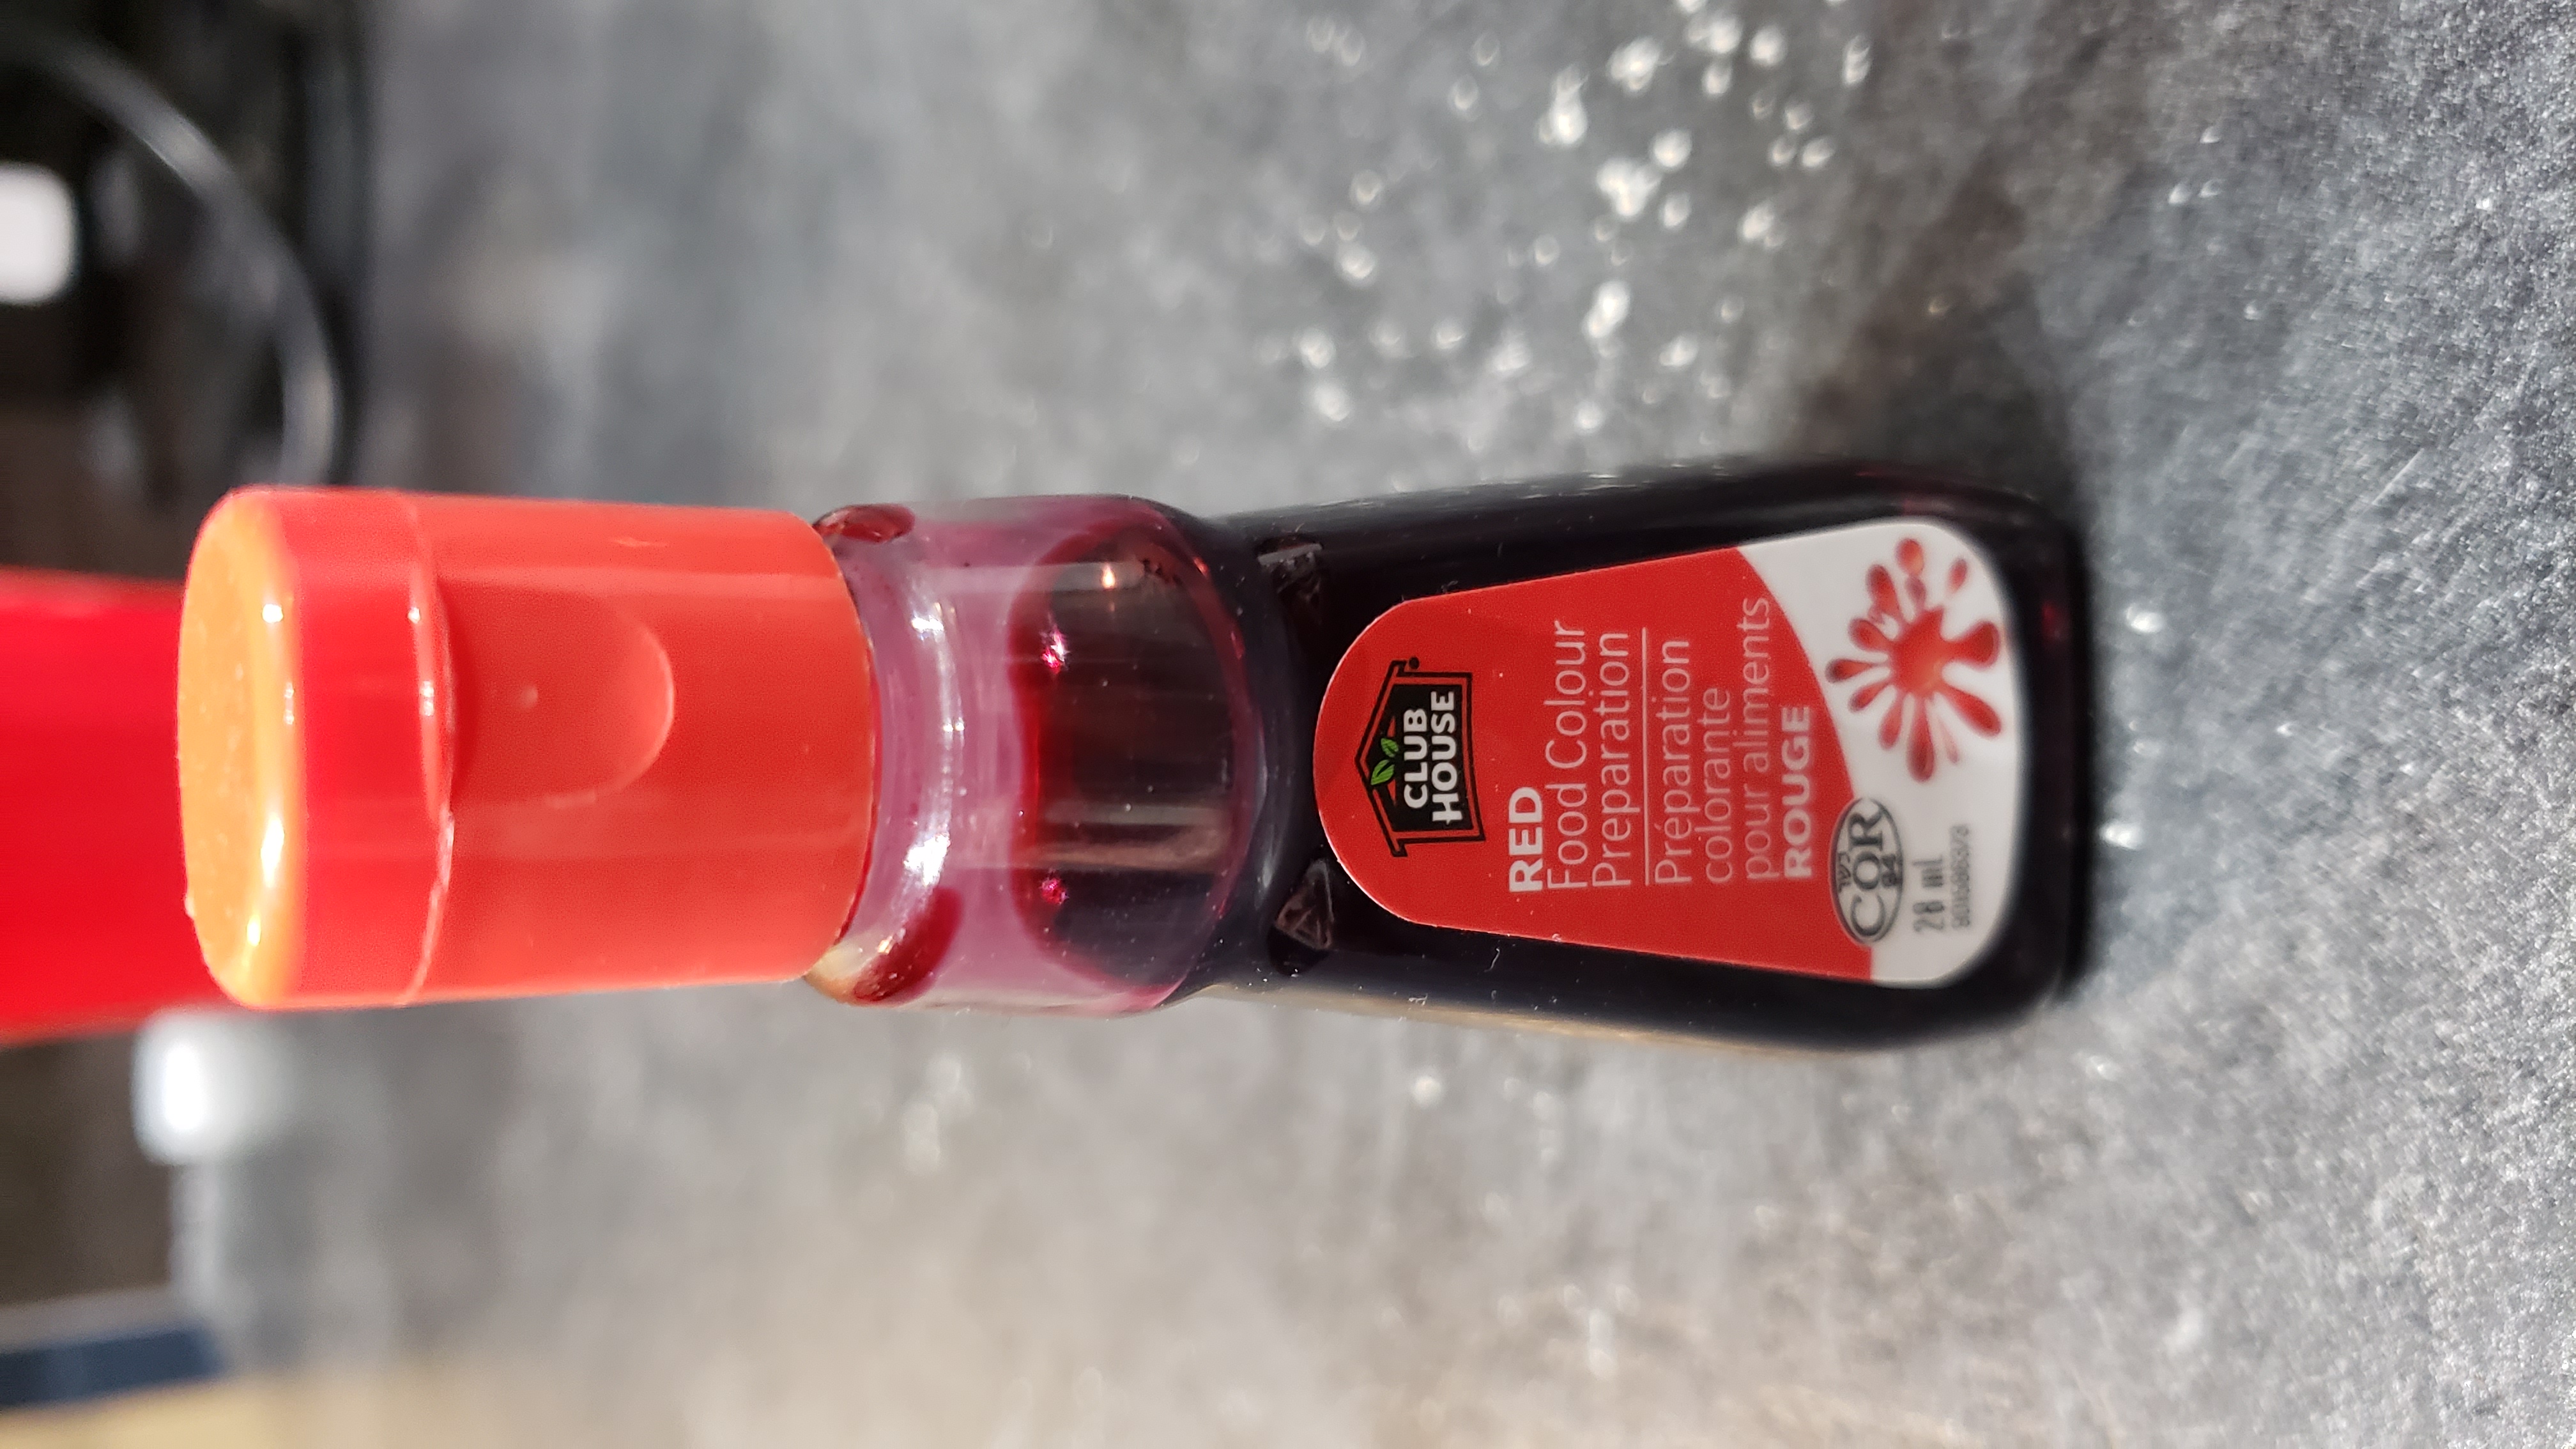
The world doesn't have a lot of fresh water. Because of human activity the water we have is becoming contaminated. If we don't want to run out of fresh water we have to find ways to remove the contaminants. There are different approaches you could use to clean water. for example boiling, distillation, filtration and various chemical treatments. Boiling your water is the easiest way of killing bacteria, but you need a hot surface and not everyone has one so boiling might not work, it also takes some time to cool down the water, still boiling is a very effective way to purify your water. However, you can't use it to get rid of things like dirt. Distillation is very similar to boiling but involves a bit more equipment and is more effective at removing contaminants including dirt from the water. You also set the water boiling and collect the vapors as it condenses, but also note that the temperature will have to be at 100 degrees Celsius but this is time consuming and requires too much energy and so is expensive.. The best way to clean cheaply is to filter the water using filters that you can buy or build your own. filtration is when you pass dirty water through a material that allows water to flow through but traps the contaminants. But there are different types of contaminants so you need to choose the right filter material for each contaminant. So if you have water with lots of contaminants you might need lots of different filter materials.in this project we tried to remove red dye and potting soil from the water. Potting soil is a mixture of large stuff like twigs, leaves and perlite, and medium and small dirt particles. Red dye is a small molecule. So by mixing potting soil and red dye in water we can see if filtration can remove different sizes of contaminants.
Variables
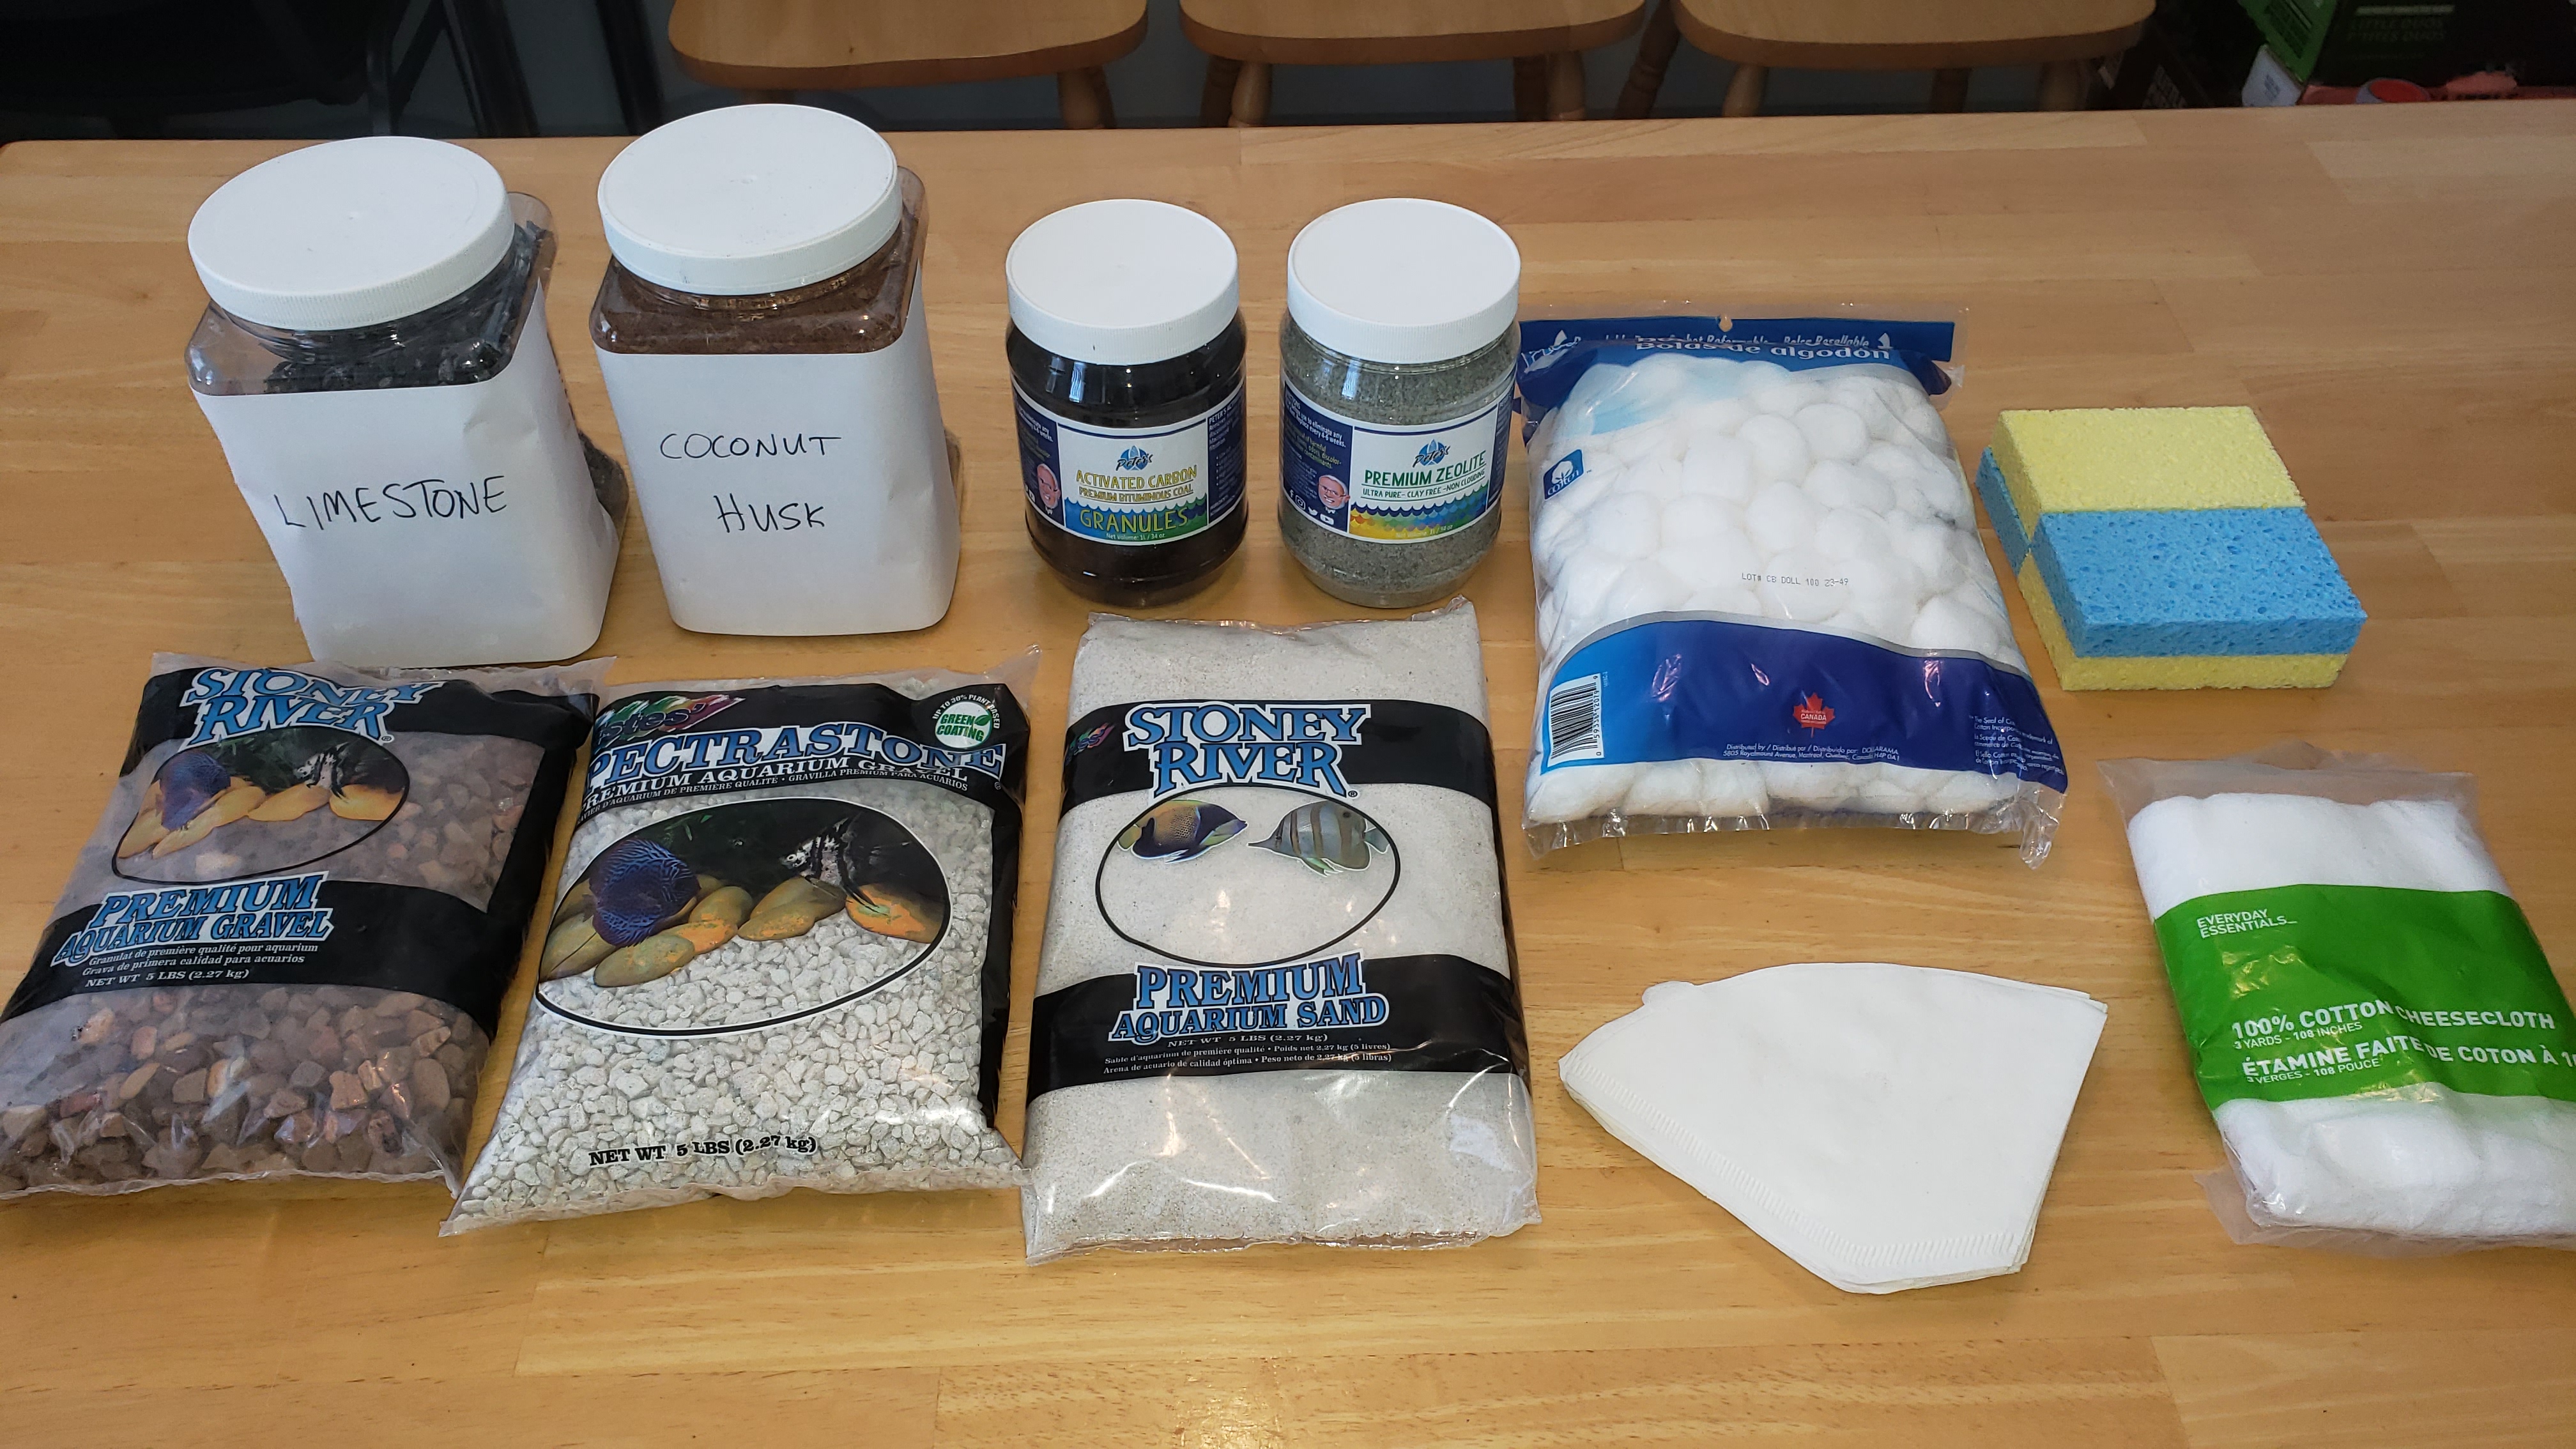
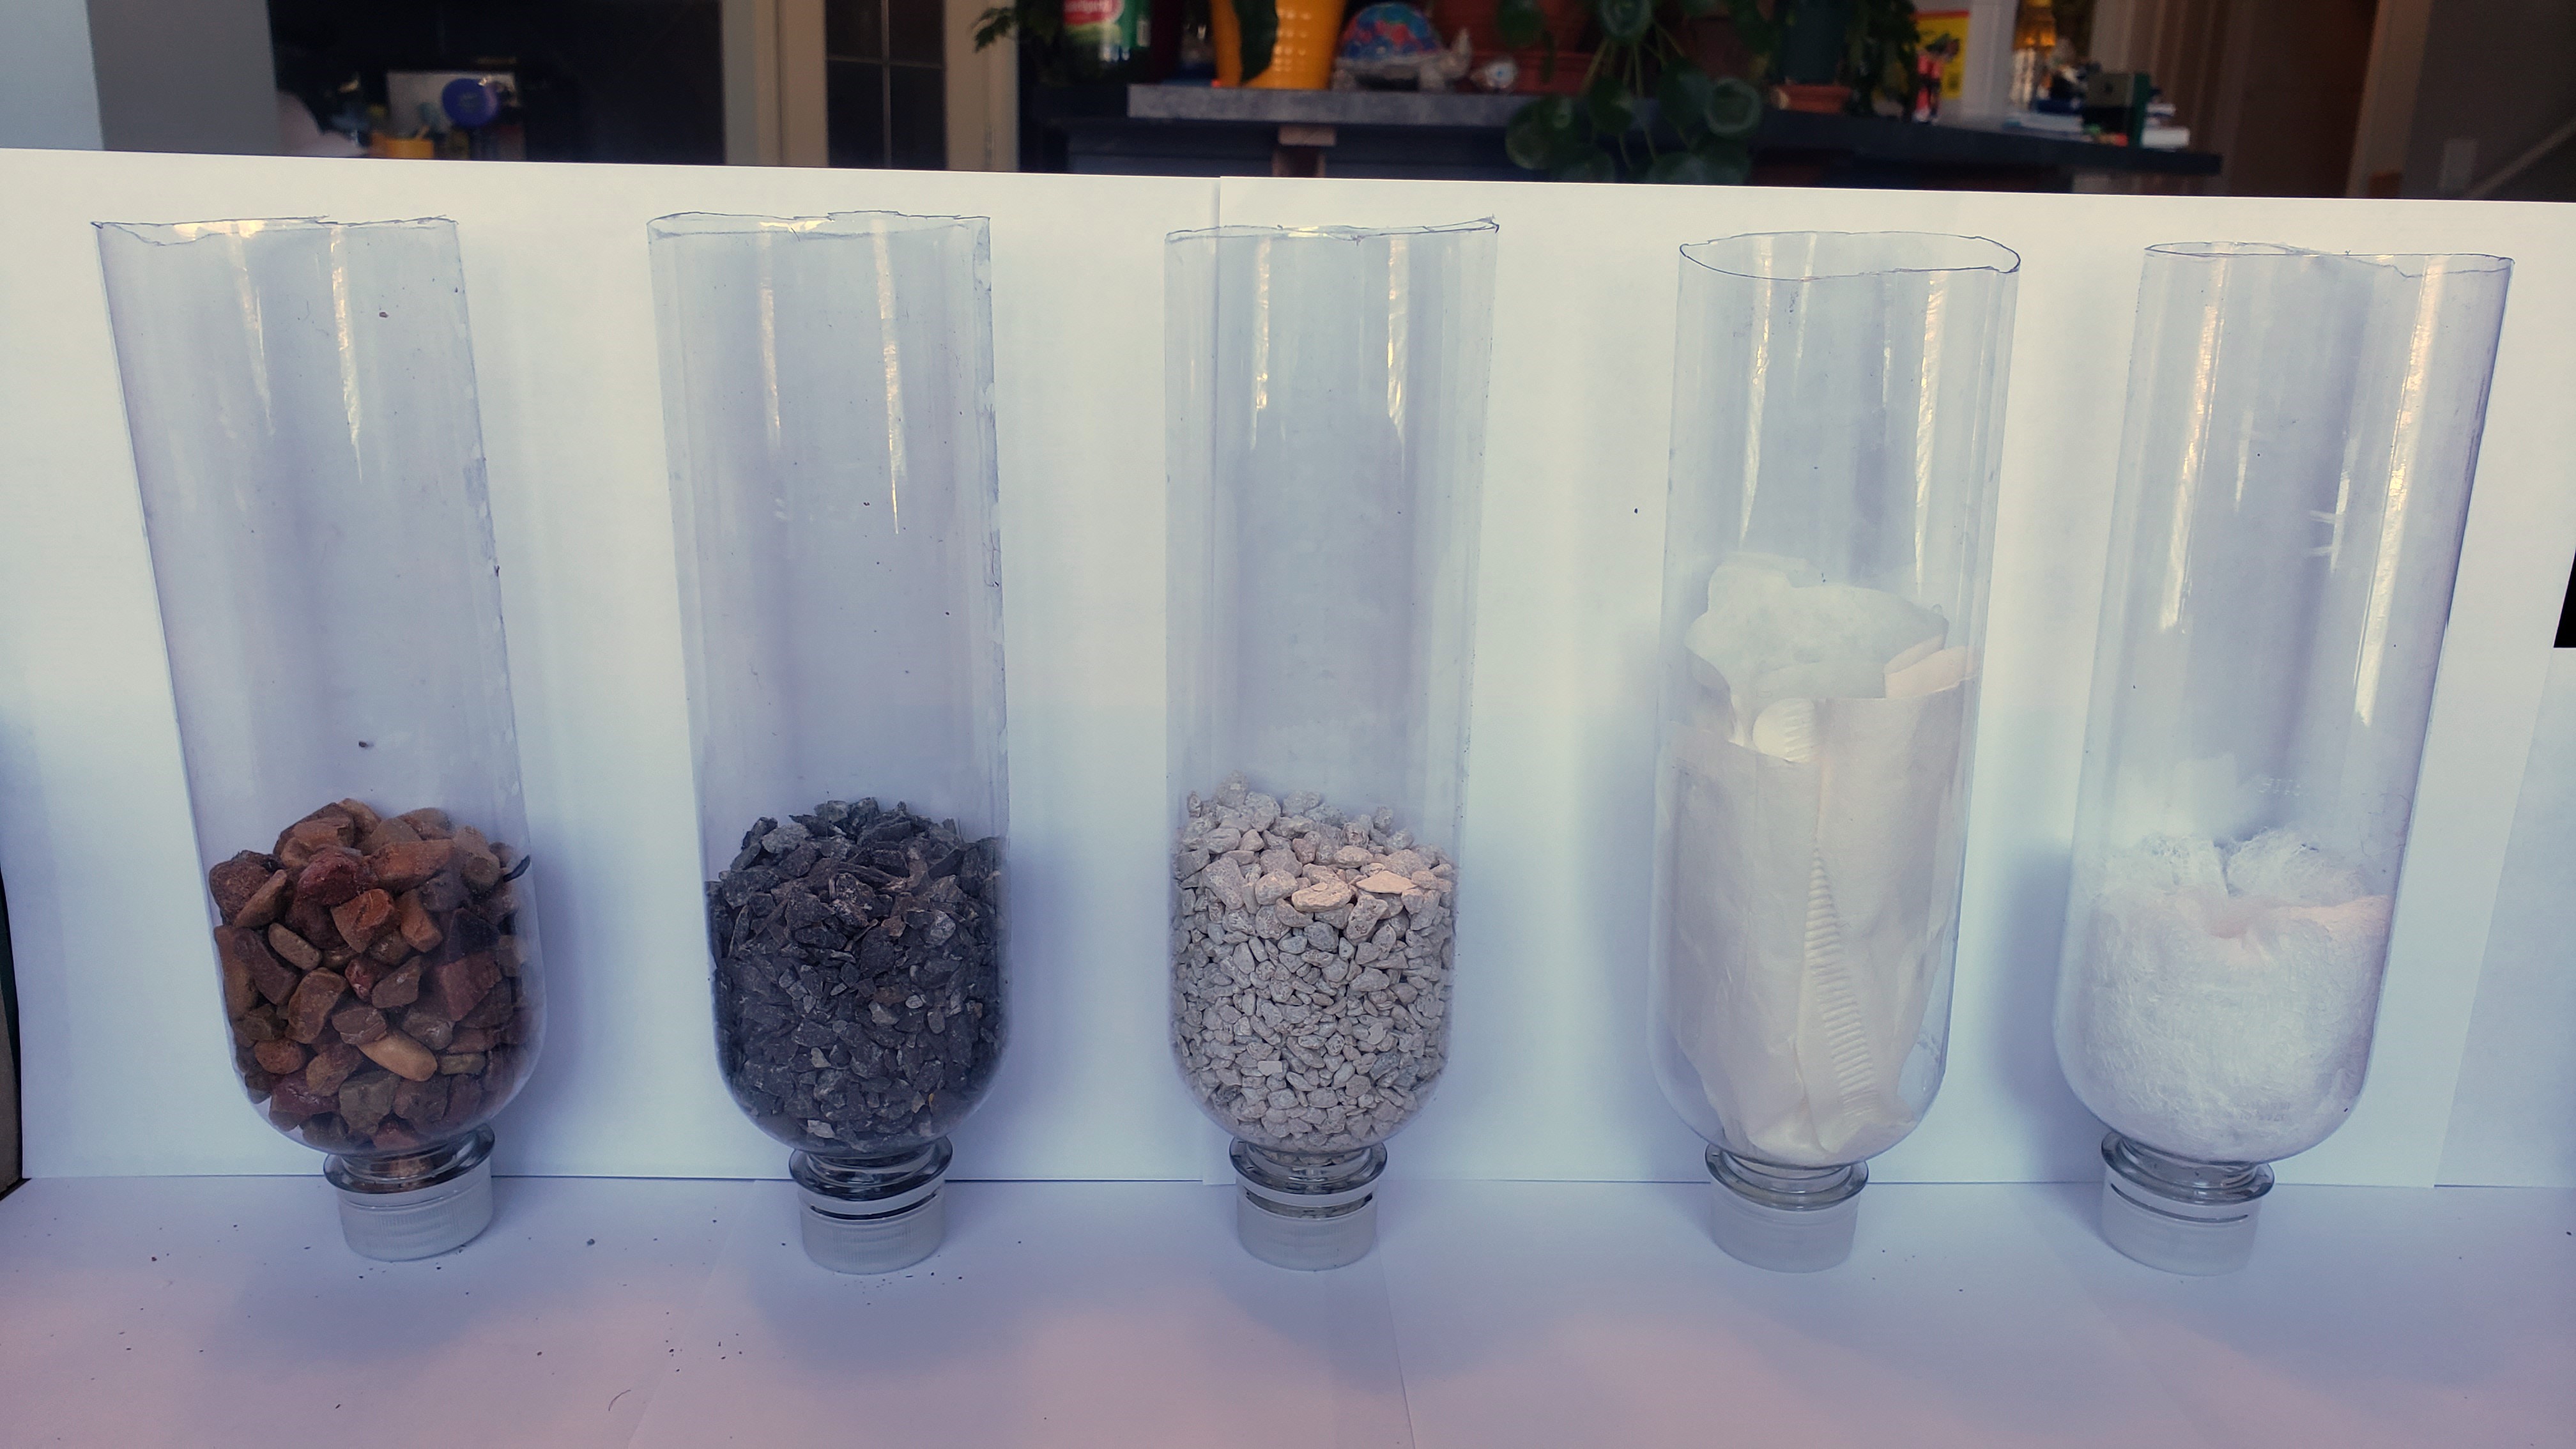
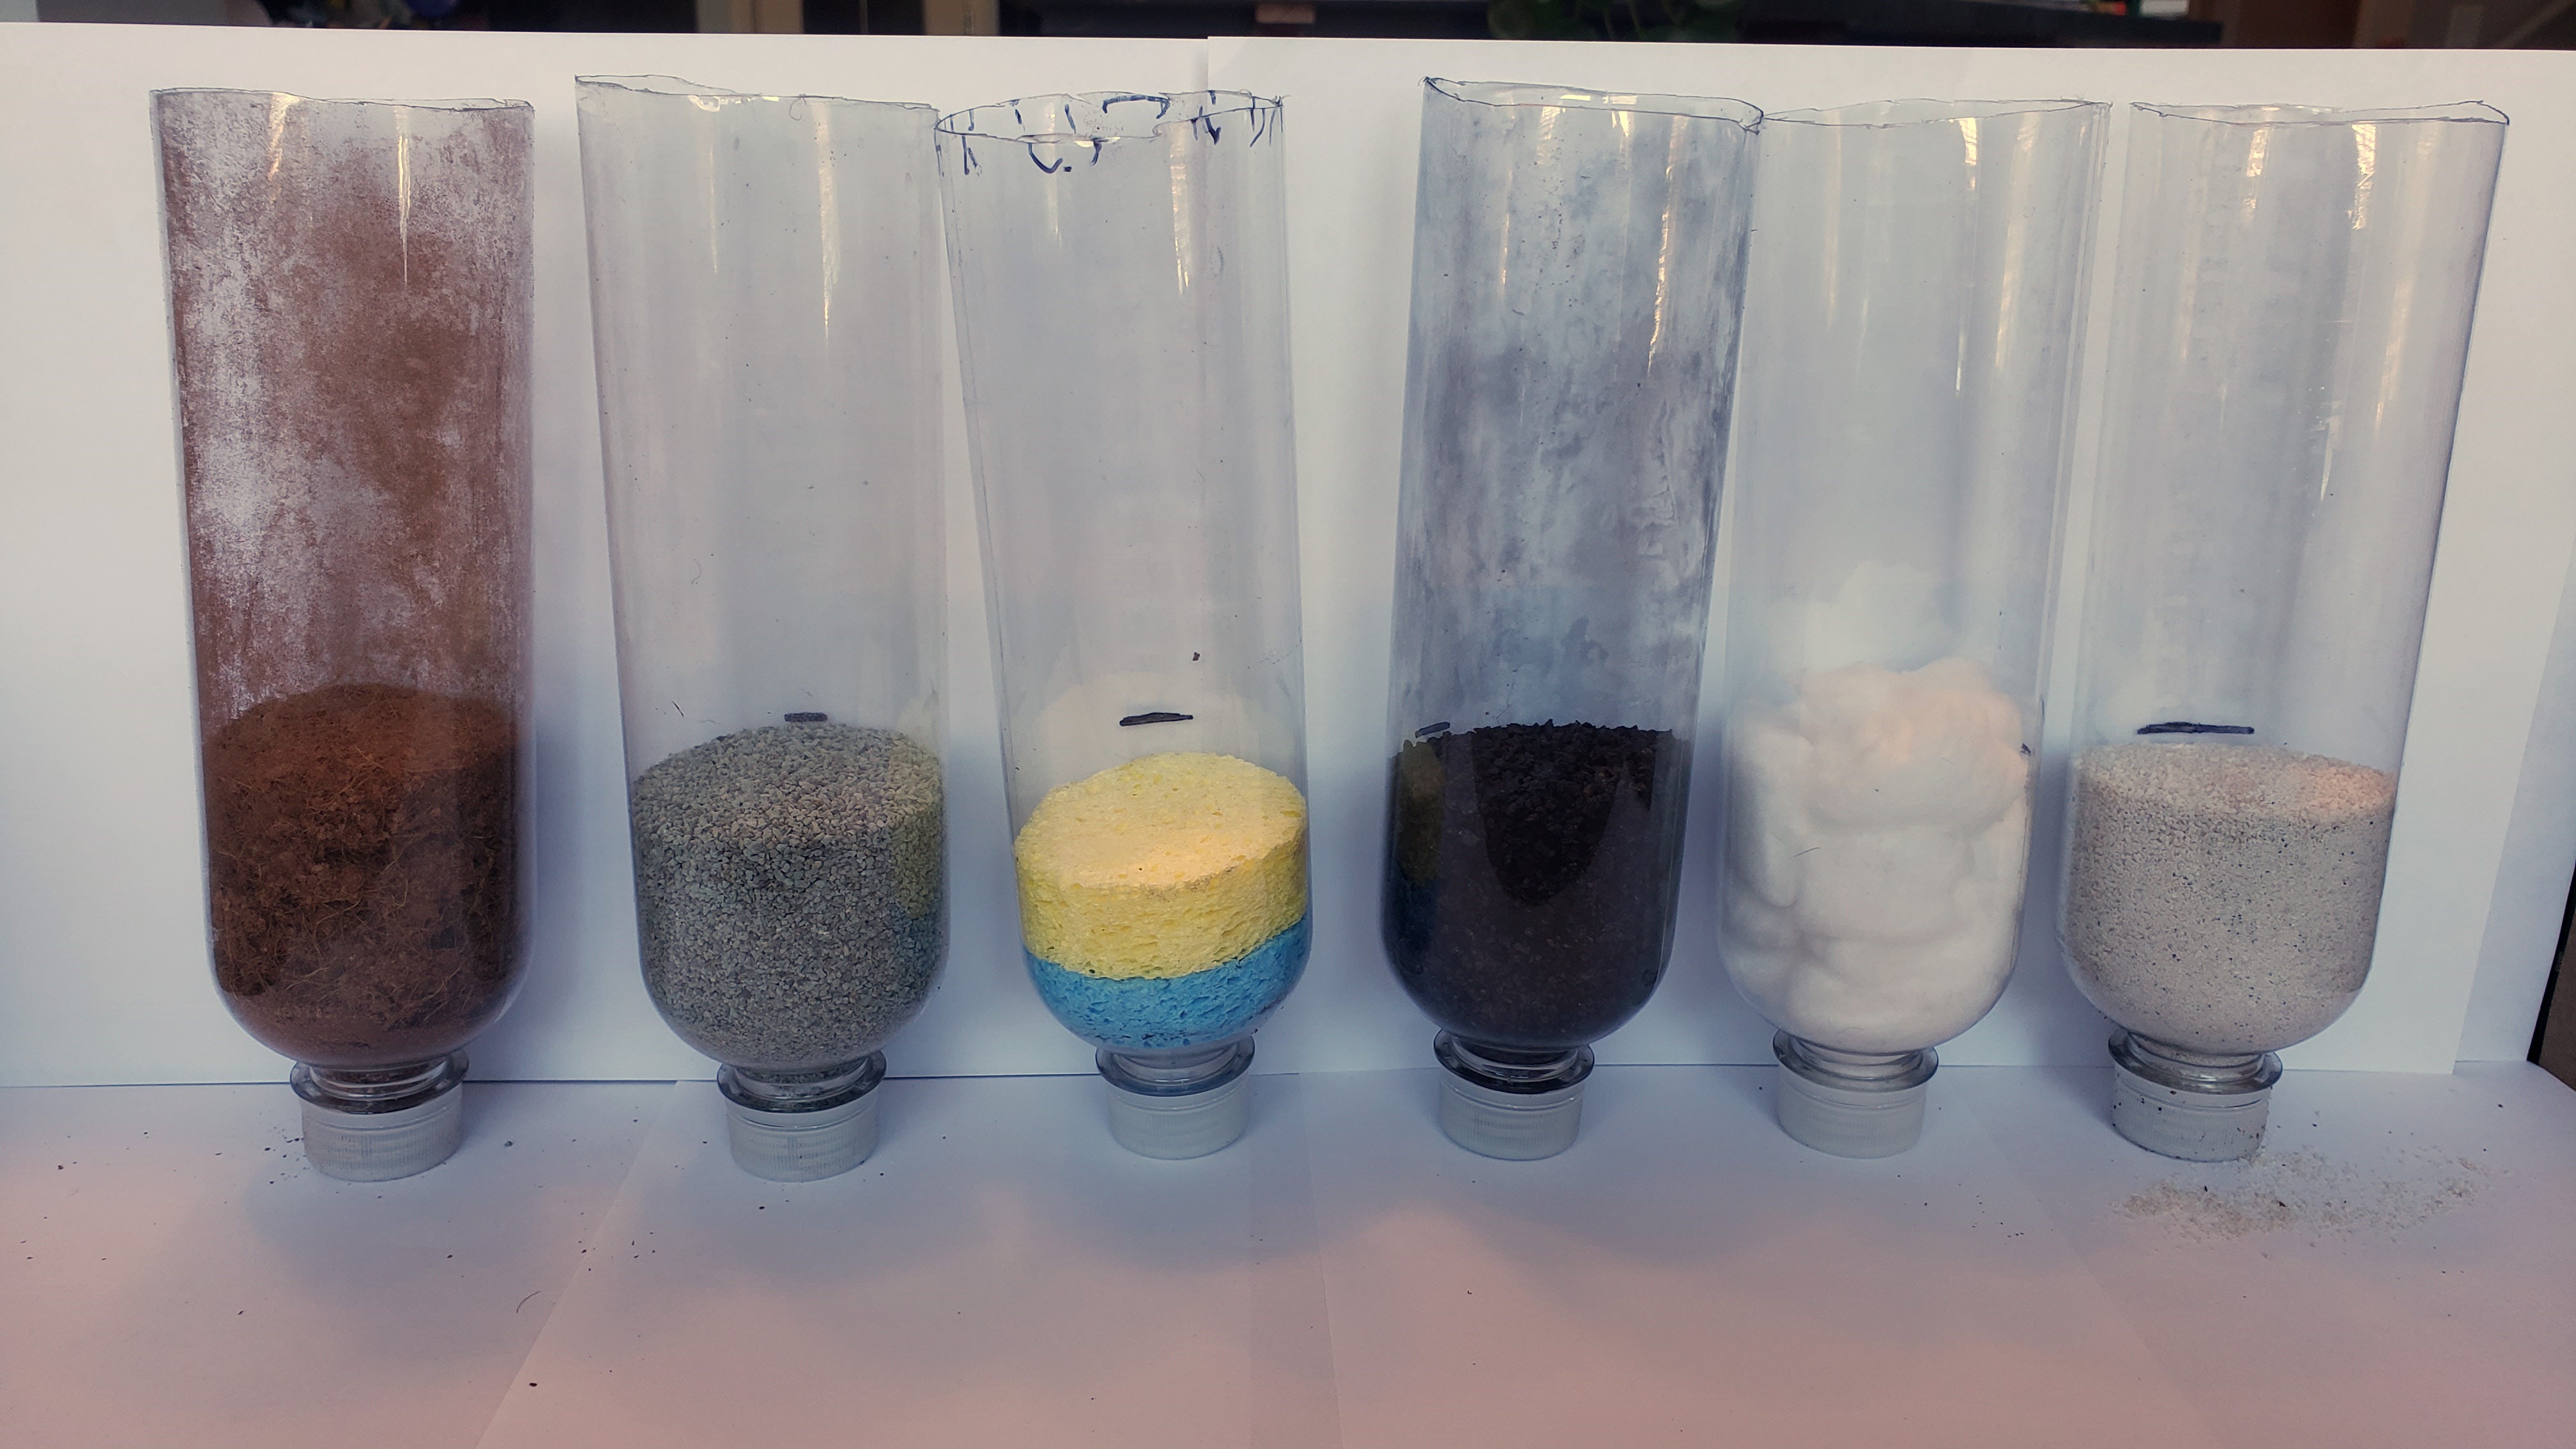
Manipulated Variables: The type of filter materials we used to clean the water. In this project we tested these materials:
- Large Gravel
- Small Gravel
- Crushed Limestone
- Sand
- Activated Carbon
- Zeolite
- Sponge
- Coffee Filters
- Cheesecloth
- Cotton balls
Responding Variable: How clean the water was when it came out of the filter
- For the red dye we looked at how pink the water was
- For the potting soil we looked at how brown the water looked
- for the dirty water with red dye and potting soil we looked to see if there was any pink in the water
Controlled Variables: The things that we kept the same in all of the experiments.
- How much drops of red dye in 1 L of water - 4 drops
- How much potting soil goes in 1 L of water - 40 grams in 1 L of water
- Each filter was made out of the same type of bottle that was cut the same way
- The volume of the filter materials put into each filter
- The mass of dirty water that we put in each filter
- We wet the filter material with the dirty water before we put in the dirty water we were testing.
Procedure
Procedure
Our project had 2 stages
STAGE 1: We will test how well each filter material cleans dirty water that has only one contaminant. That way we can learn which filter materials can be used to remove each contaminant.
Filter Materials
Water Contaminants
Stage 1 - Procedure to Build Filters
Each filter was made using two 503 mL sparkling ice drink bottles
- Clean each bottle and dry it
- Remove the label from the bottle so you could see in it.
- The top bottle was where we put the filter materials. For that one an adult cut the bottom 25 mm off the bottle
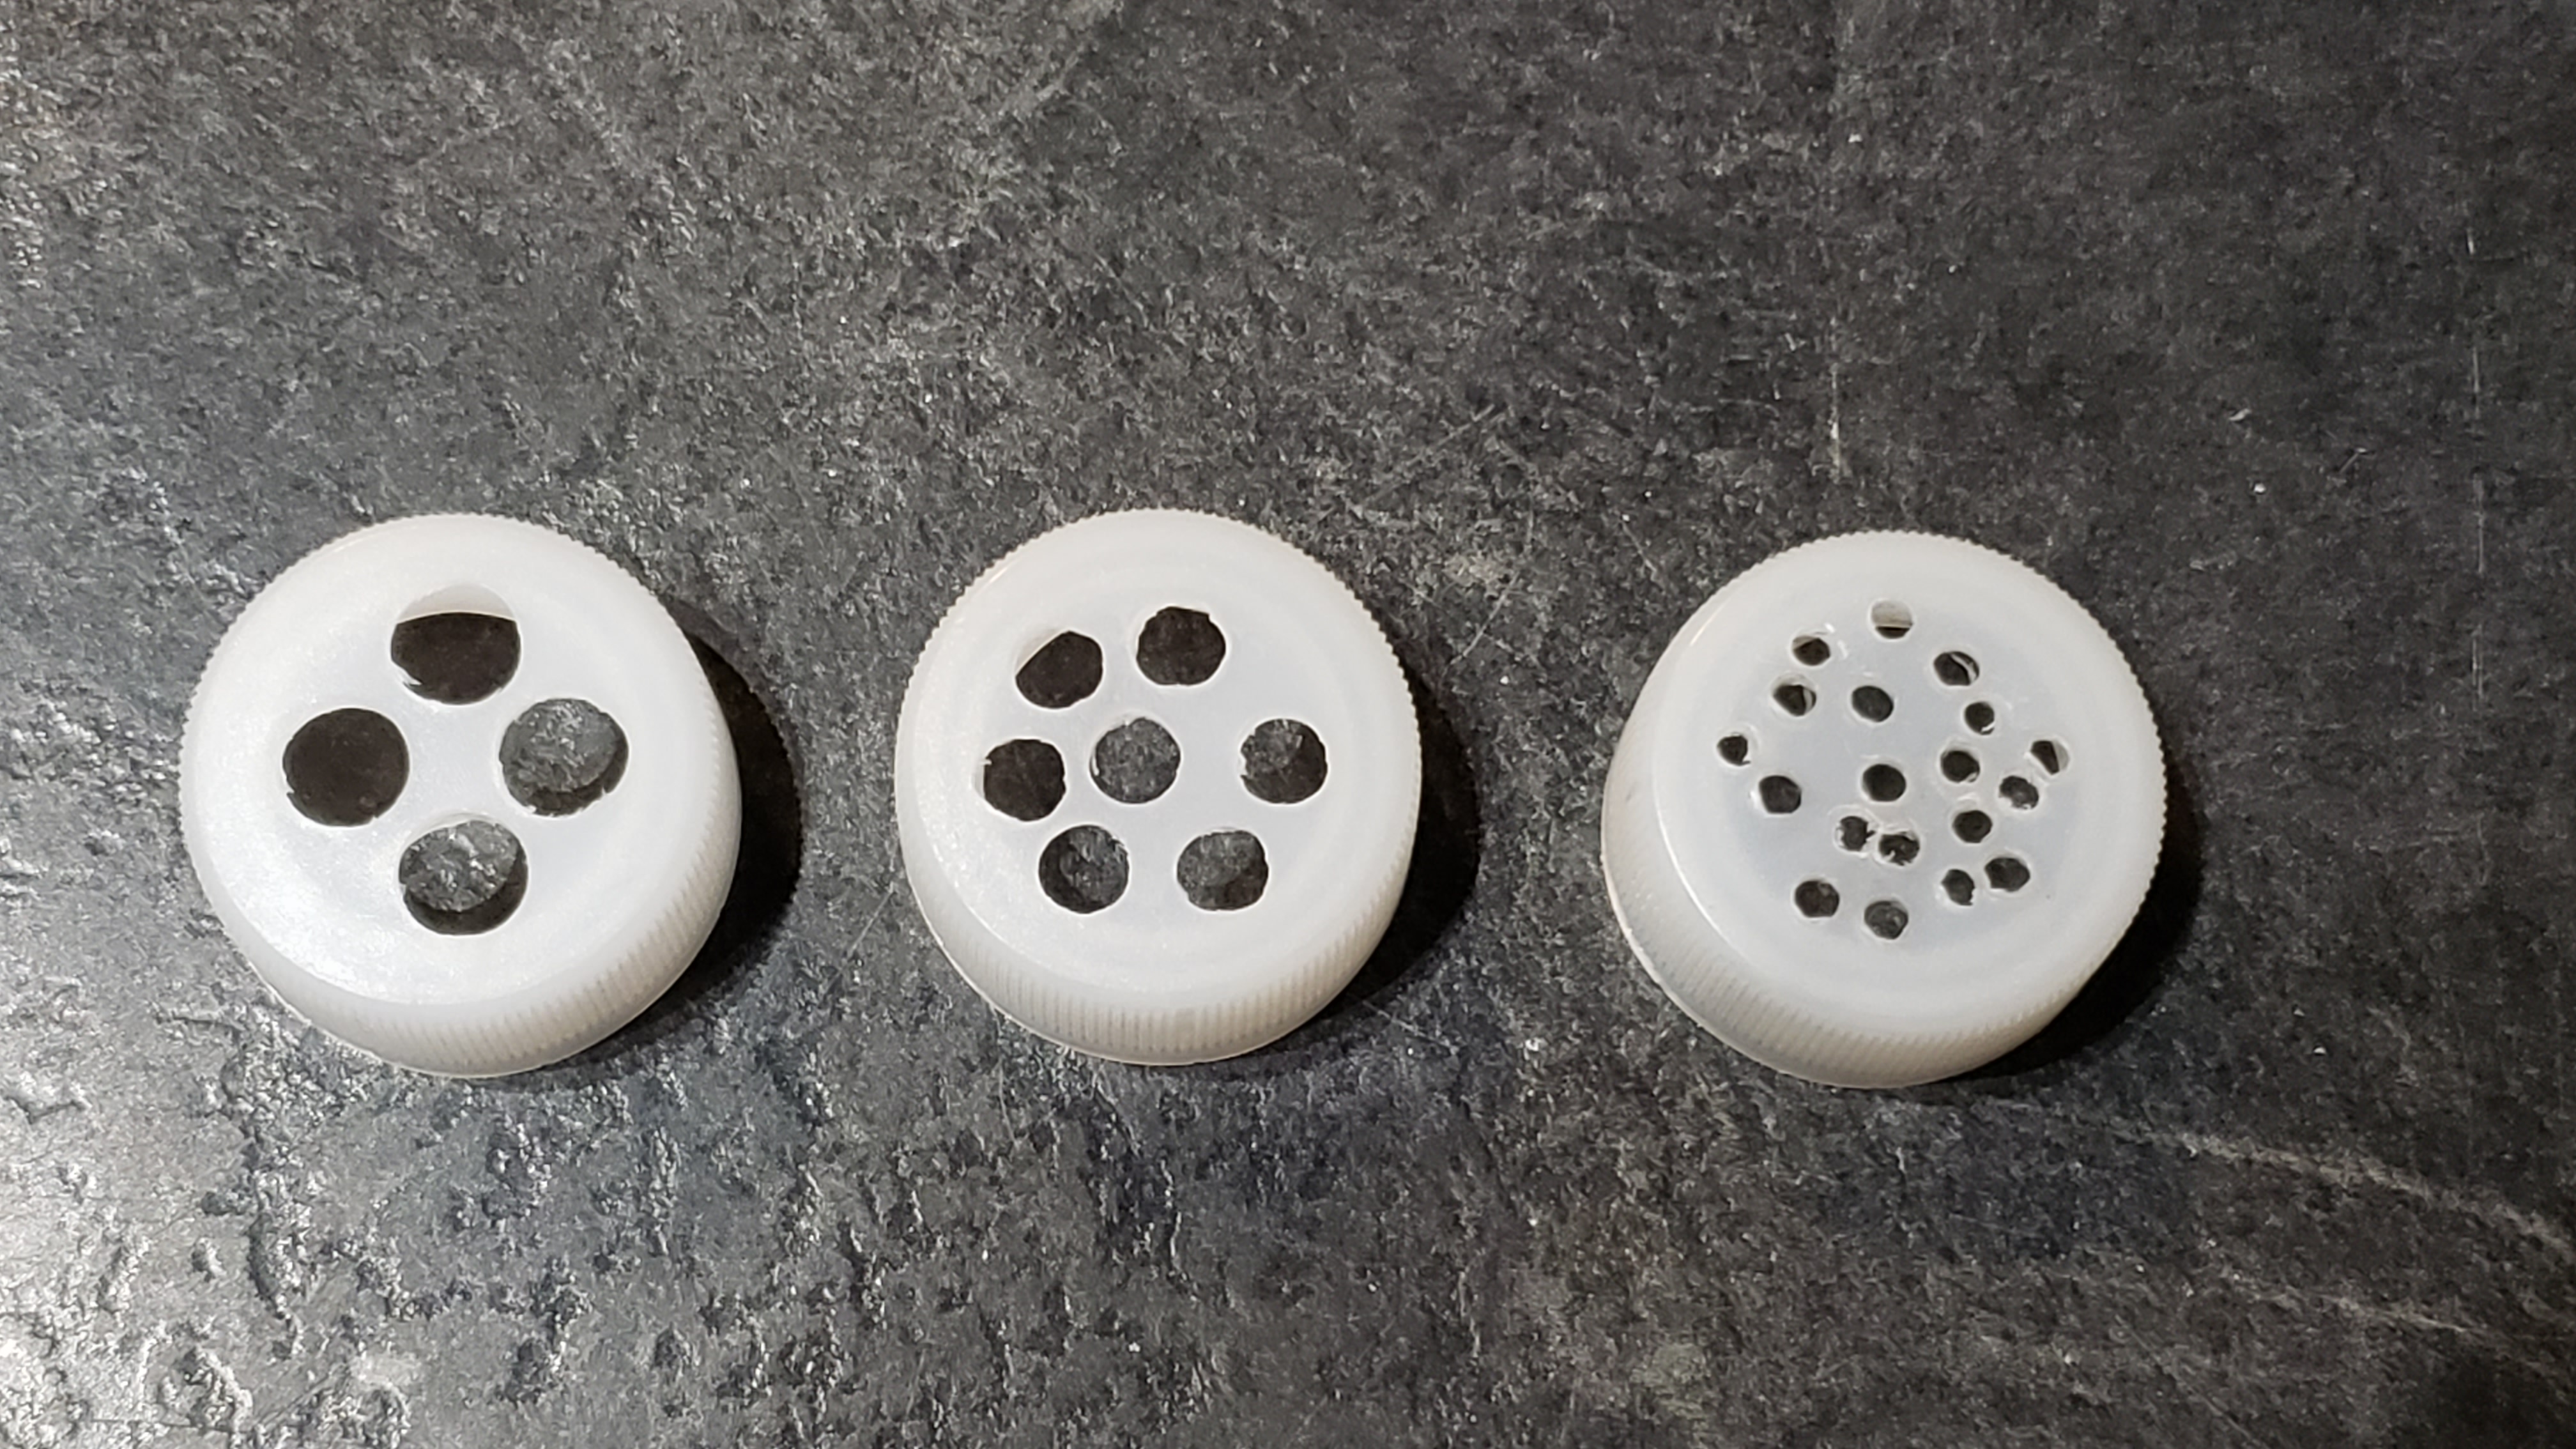
- Holes were drilled in the caps by an adult. There were three sizes of holes. The caps with the large holes were used for large gravel, cotton balls, cheesecloth, coffee filter and sponges. The caps with medium holes were used for small gravel and crushed limestone.The caps with small holes were used for sand, zeolite, and activated carbon.
- We turned the bottle upside down with the cap on and drew a line 85 mm up from the cap.
- We filled the bottle up to the 85 mm with large gravel. Then we emptied the large gravel out and weighed it and then put it back in the bottle.
- Repeat step 6 for small gravel and sand and zeolite and activated carbon. Each bottle had only one filter material.
- For the sponges we put two of them in there
- For the cotton balls we put 13 of them in there
- For the coffee filters we put two of them in there and pushed it down with a wooden stick
- For the cheese cloth we cut it and put two cheese cloths in the bottle
- The bottom bottle was where the water went when it came out of the top bottle with the filter material. For the bottom bottle an adult cut off the top 45 mm off the bottle
- We put the top bottle into the bottom bottle
Stage 1 - Procedure to make contaminated water with red dye
- First you have to get your materials and put them on a flat surface [kitchen counter]
- Put 1000 mL of water into a plastic milk jug that is clean using a measuring cup
- Put 4 drops of red dye into the water and put on the lid and shake it
Stage 1 - Procedure to make contaminated water with potting soil
- First you have to get your materials and put them on a flat surface [kitchen counter]
- Find a scale and a piece of paper and fold the paper until you have four square shapes on the paper
- Next you get your scale and you turn it on put the piece of paper on top of the scale and set it to zero
- When you are done that you have to take the potting soil and weigh that as well. It was 40 g for dirt.
- Now put 1000 mL of water into a big bowl using a measuring cup
- After that put your potting soil in to the water and stir it hard for a bit with a whisk
Stage 1 - Procedure to test if the filter can clean the water
- finally pour the dirty water through your filter
- time it with a stopwatch
- take some photos
- then weigh the water that came out in the bottom bottle
- after that we got the second round of dirty water, repeat steps 1-4
- then you do a third round of dirty water, repeat steps 1-4
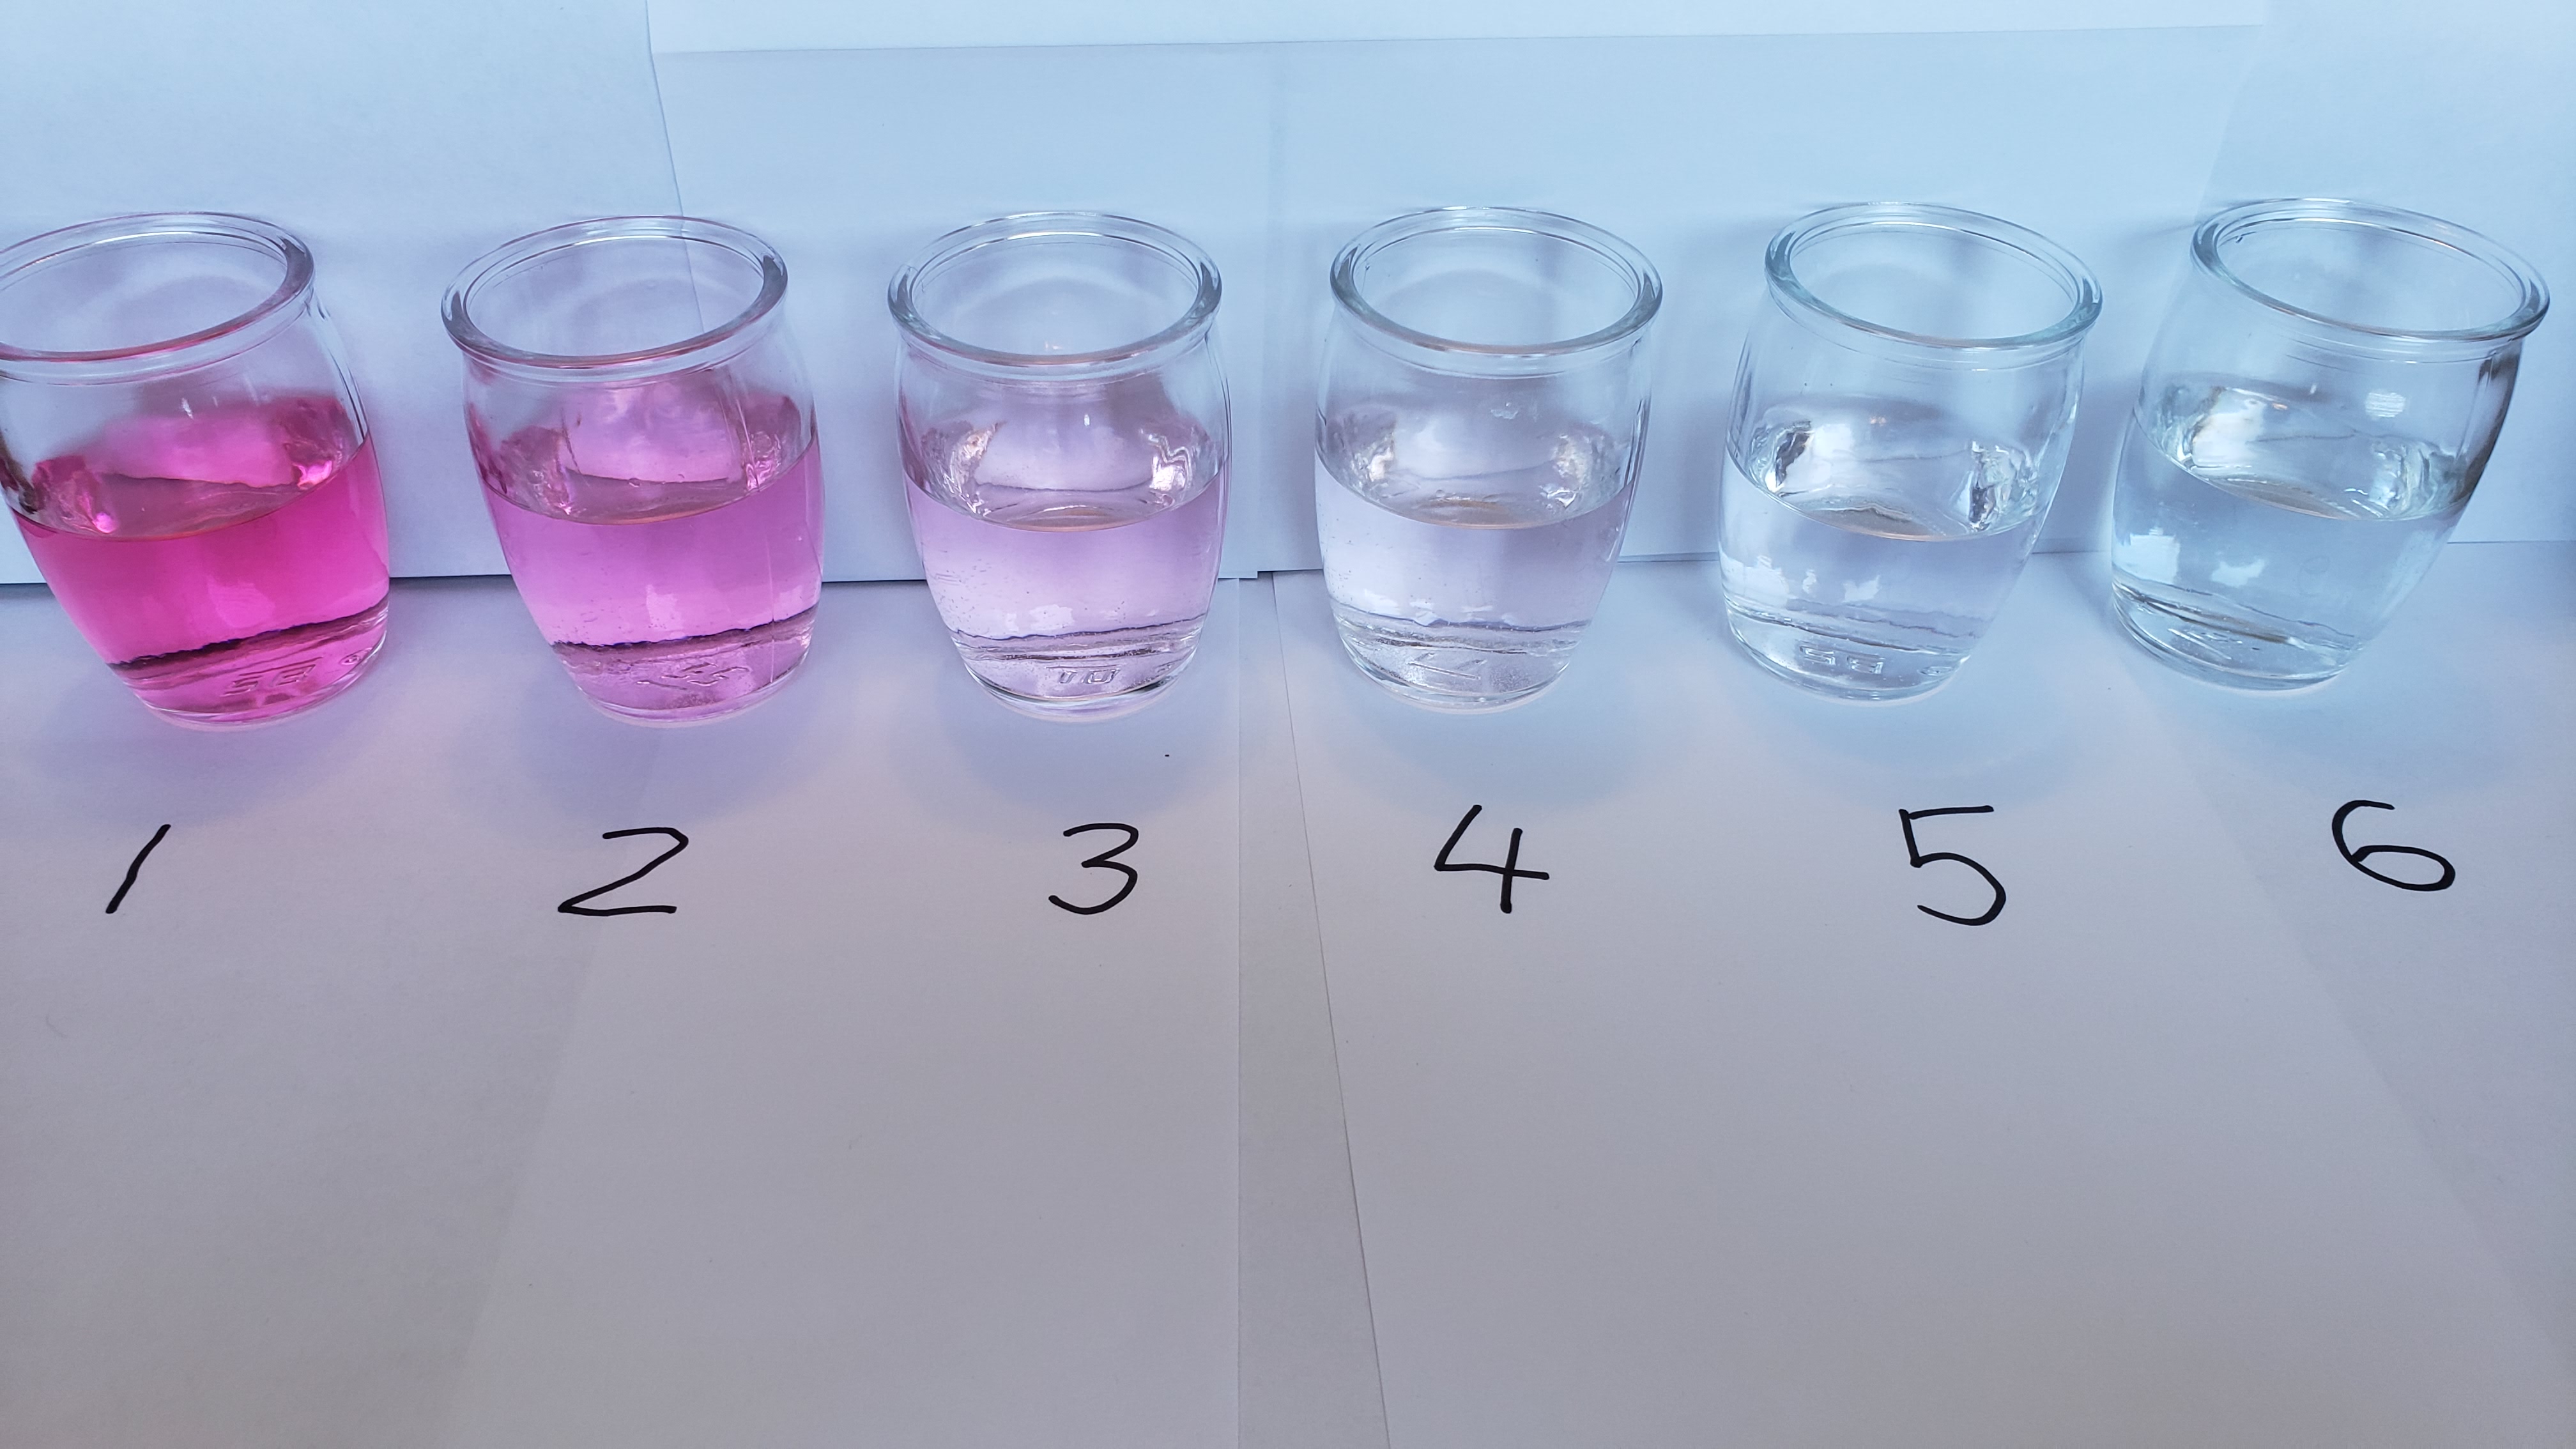
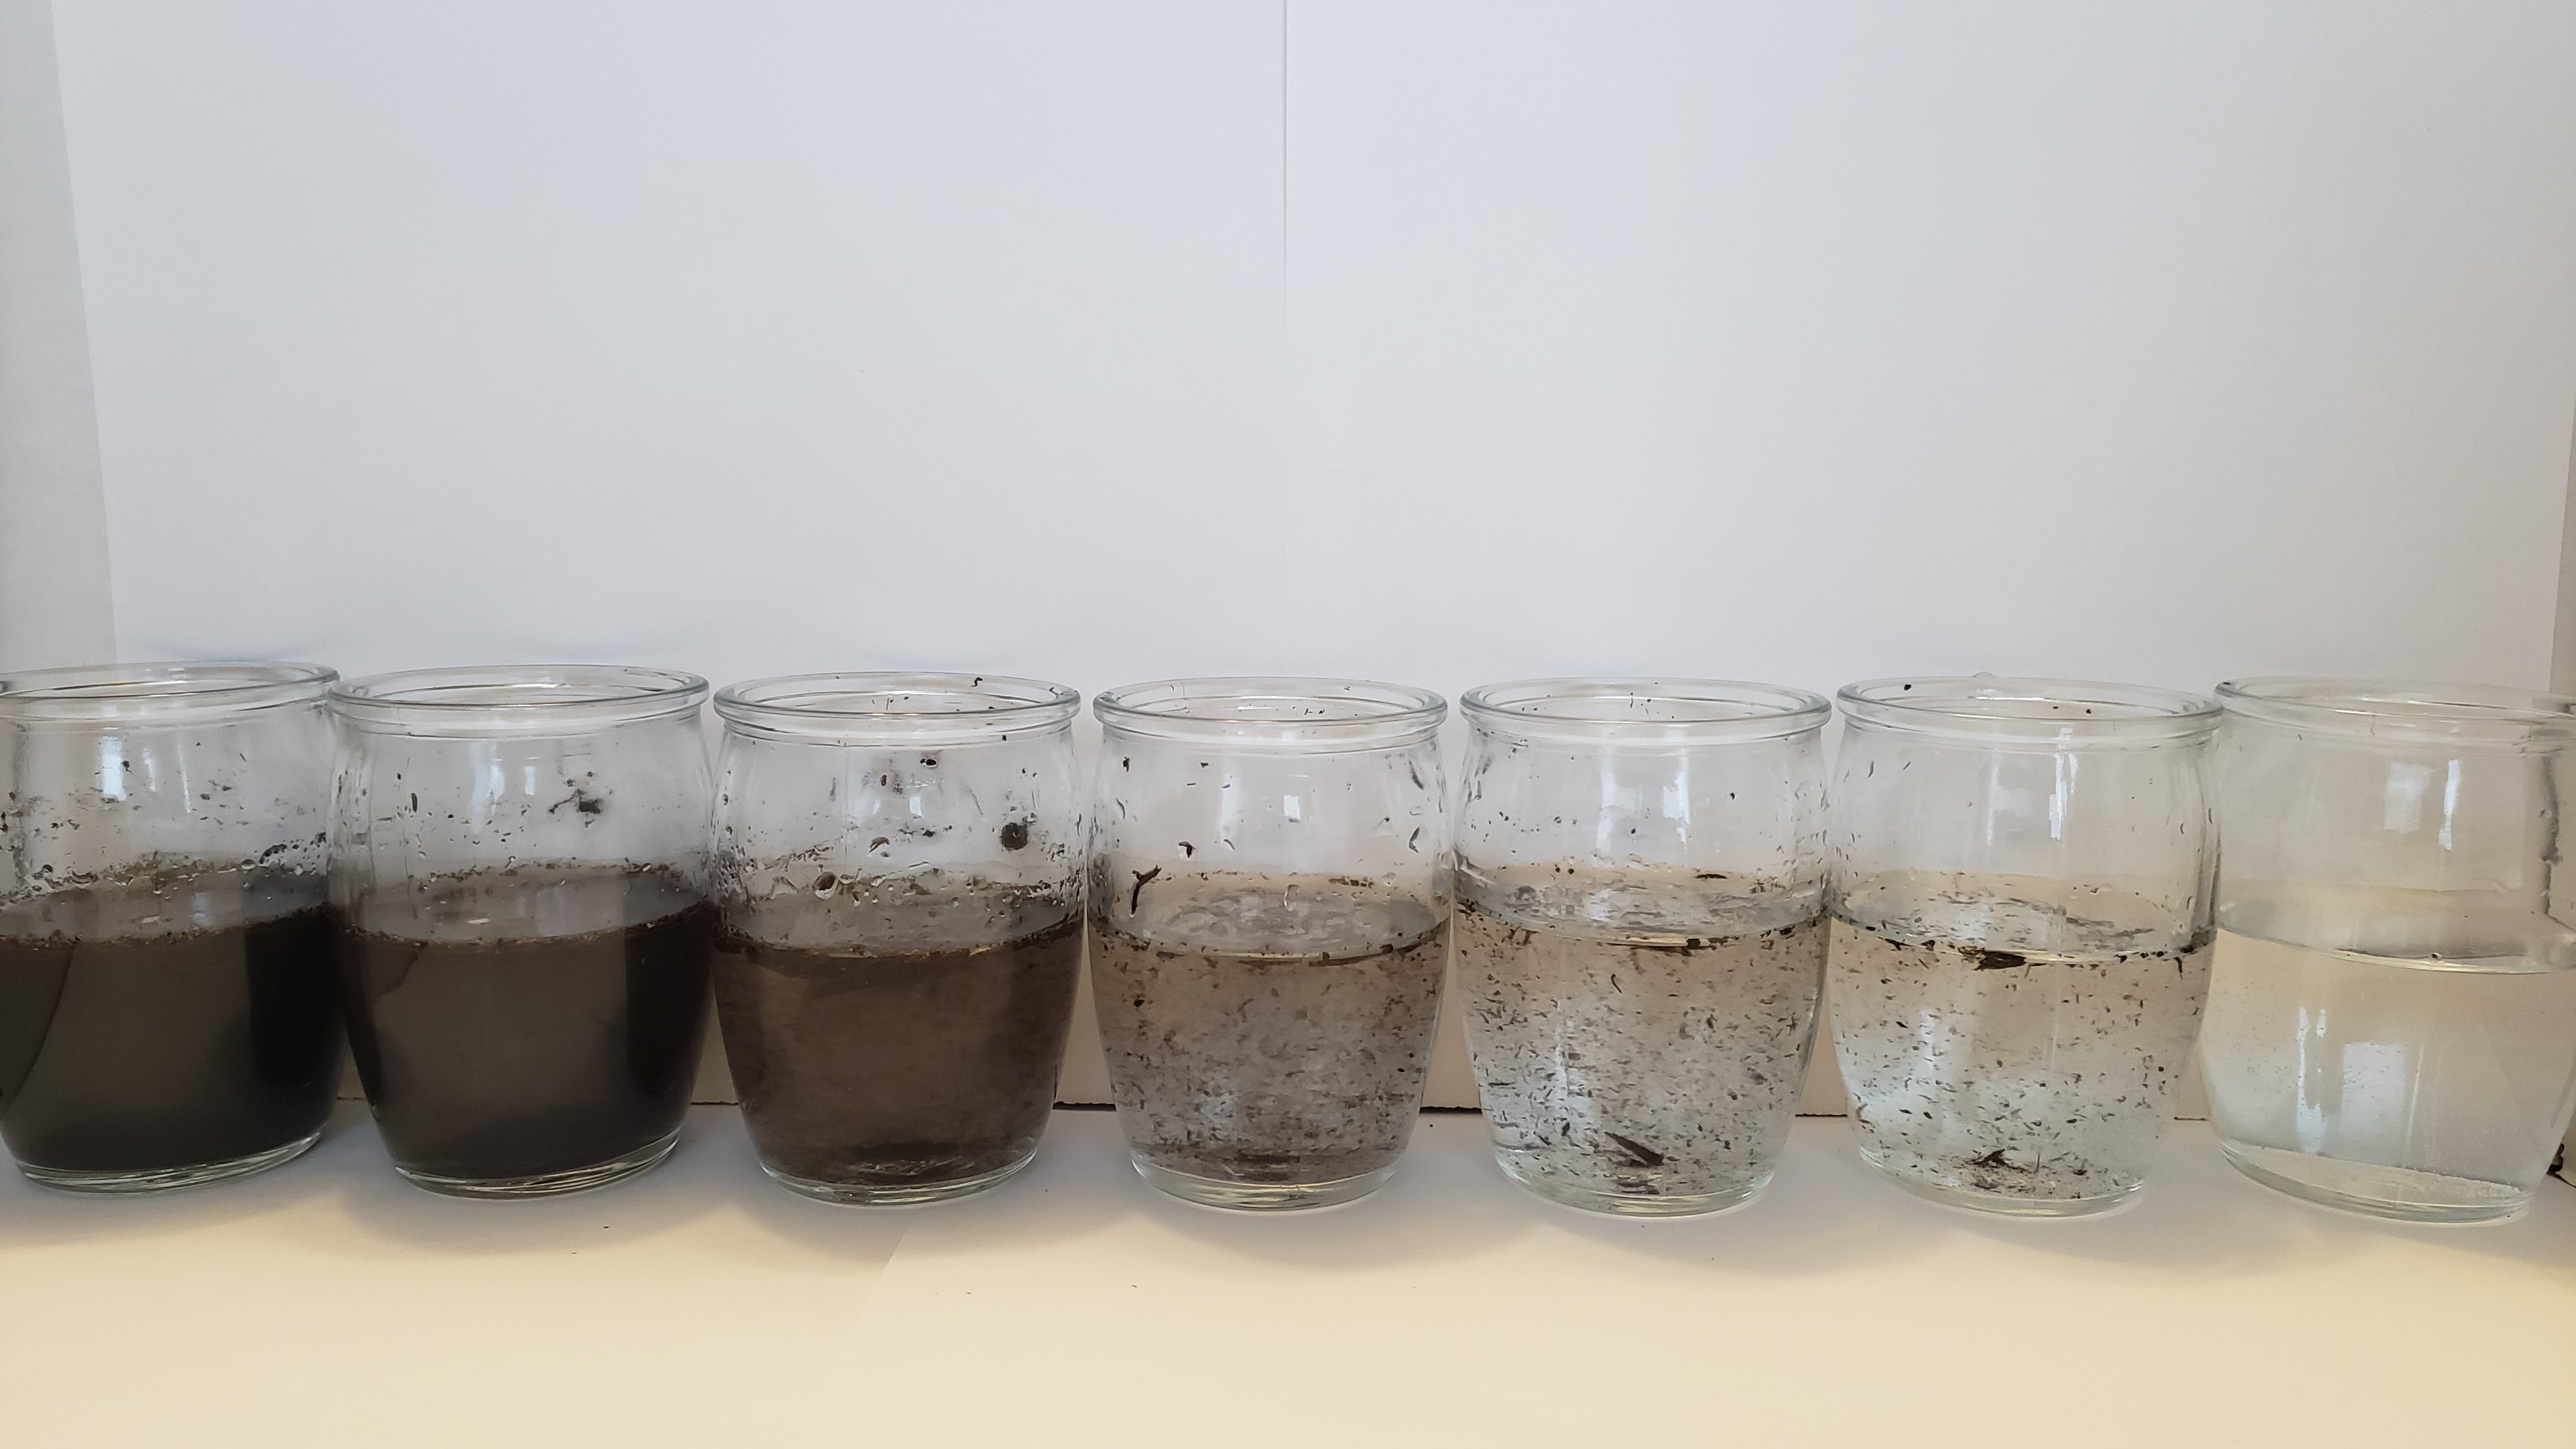
Stage 1 - Procedure to make a color scale for red dye in water
We made this to explain how much dye was in the water that came out after the filter
- Get your materials [1 L of red dye (four drops) in 1L of water, 3 sheets of paper, scale, six small glass cups]
- Then cut your 3 sheets of paper and make them squares and fold it til there is 4 smaller squares in the 1 big square and turn on your scale
- Now take a 80 mL measuring cup and scoop up some of the dirty water and put it into a small glass cup called cup #1.
- Next take the six cups left and pour 80 mL of clean water into each one
- Now take 80 mL of dirty water with the measuring cup and put it into cup#2 which has 80 mL of clean water already. Mix it with a chopstick.
- Now take 80 mL from cup #2 and put it into cup#3. Mix cup #3 with a chopstick.
- Now take 80 mL from cup #3 and put it into cup#4. Mix cup #4 with a chopstick.
- Now take 80 mL from cup #4 and put it into cup#5 Mix cup #5 with a chopstick.
- Now take 80 mL from cup #5 and put it into cup#6. Mix cup #6 with a chopstick.
- The last sup [cup #7] has clean water in it. No dirt.
- Finally take the glasses and take a photo
Stage 1 - Procedure to make a color scale for soil in water
- Get your materials [large bowl, potting soil, whisk, 3 sheets of paper, scale, seven small glass cups]. Then cut your 3 sheets of paper and make them squares and fold it til there is 4 smaller squares in the 1 big square and turn on your scale
- Next put 1 sheet of paper on the scale and set it to zero
- Now weigh out 40 grams of dirt and pour it into 1000 mL of water
- Then whisk until the dirt looks all wet
- Now take a 80 mL measuring cup and scoop up some of the dirty water and put it into a small glass cup called cup #1 and put it aside
- Next take the six cups left and pour 80 mL of clean water into each one
- Now take 80 mL of dirty water with the measuring cup and put it into cup#2 which has 80 mL of clean water already. Mix it with a chopstick.
- Clean the measuring cup with clean water and the chopstick.
- Now take 80 mL from cup #2 and put it into cup#3. Mix cup #3 with a chop stick.
- Now take 80 mL from cup #3 and put it into cup#4. Mix cup #4 with a chop stick.
- Now take 80 mL from cup #4 and put it into cup#5 Mix cup #5 with a chop stick.
- Now take 80 mL from cup #5 and put it into cup#6. Mix cup #6 with a chop stick.
- The last sup [cup #7] has clean water in it. No dirt.
- Finally take the glasses and take a photo
STAGE 2: Now we put the dirty water through more than one filter material to test if we can remove dirty water that has all of our contaminants in it. We picked the filter materials based on what we saw in stage 1.
Stage 2 - Procedure to Build Filters
- We used the same procedure like we said before for making a filter. But in this stage we poured the dirty water through more than one of them.
Stage 2 - Procedure to make dirty water with two contaminants
- First you have to get your materials and put them on a flat surface [kitchen counter]
- Find a scale and a piece of paper and fold the paper until you have four square shapes on the paper.
- Next you get your scale and you turn it on put the piece of paper on top of the scale and set it to zero
- When you are done that you have to take the potting soil and weigh that as well. It was 40 g for dirt.
- Now put 1000 mL of water into a big bowl using a measuring cup
- After that put your potting soil in to the water and stir it hard for a bit with a whisk
- Now add in 4 drop of red dye
- Mix the water a lot to mix it all together,
Stage 2 - Procedure to test filter
- we wetted the filter materials before use
- we poured the contaminated water into a bottle containing a certain filter material
- time how long it took to run through the filter with a stopwatch
- take some photos
- then weigh the water that came out
- Then we took the water that came out of the first filter and poured in another filter with a different filter material.
- Then we repeated steps 3-5 a few times changing from one filter material to another one.
- we repeated step 1-7 using a second set of the same filter materials
- we repeated step 1-7 using a third set of the same filter materials for a third filter with the same filter material
Observations
STAGE 1 OBSERVATIONS - RED DYE
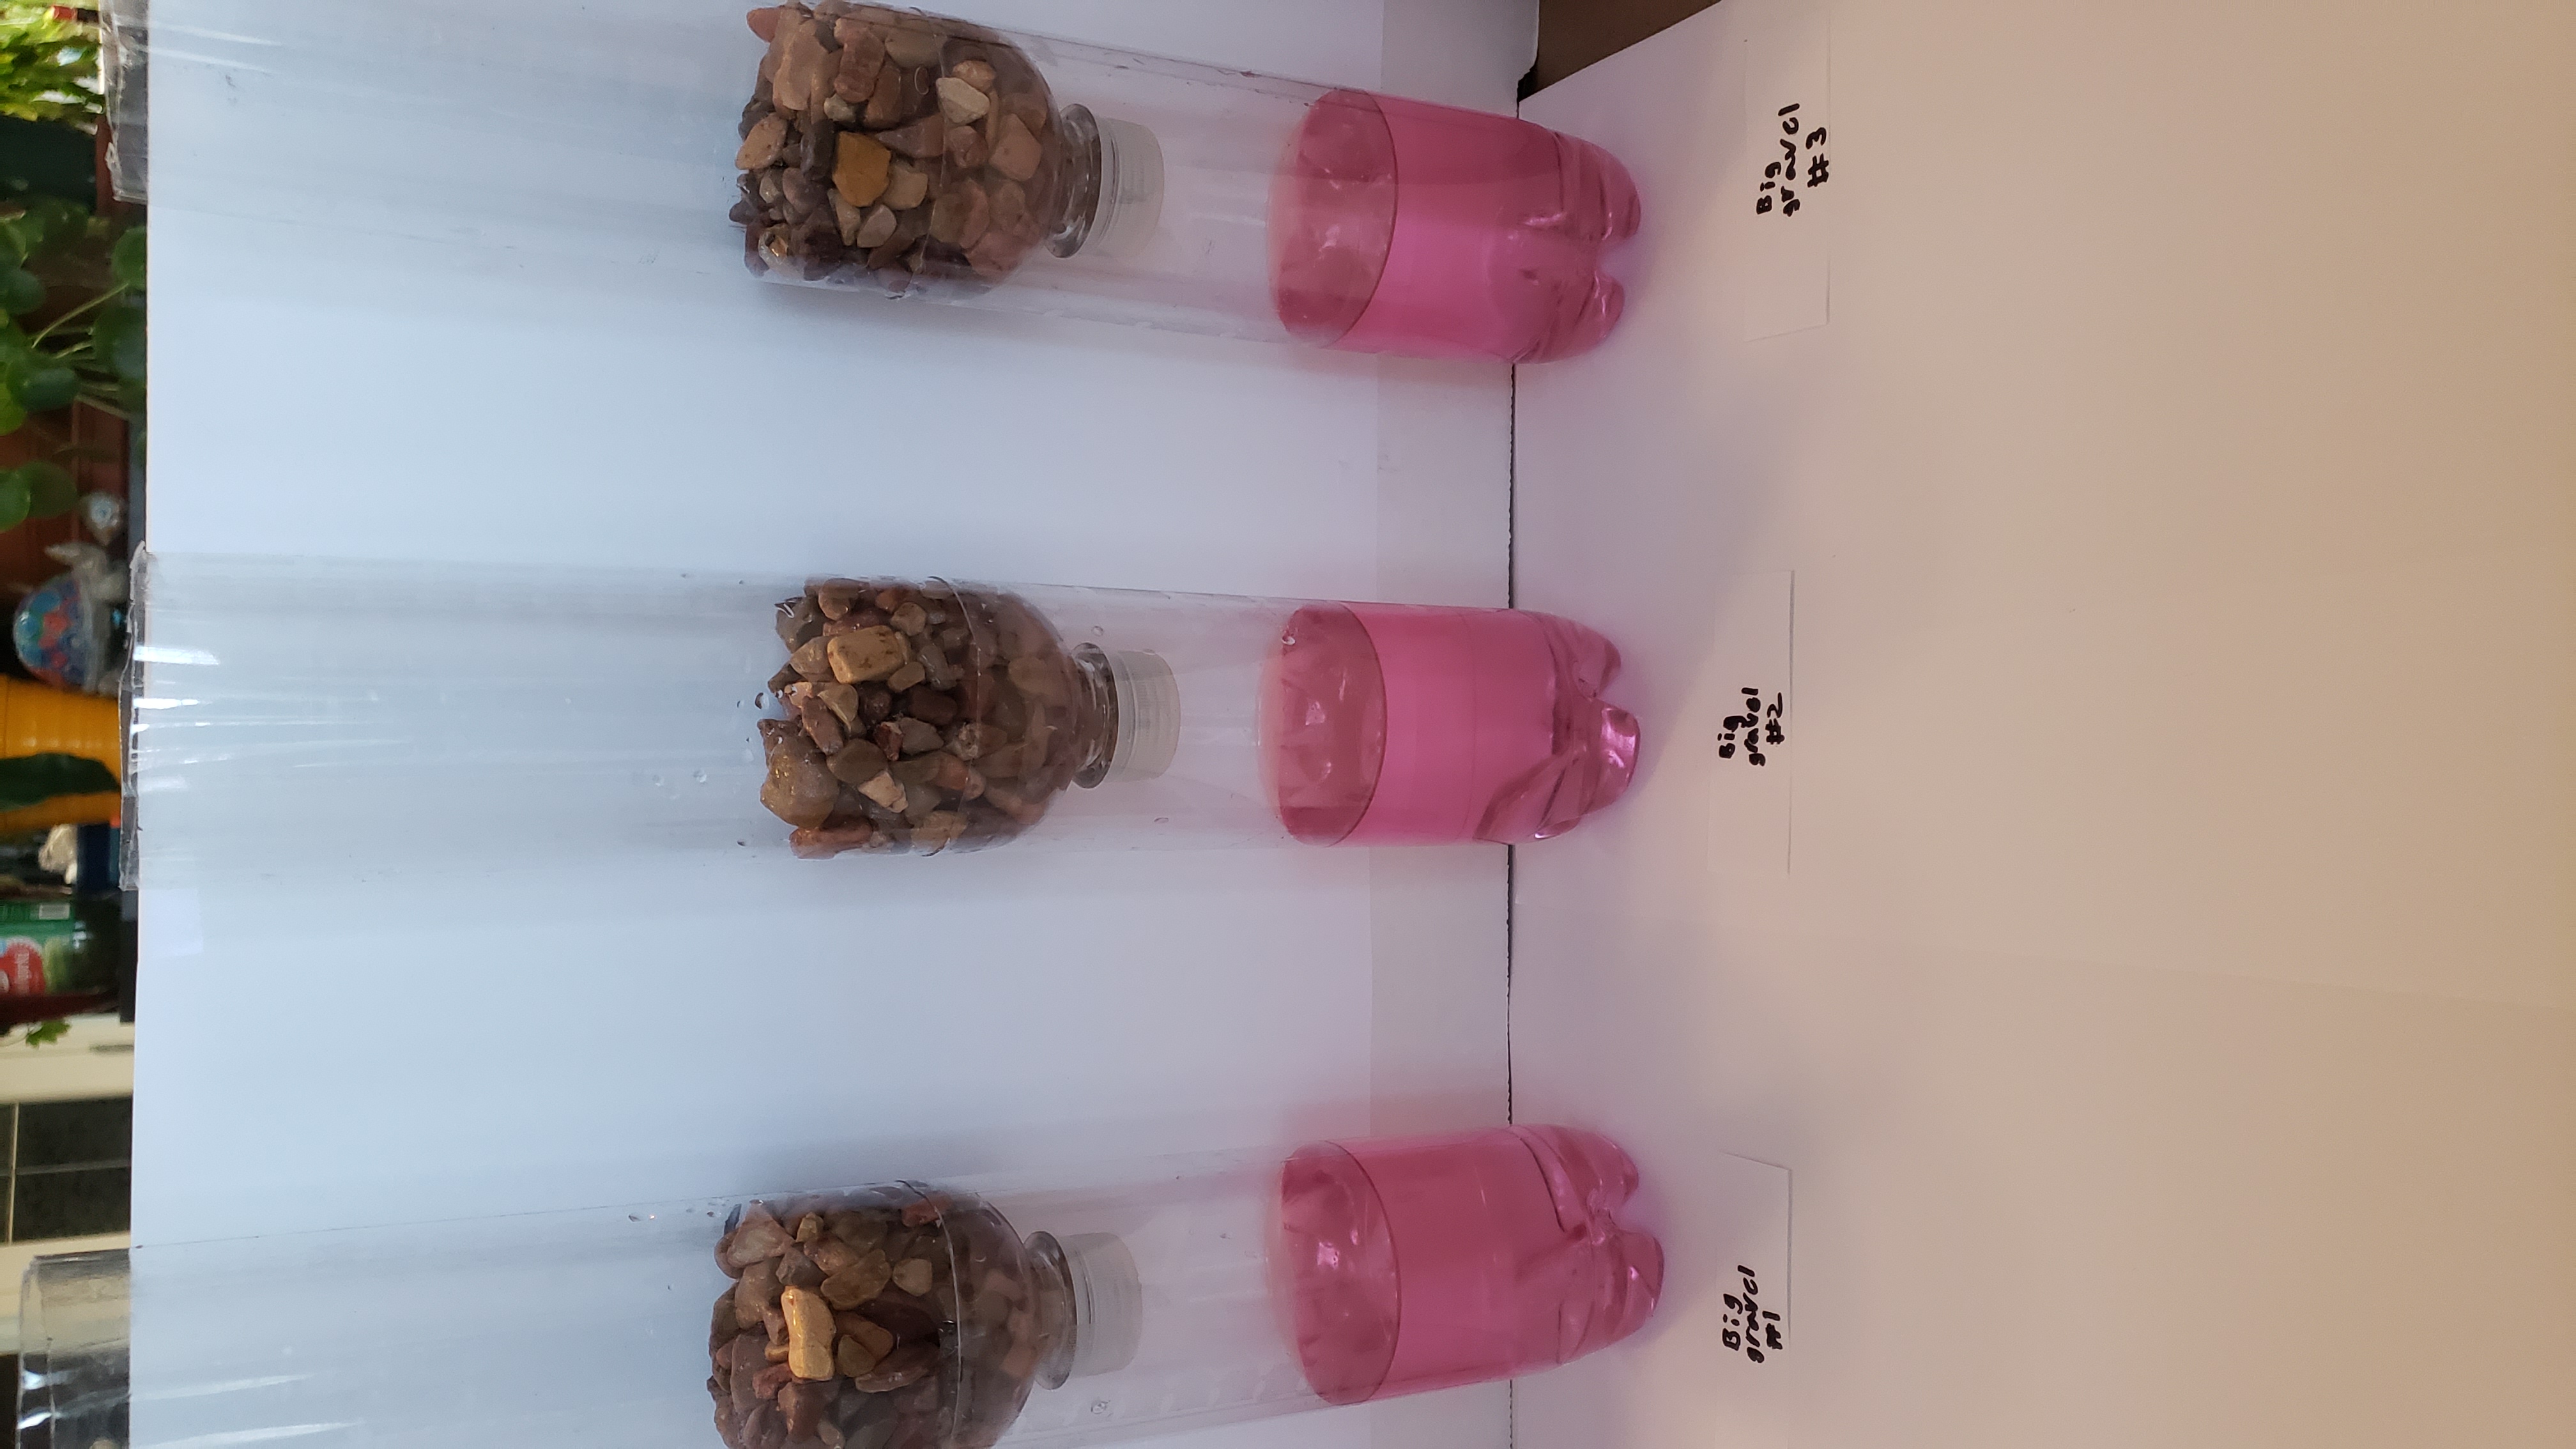
When we poured the red dye water into large gravel the color coming out of the filter was the same as the colour of the water that we poured in. So big gravel didn’t remove the red dye.
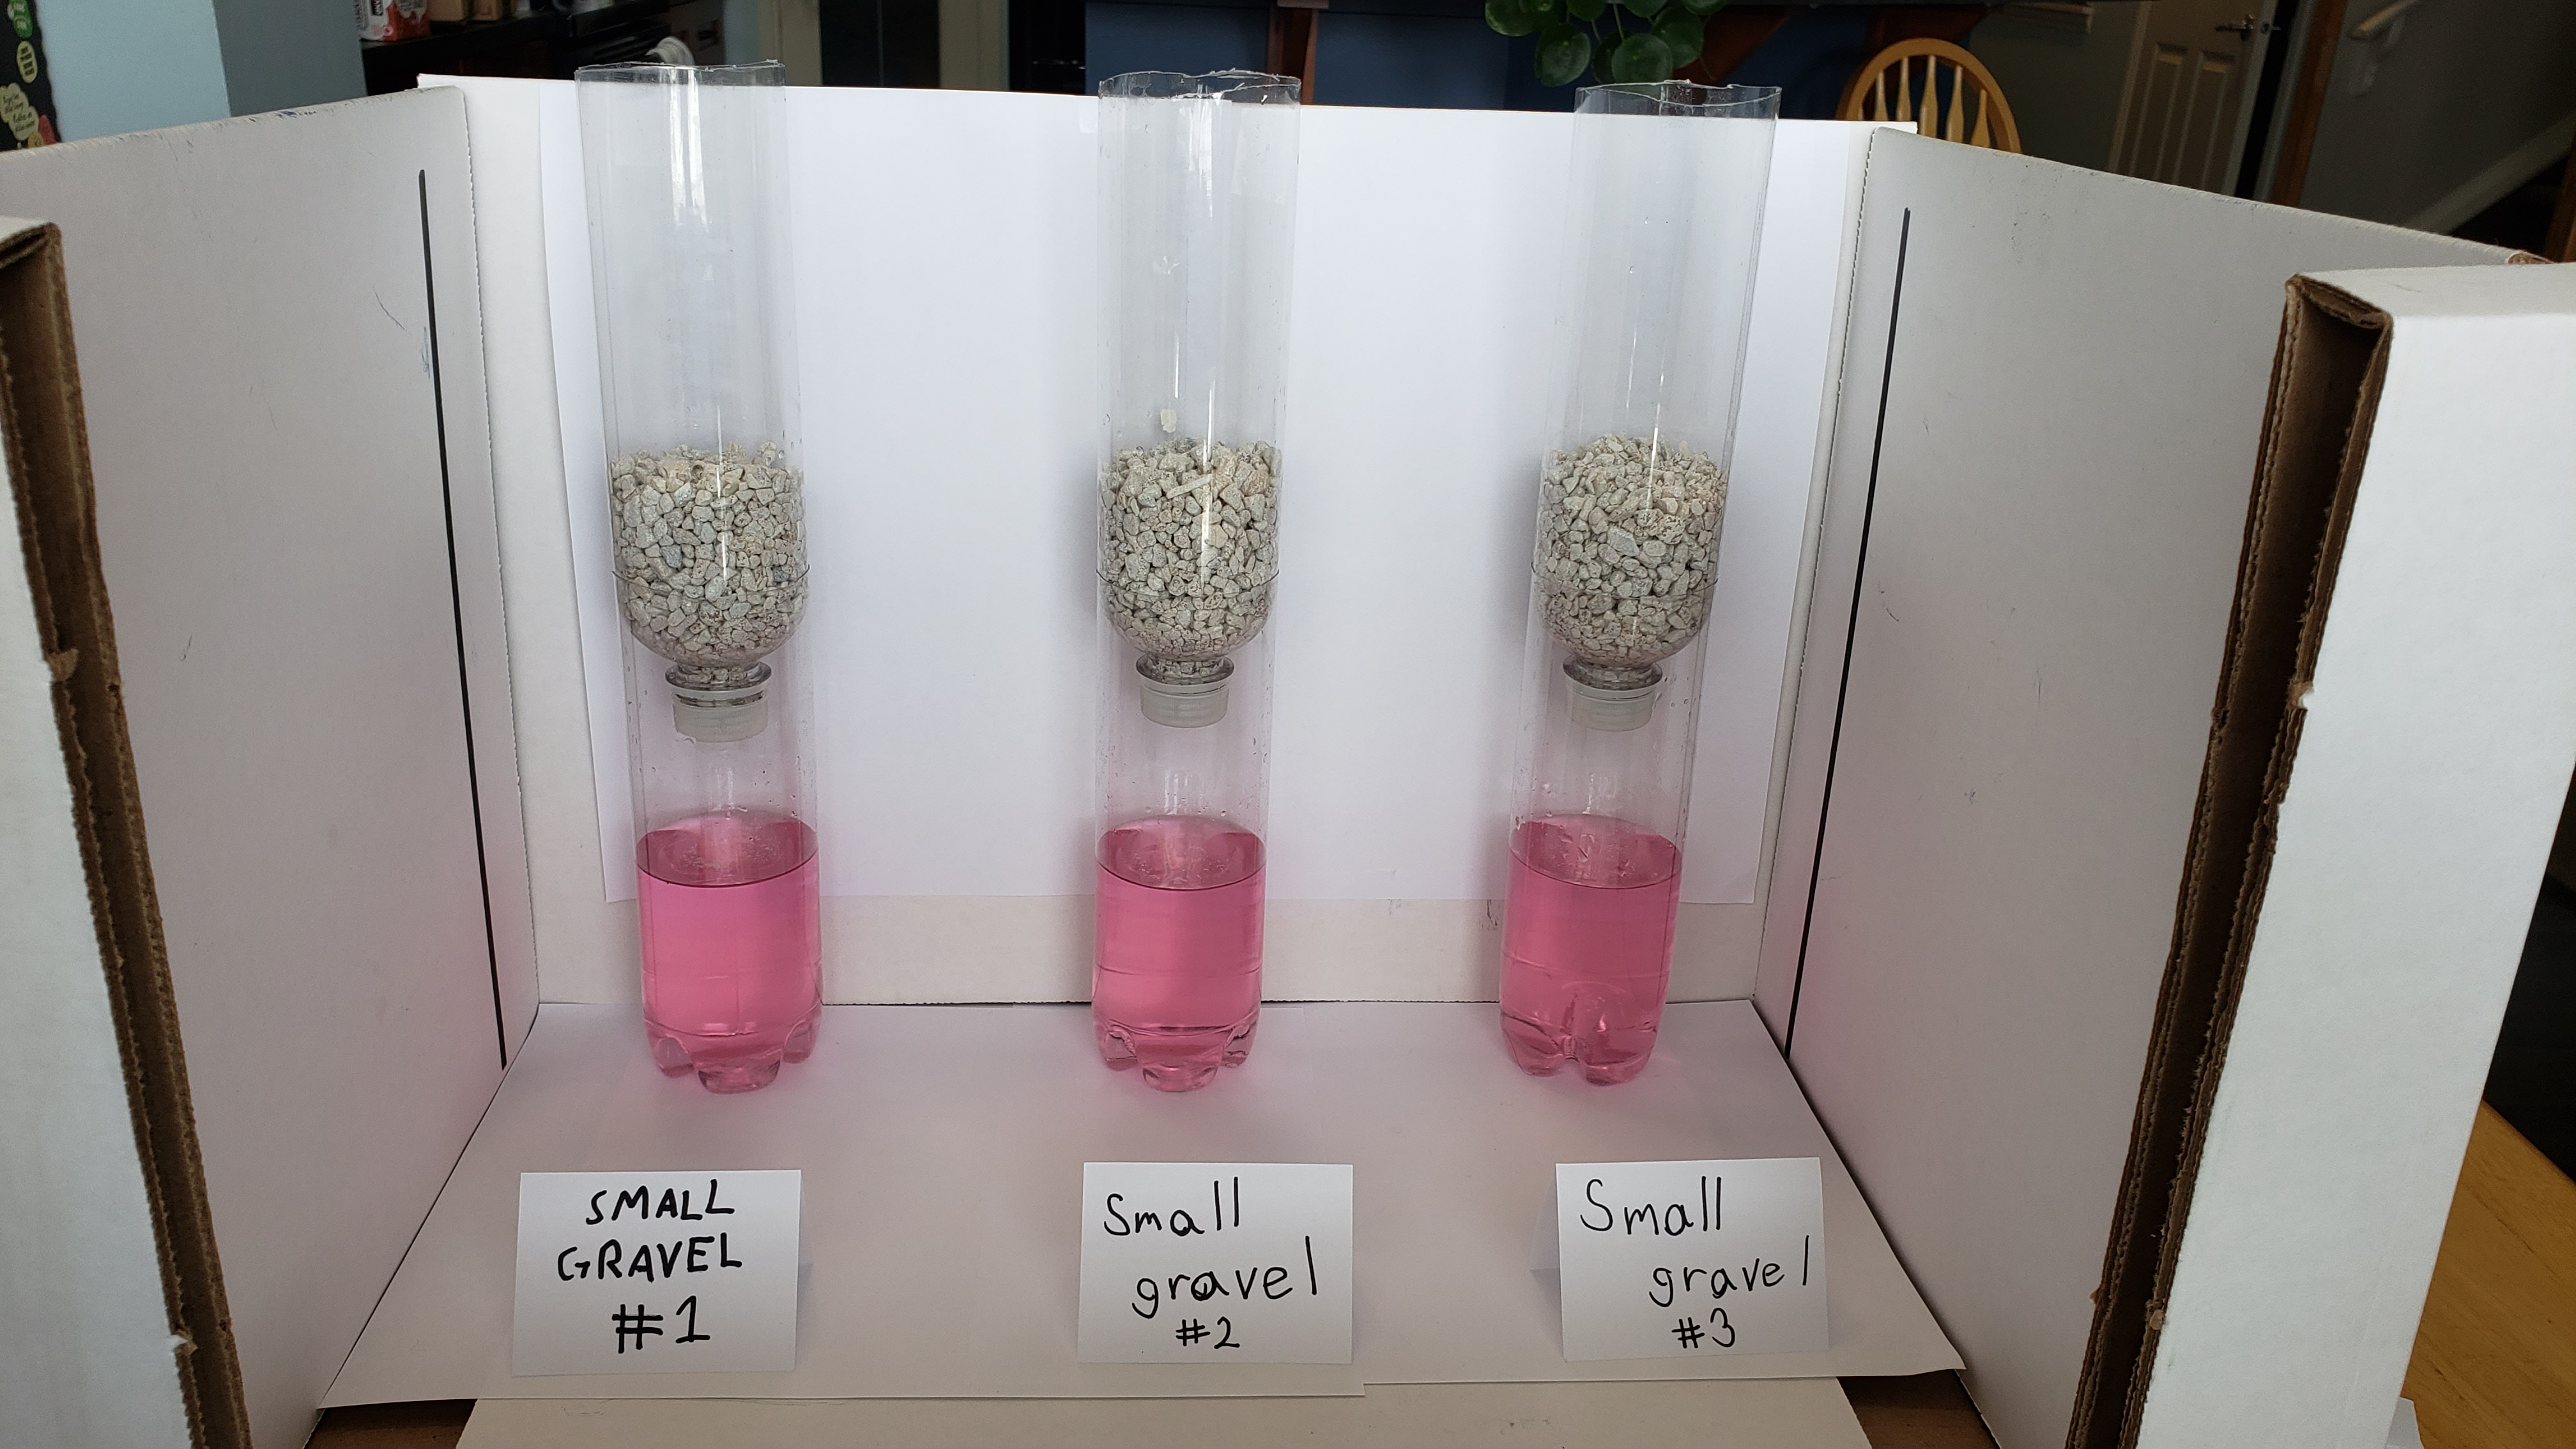
When we poured the red dye water into small gravel the color coming out of the filter was the same as the colour of the water that we poured in. So small gravel didn’t remove the red dye.
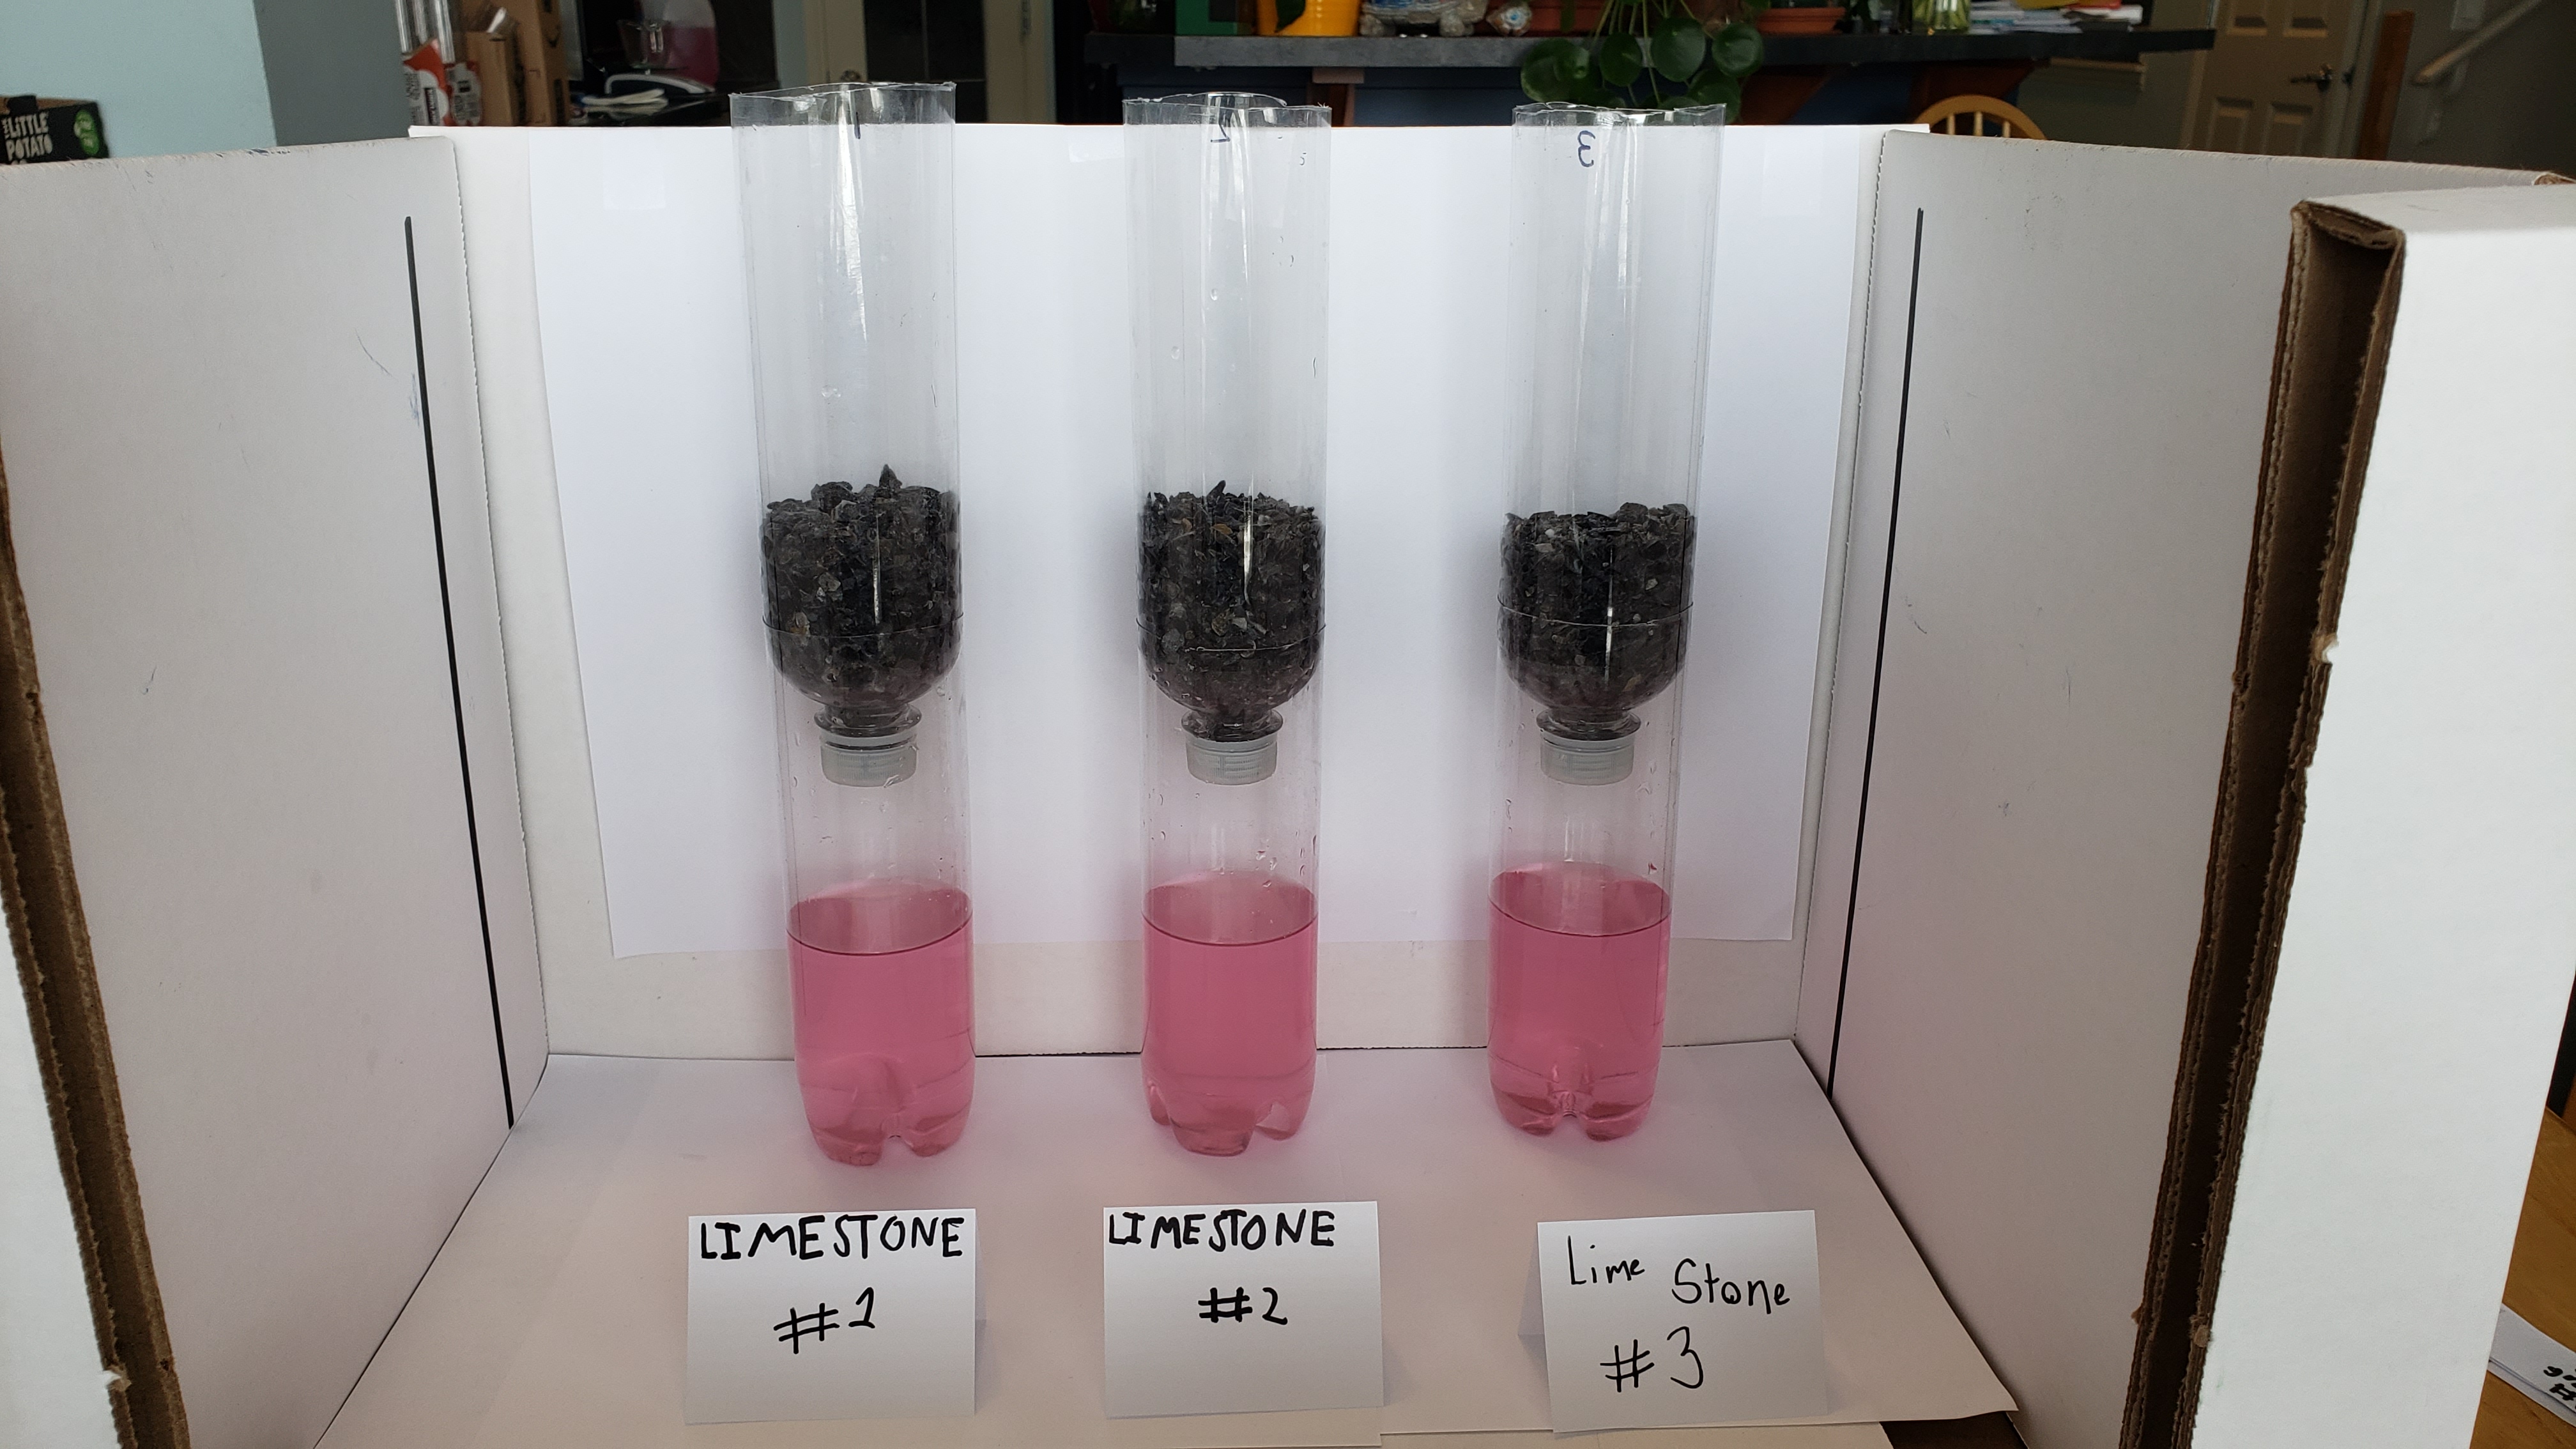
When we poured the red dye water into the limestone the color coming out of the filter was the same as the colour of the water that we poured in. So limestone didn’t remove the red dye.
When we poured the red dye water into sand the color coming out of the filter was the same as the colour of the water that we poured in. So sand didn’t remove the red dye.

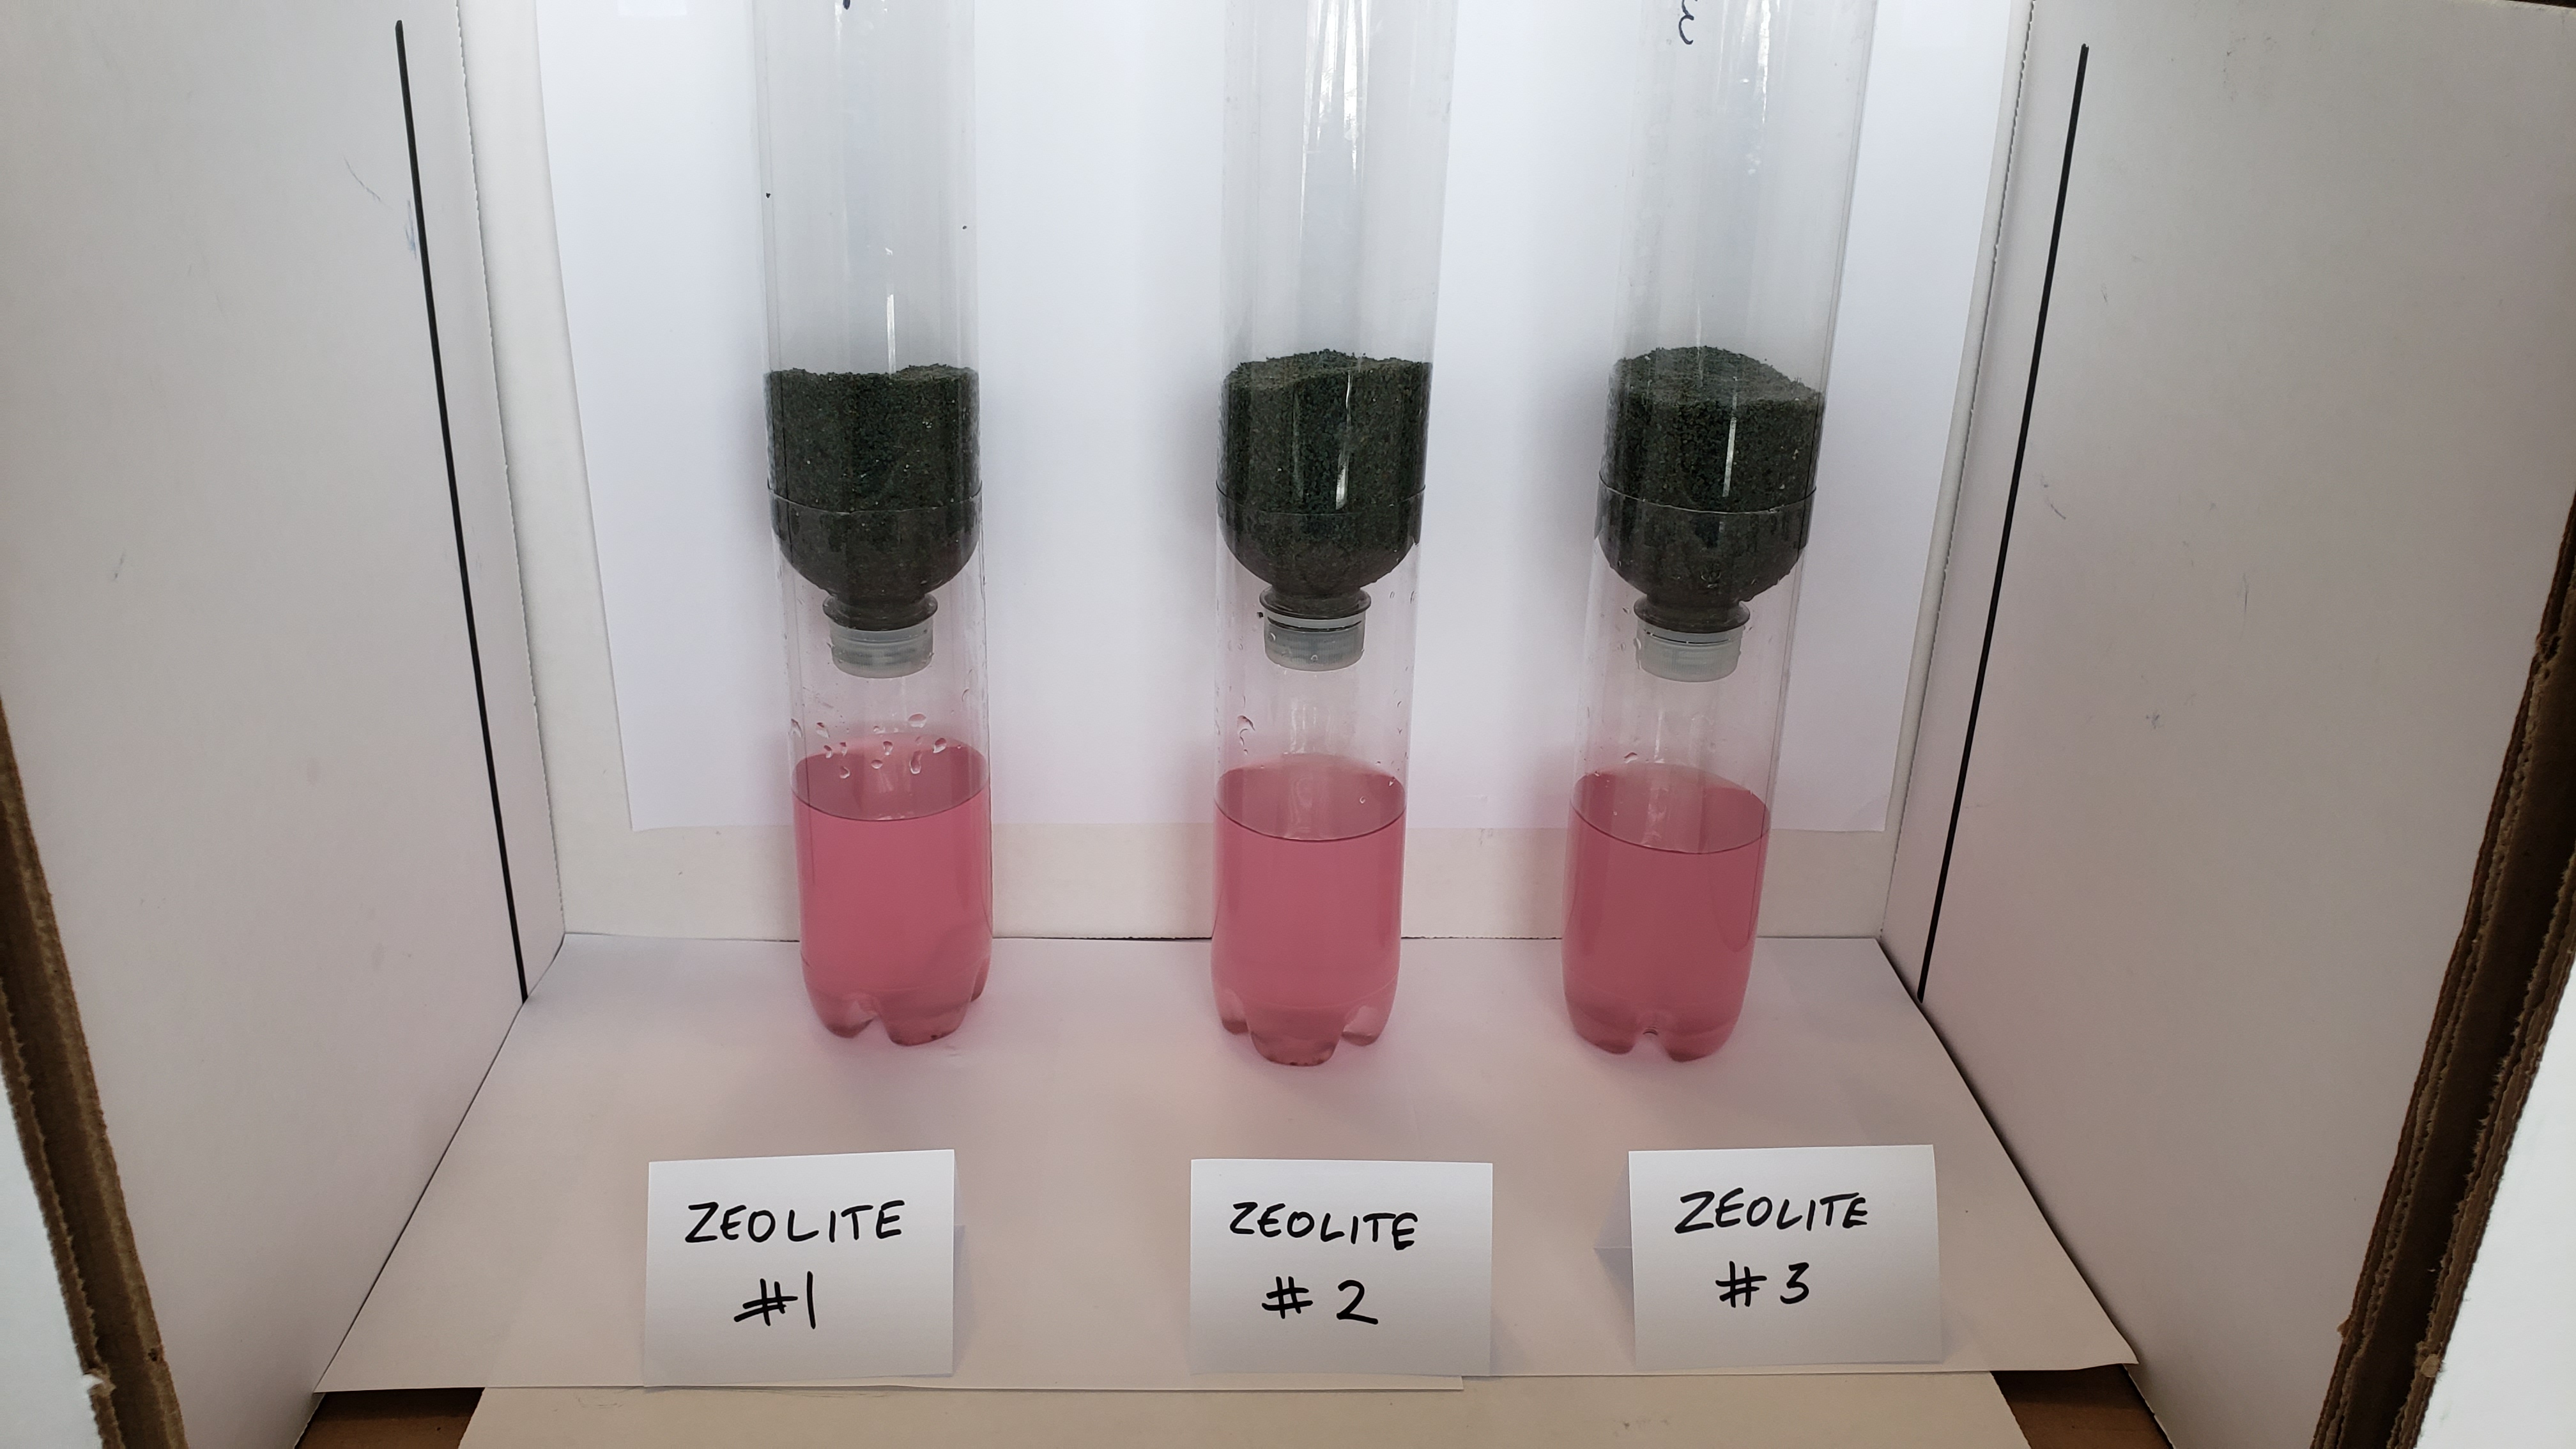
When we poured the red dye water into zeolite the color coming out of the filter was the same as the colour of the water that we poured in. So zeolite didn’t remove the red dye.
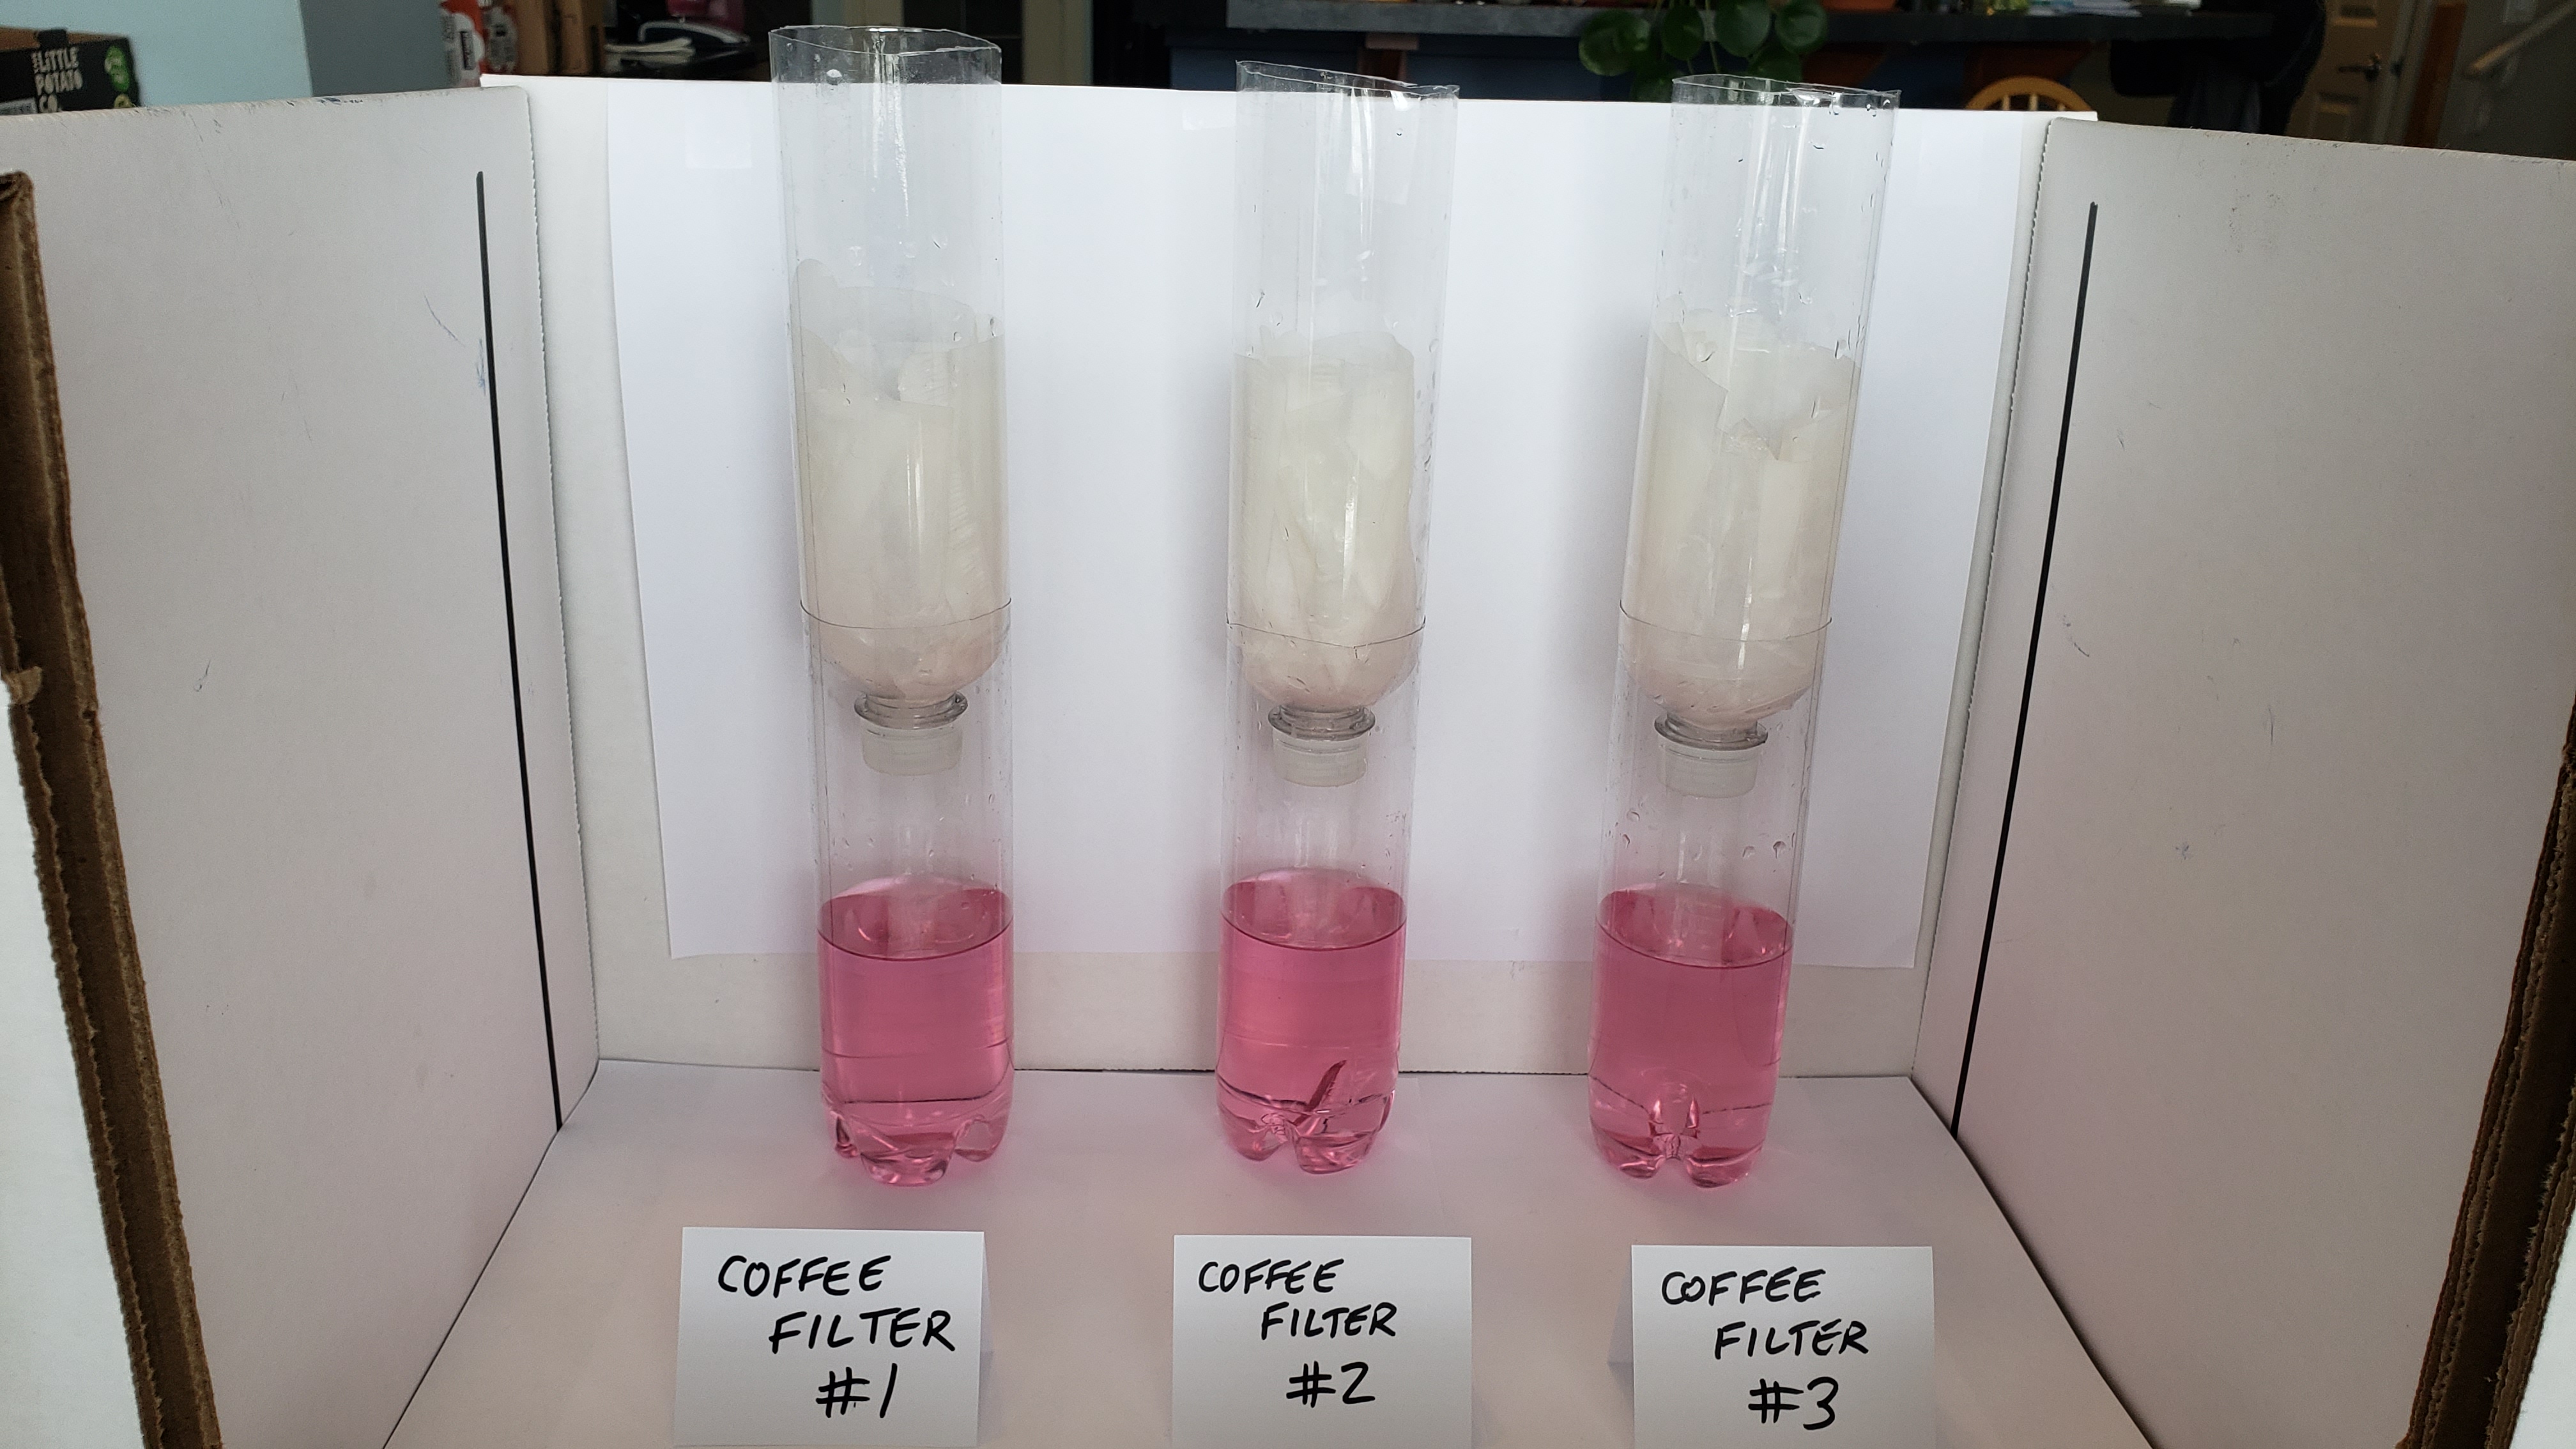
When we poured the red dye water into coffee filters the color coming out of the filter was the same as the colour of the water that we poured in. So coffee filters didn’t remove the red dye.
When we poured the red dye water into cotton balls, the color coming out of the filter was the same as the colour of the water that we poured in. So cotton balls didn’t remove the red dye.
When we poured the red dye water into sponge, the color coming out of the filter was the same as the colour of the water that we poured in, except for one sponge which seemed to remove some of the colour. But that different sponge came in a different packet than those other ones and it felt slimy when we washed it before using it. So sponge didn’t remove the red dye.

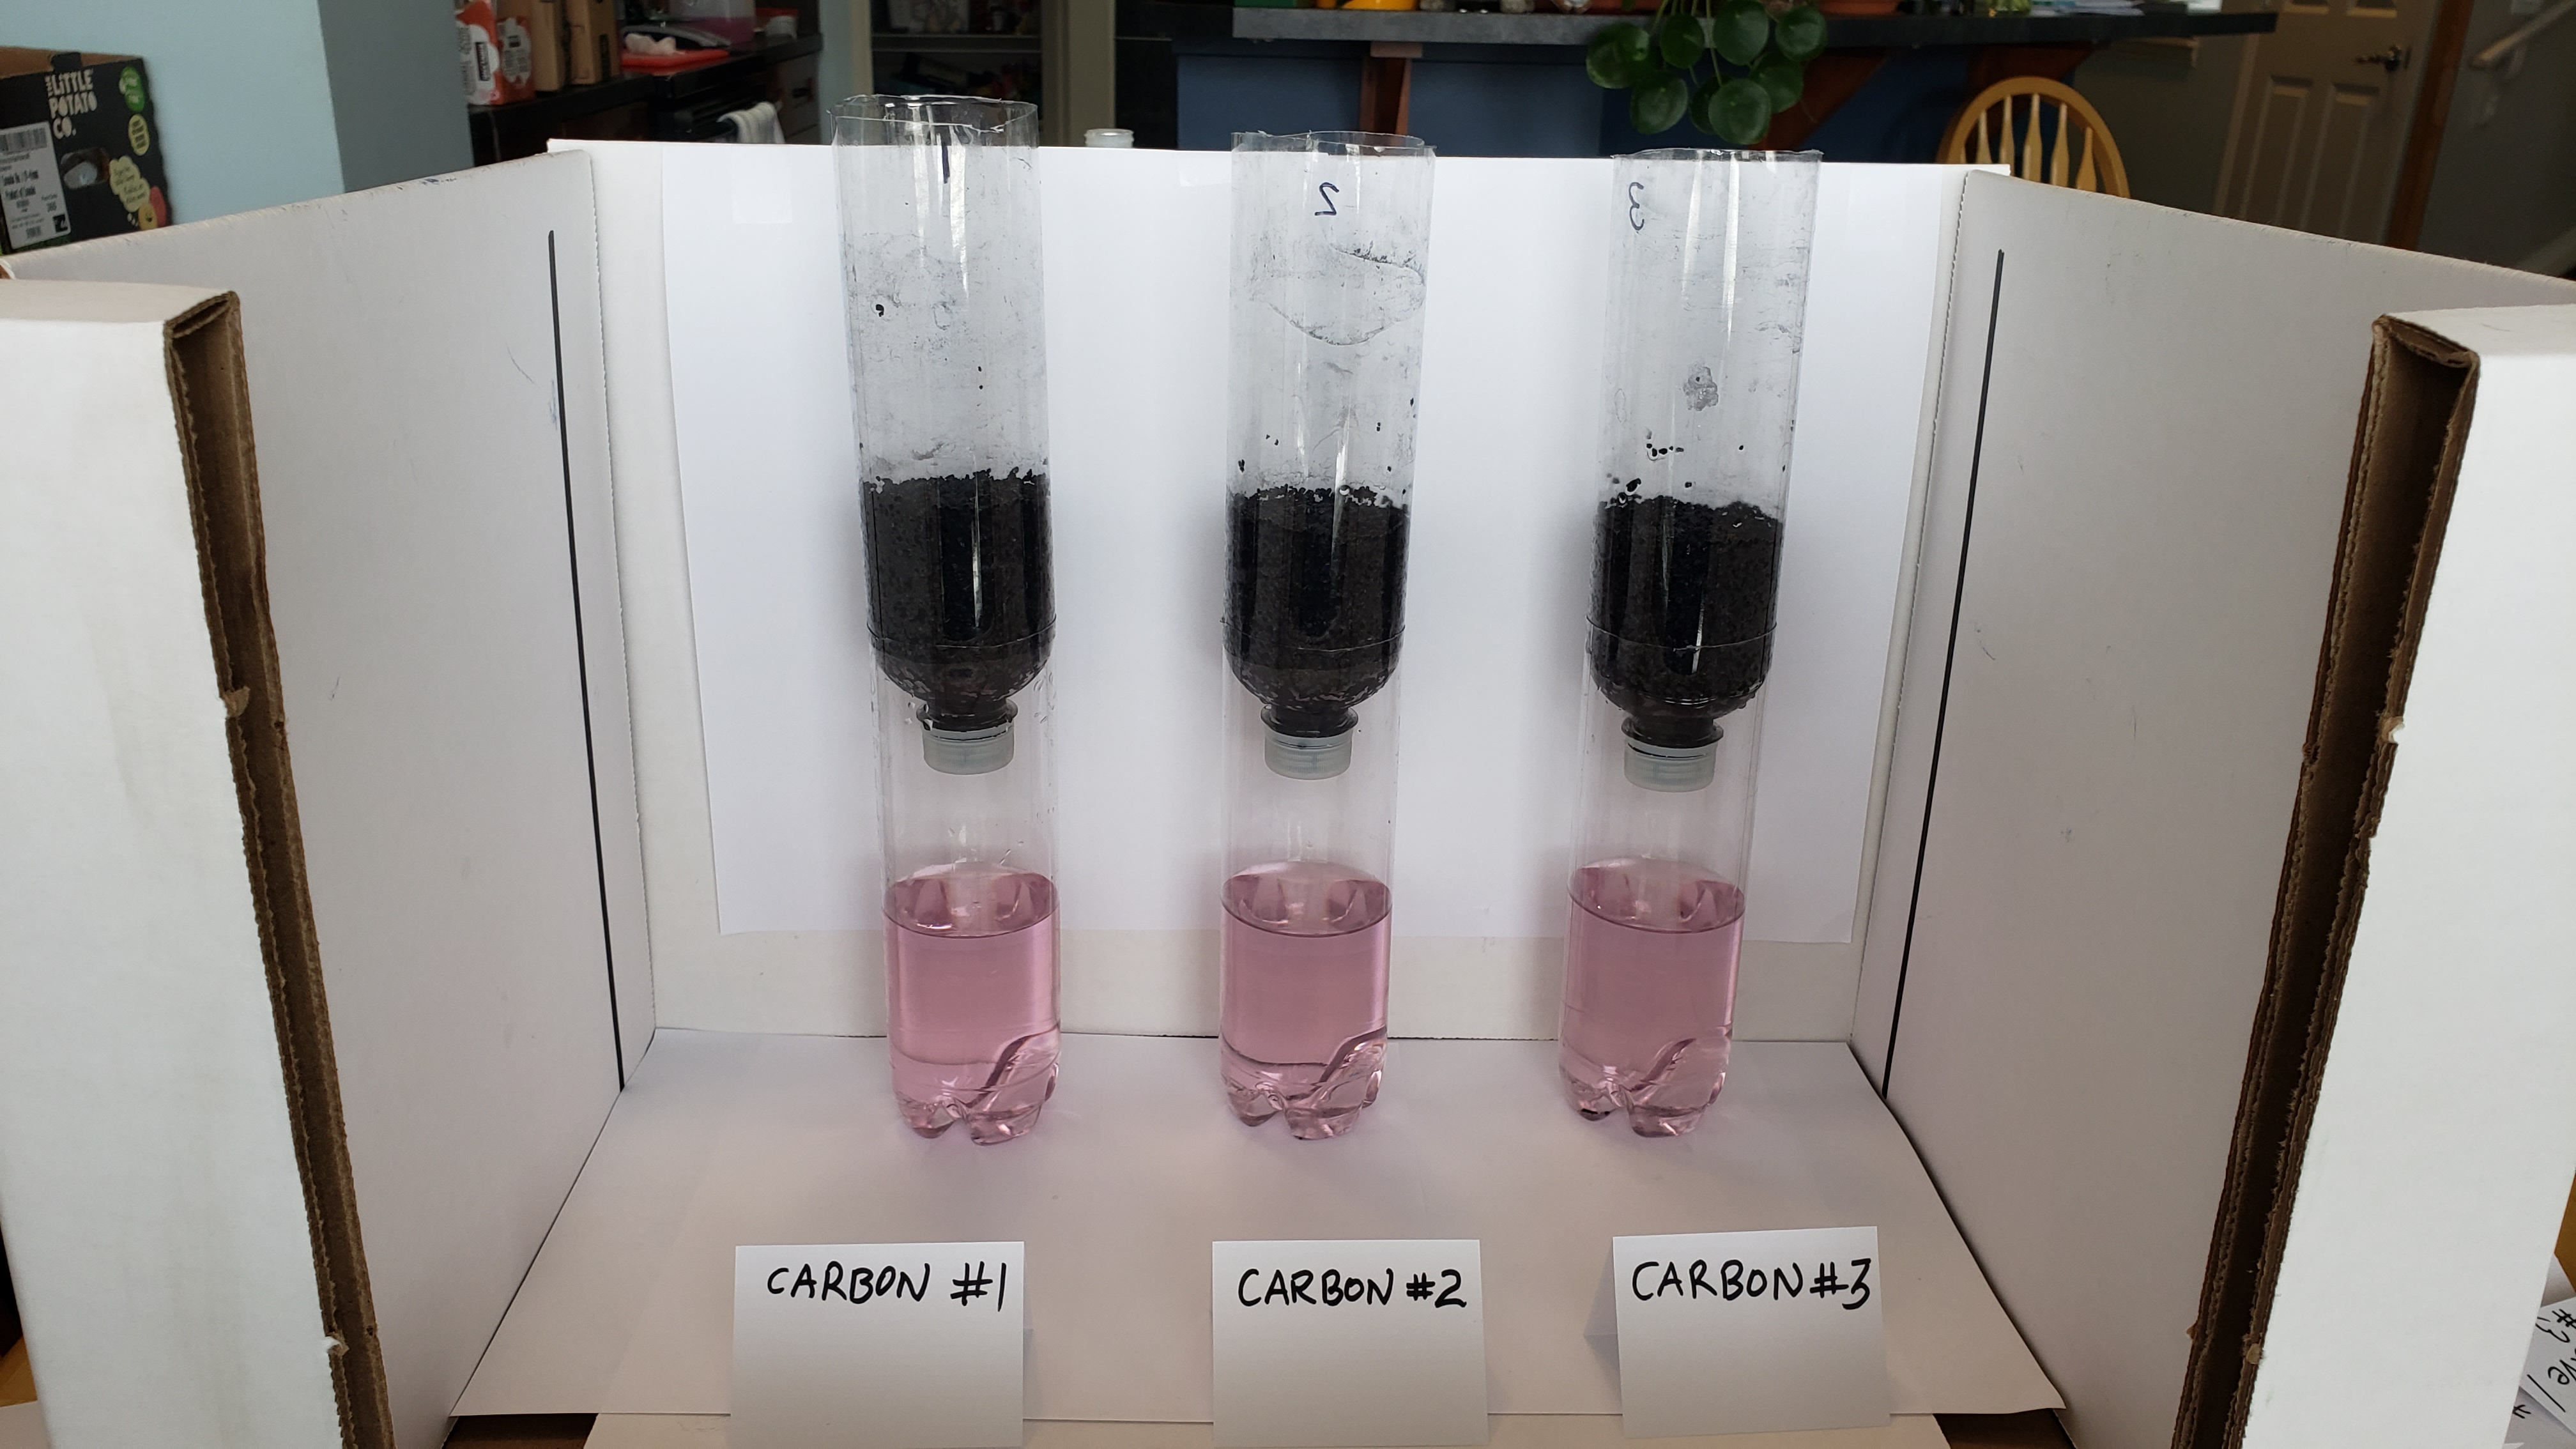
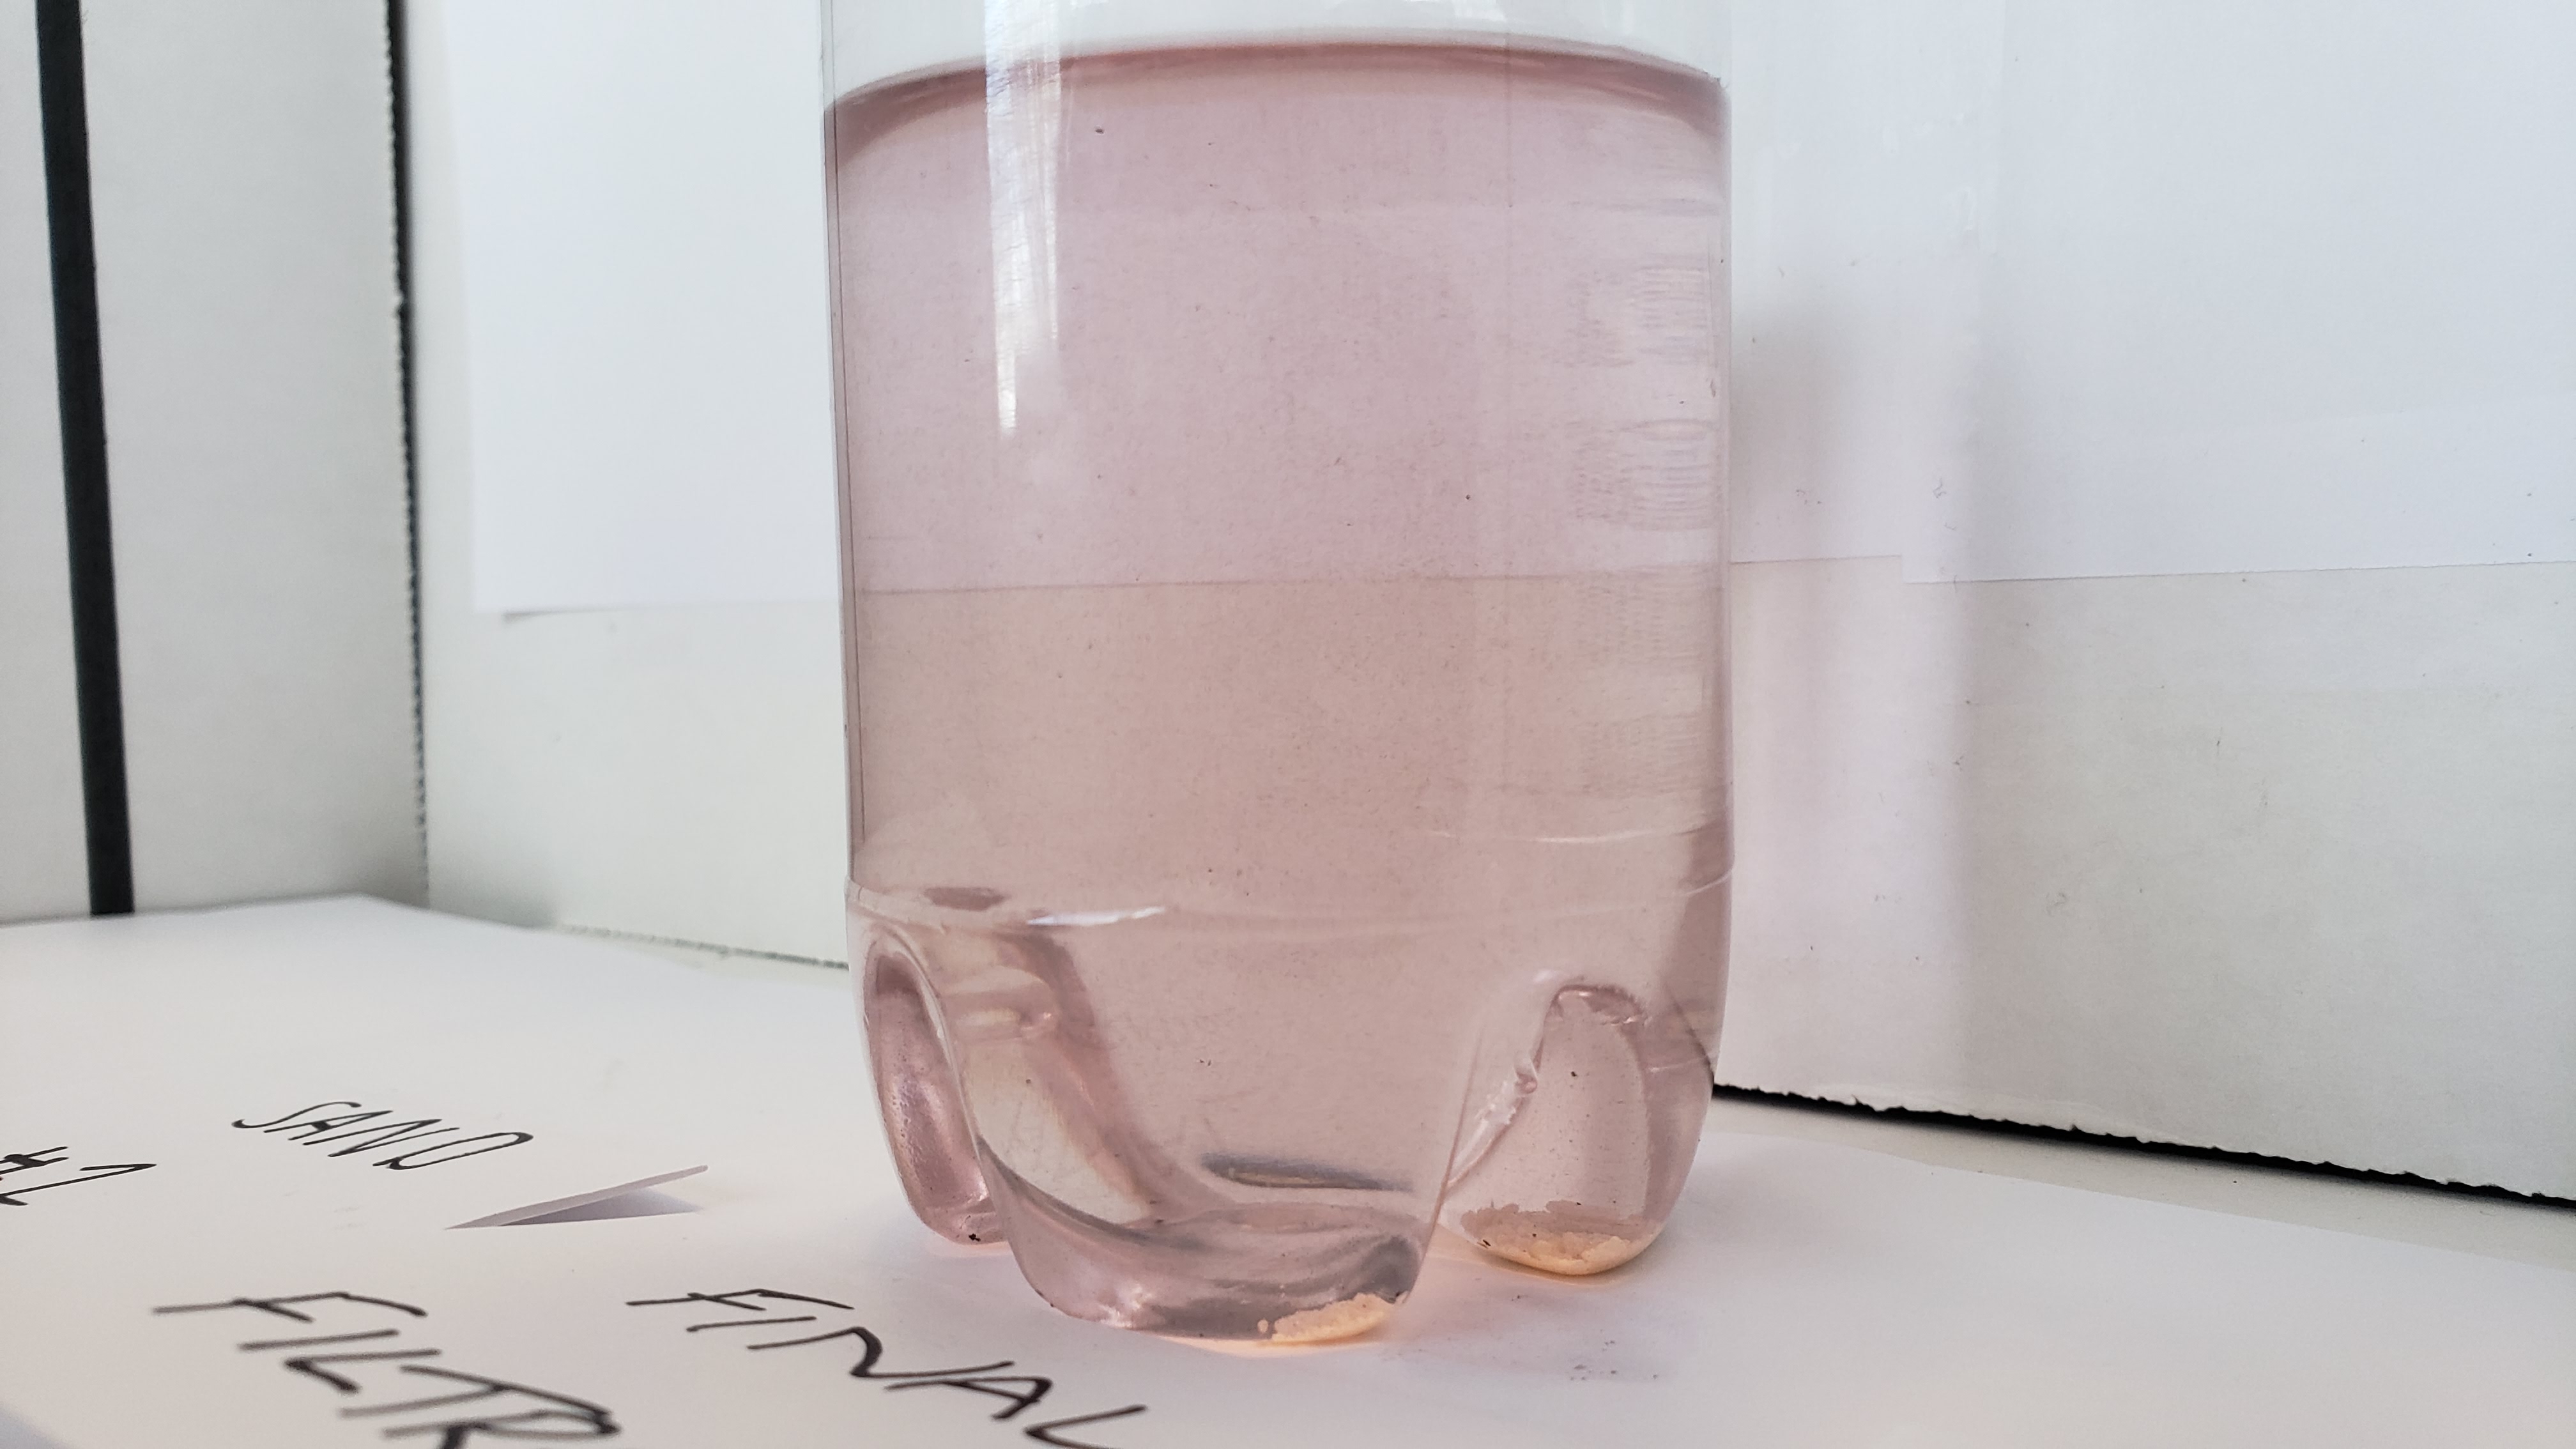
When we poured the red dye water into activated carbon, the color coming out of the filter was less pink that the water that we poured in. So activated carbon can remove some of the dye.
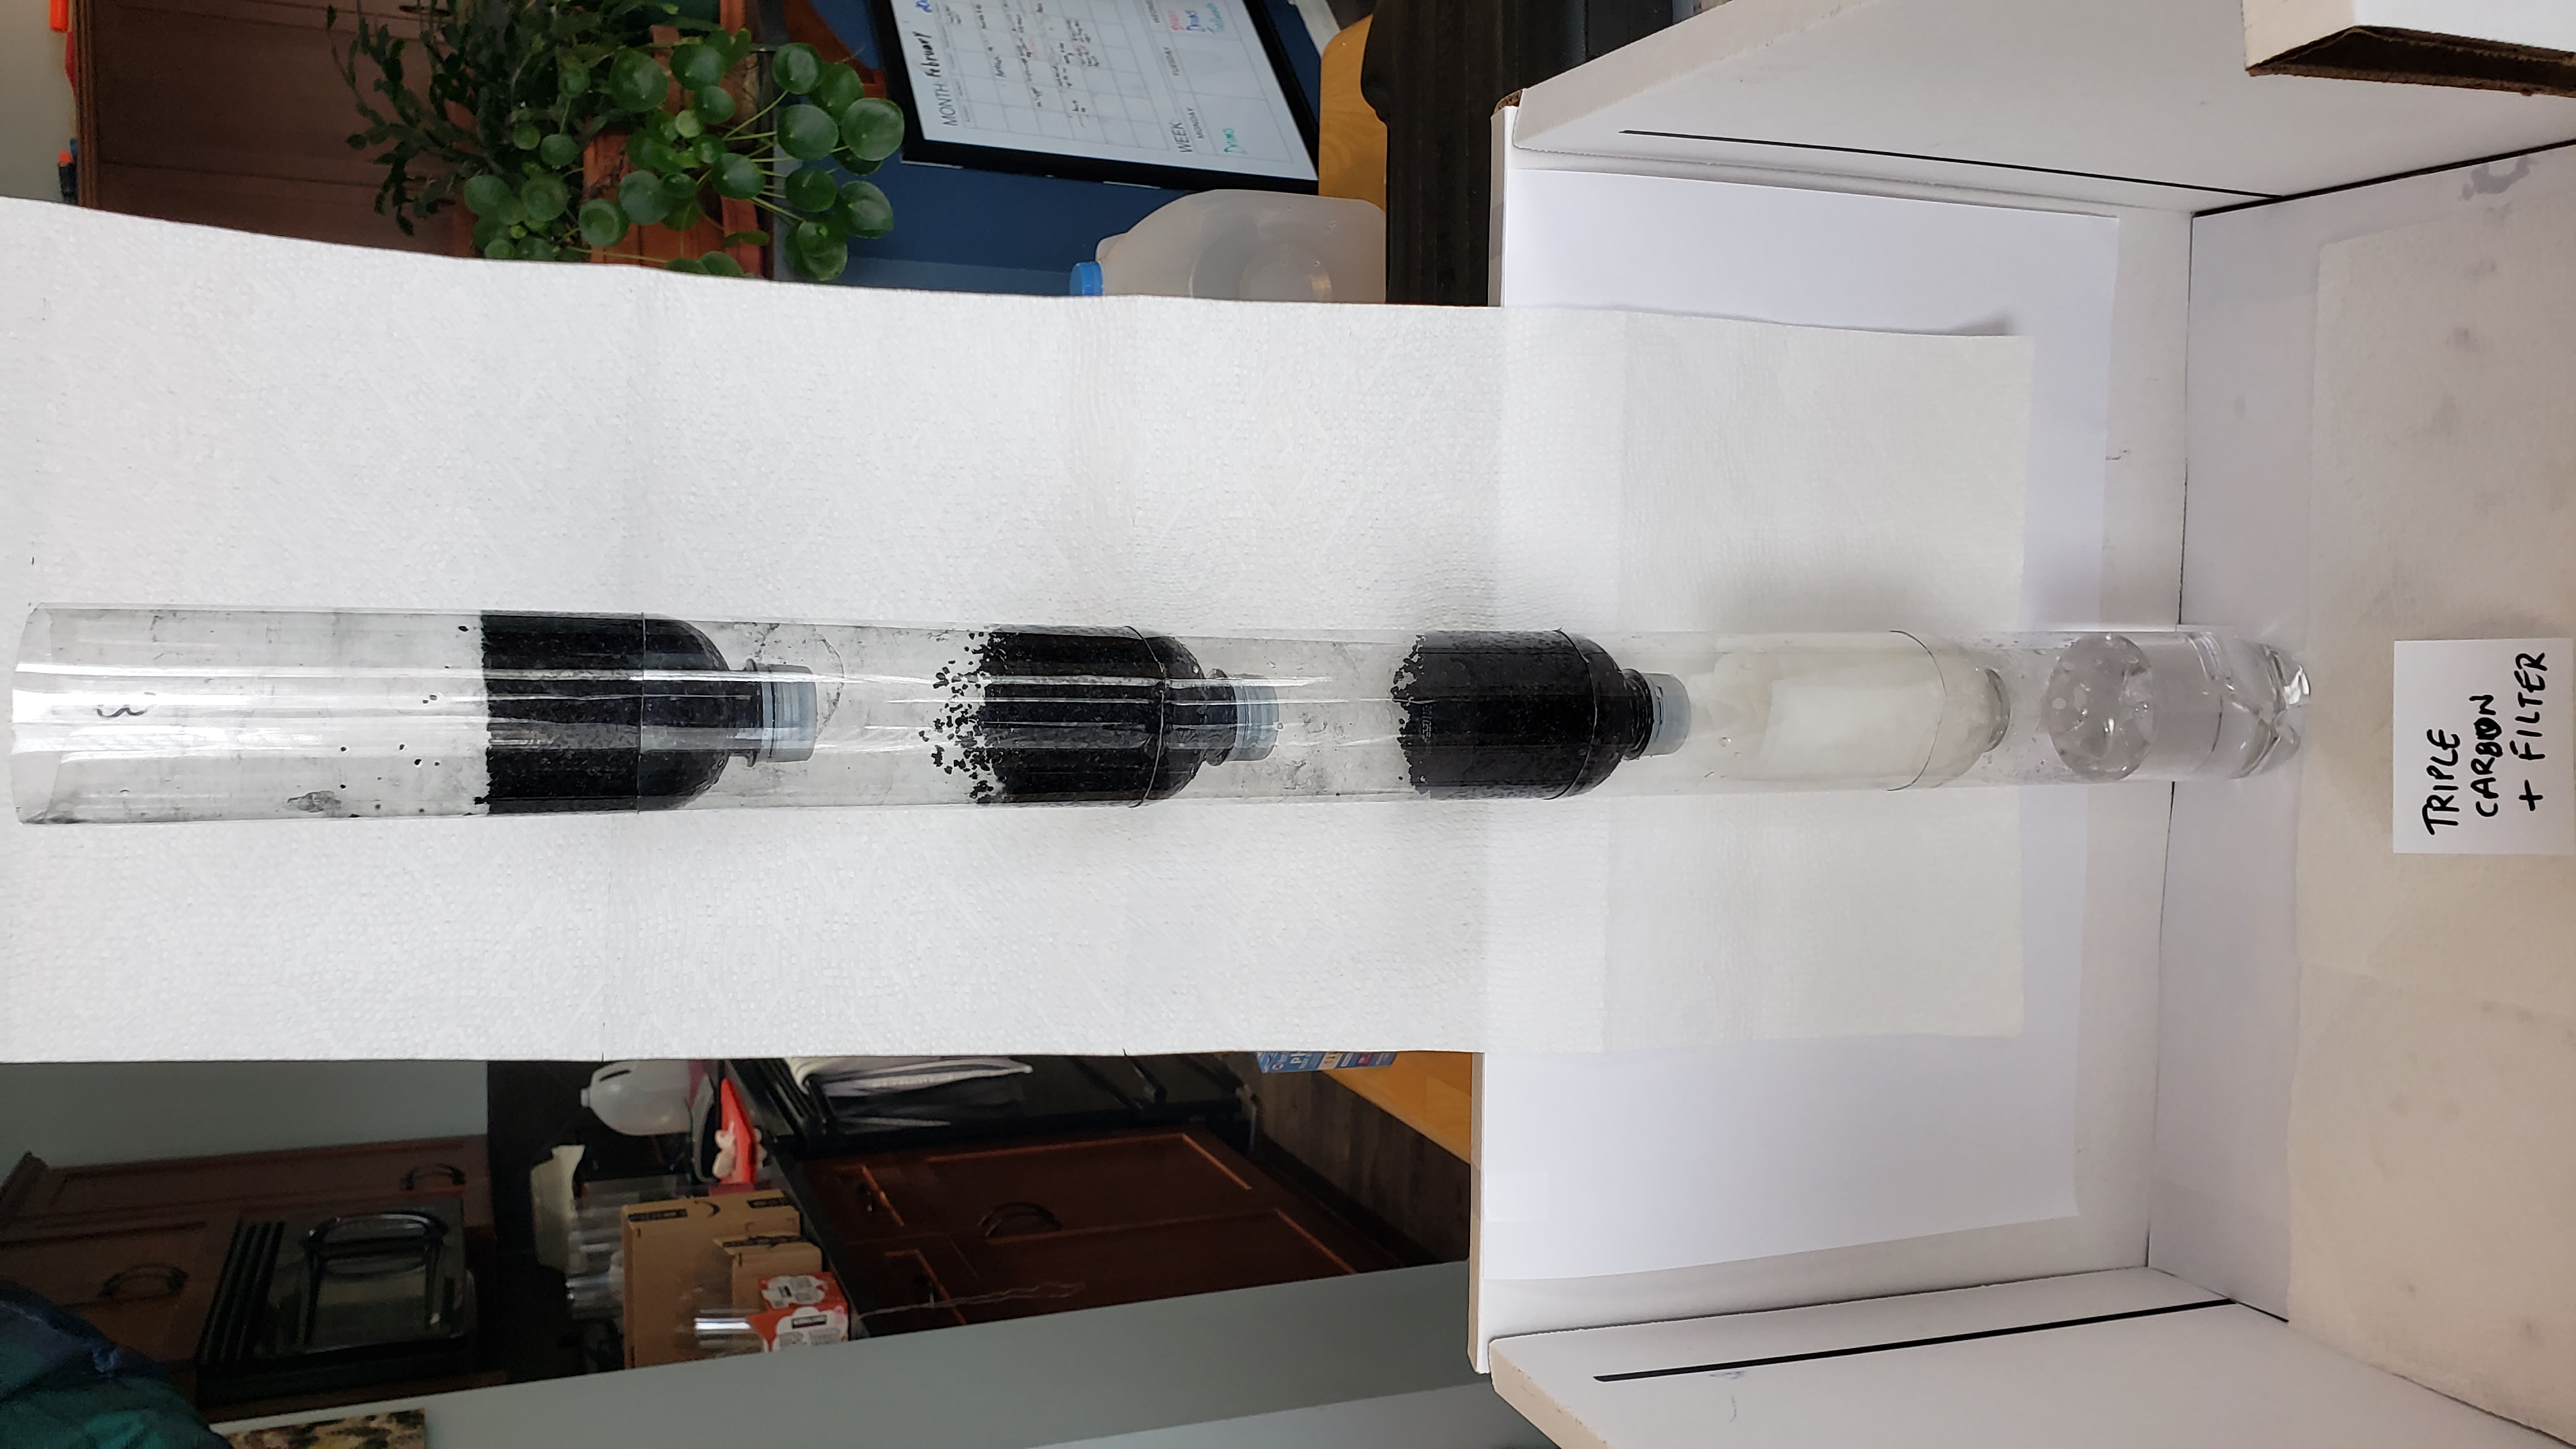
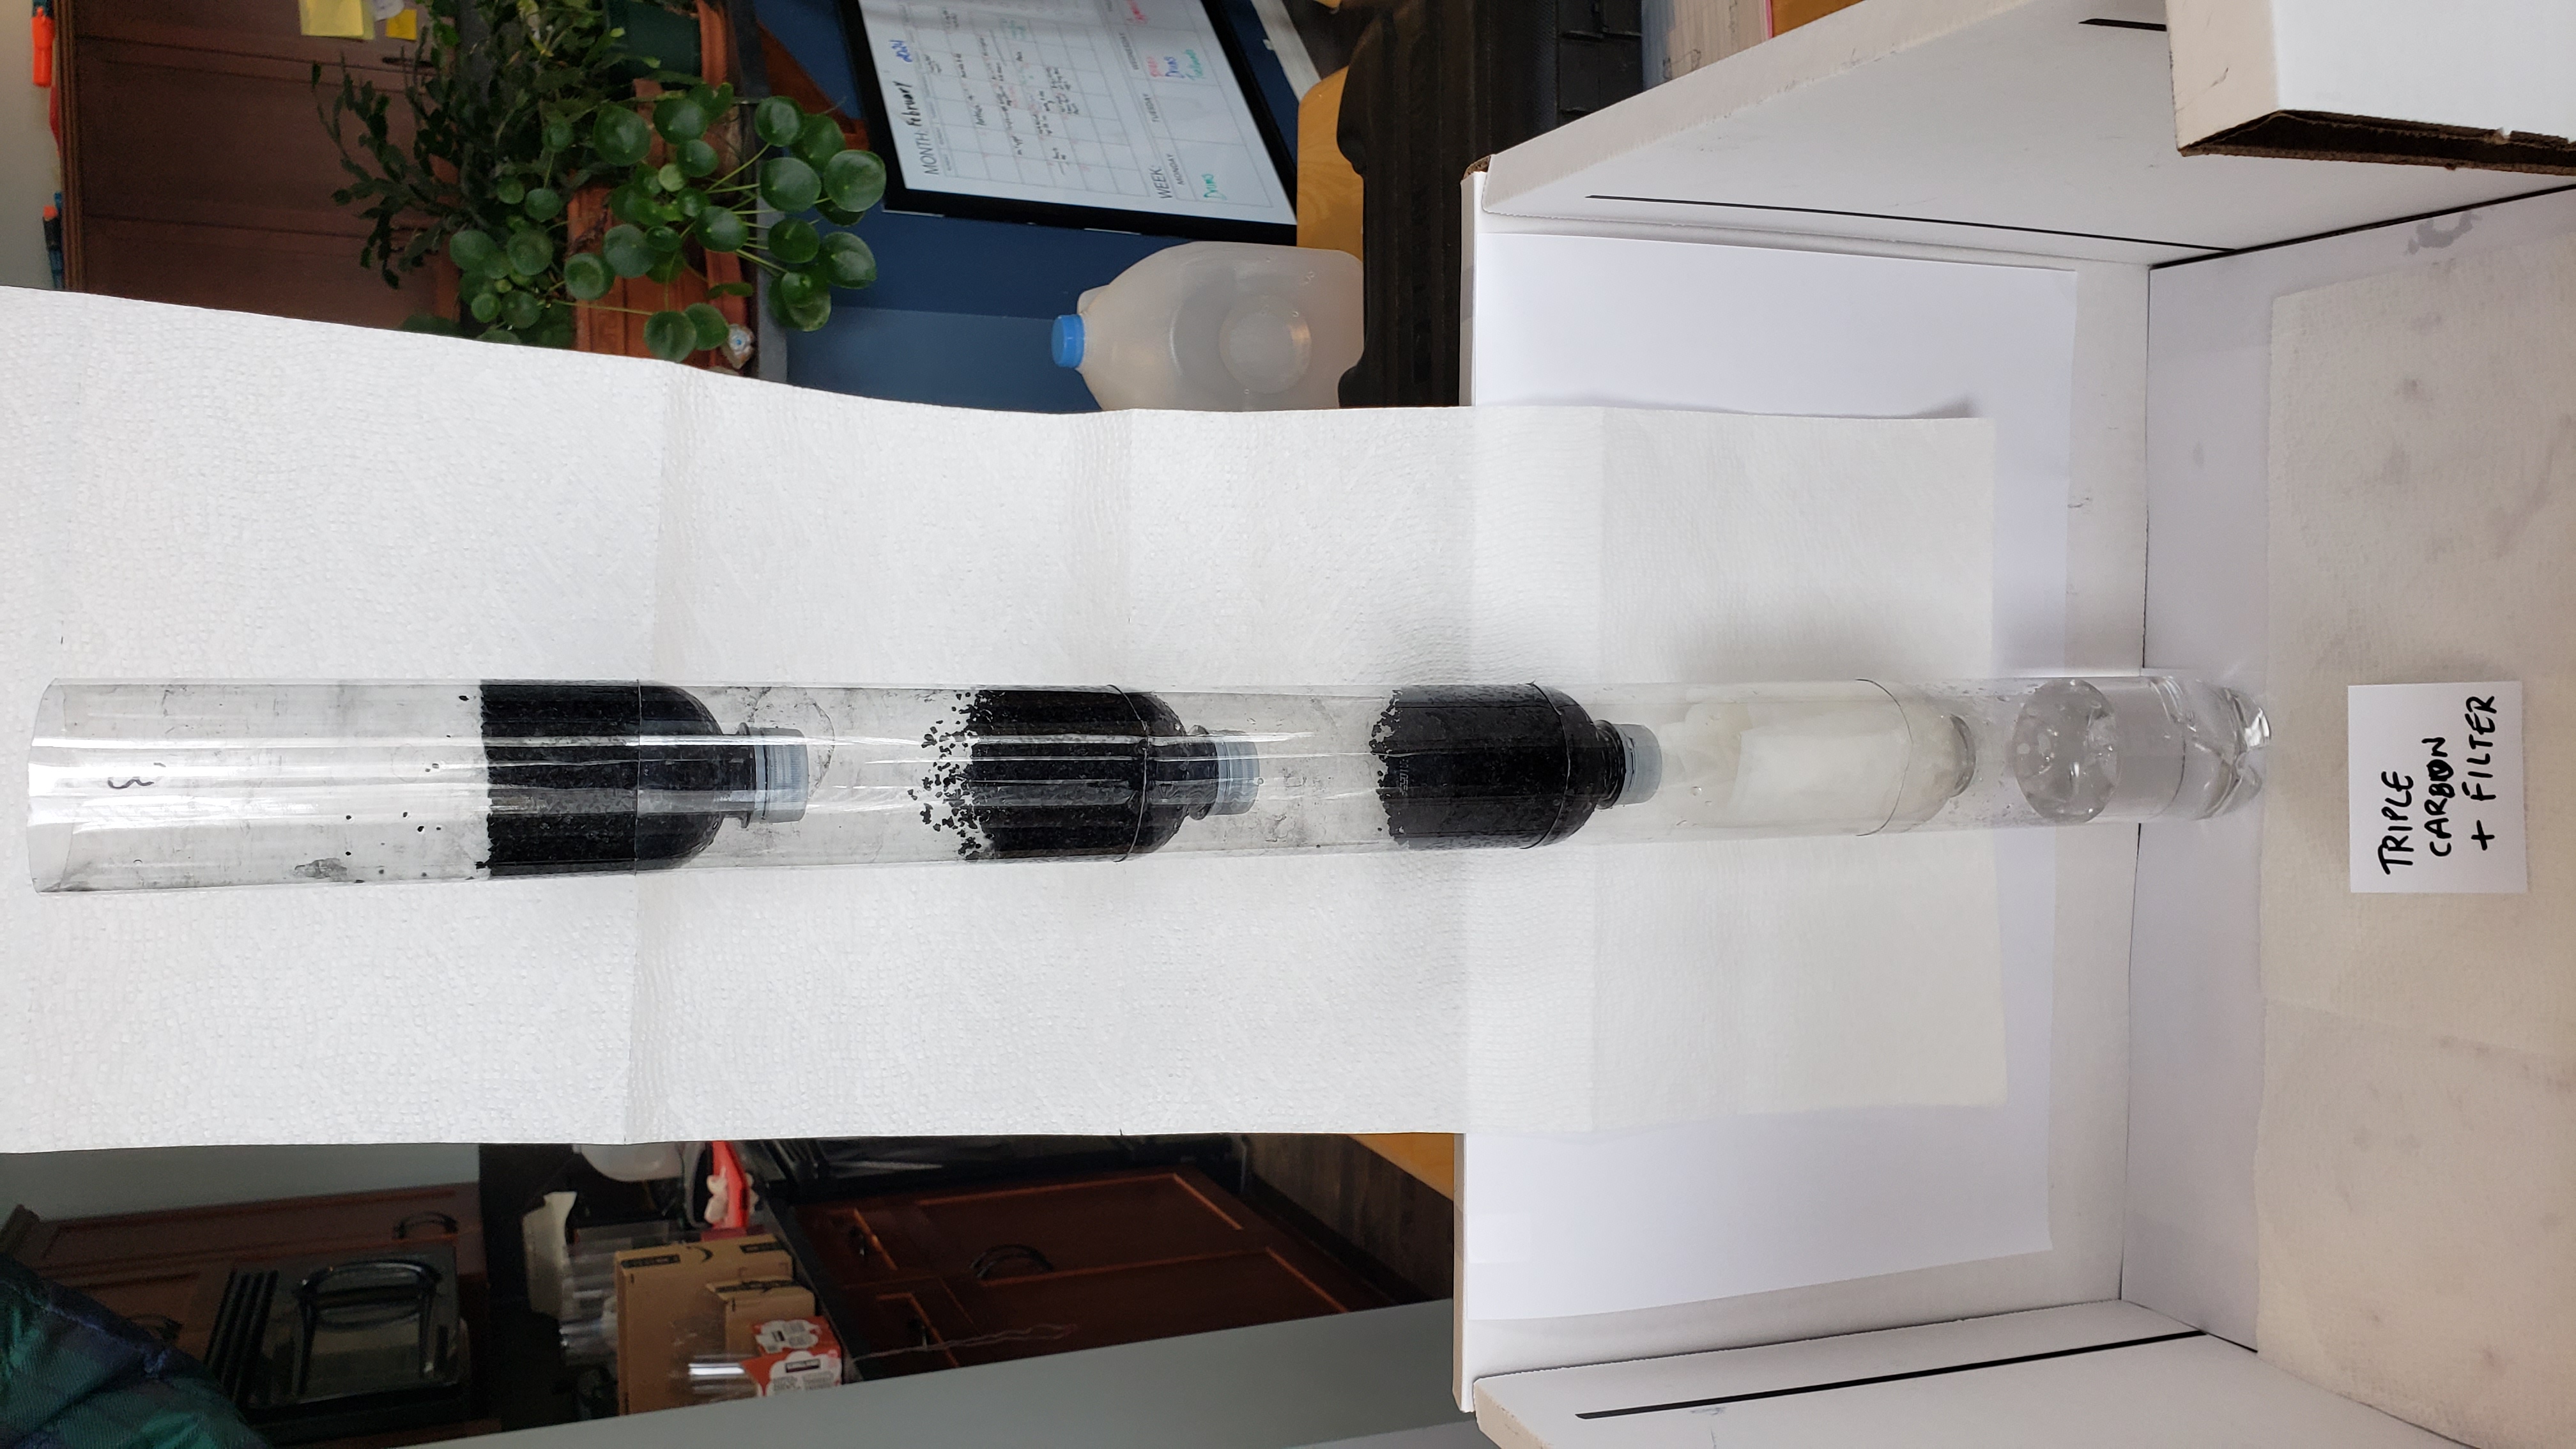
We thought pouring it in activated carbon more than one time would make it more clean and less pink. So we took the water that came out of the filter and poured it in another filter with activated carbon. Then we took what came out and put it in another one. Then we took what came out and put it in another one.

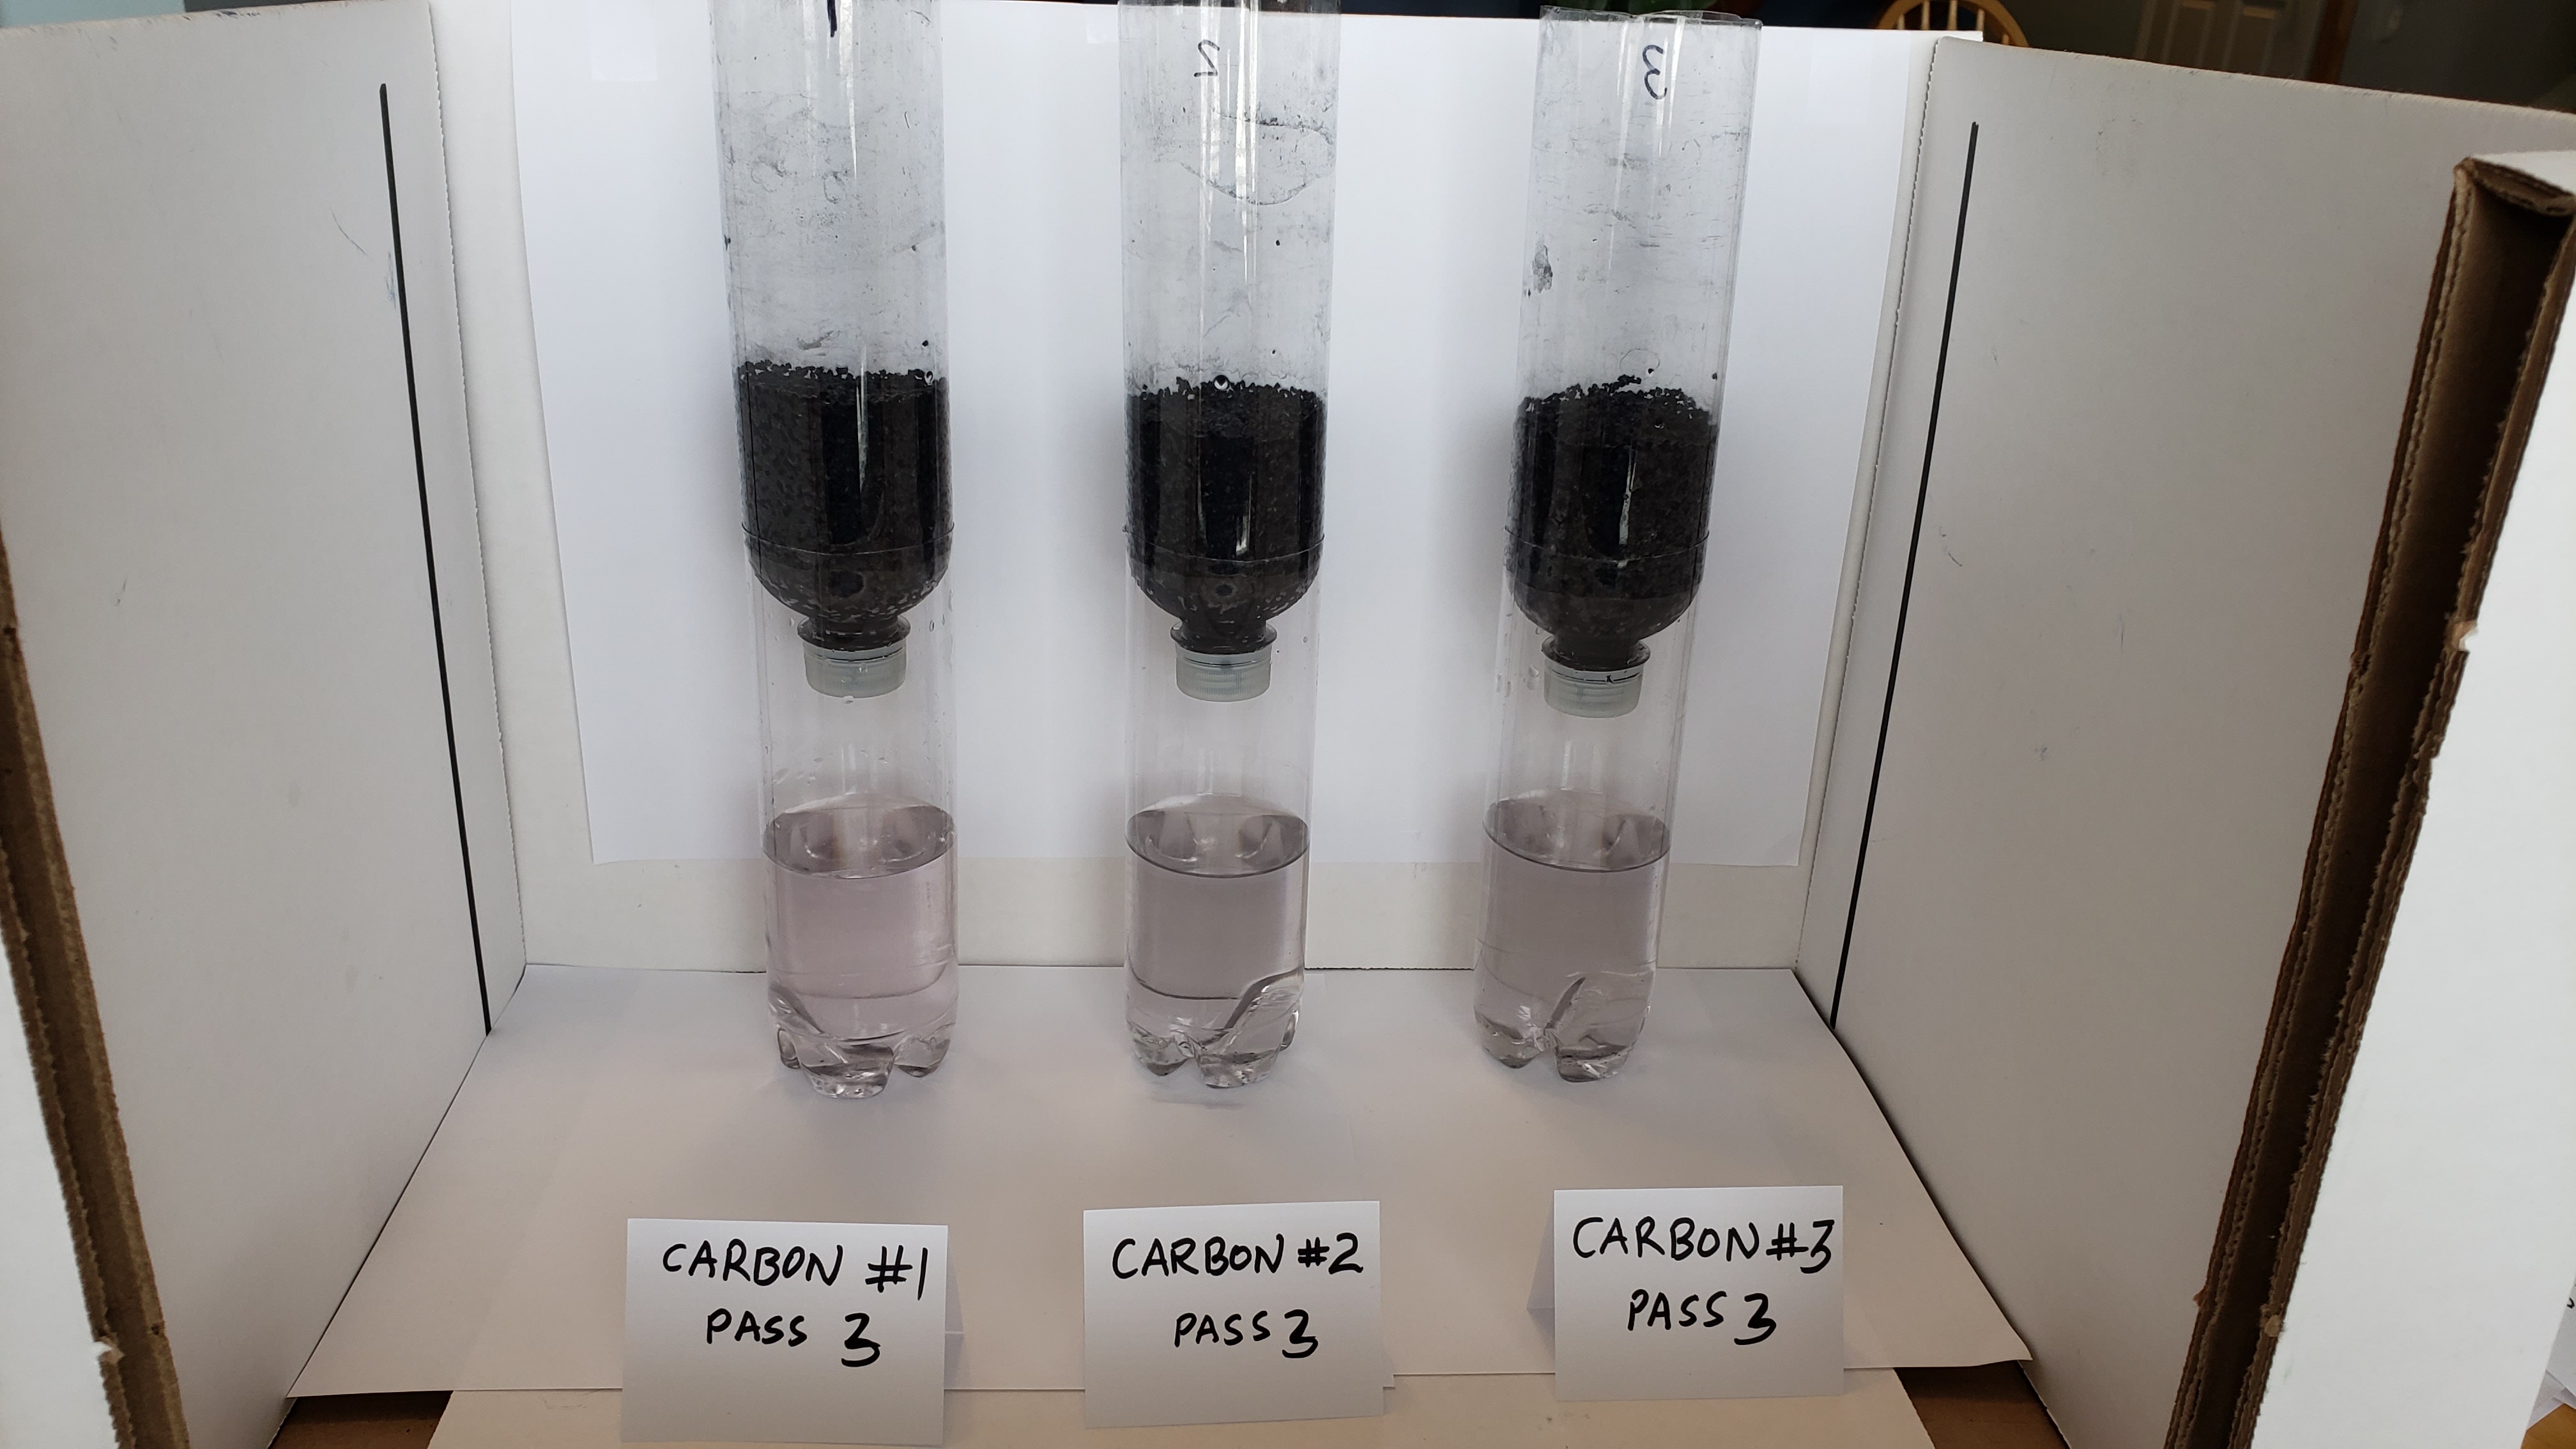
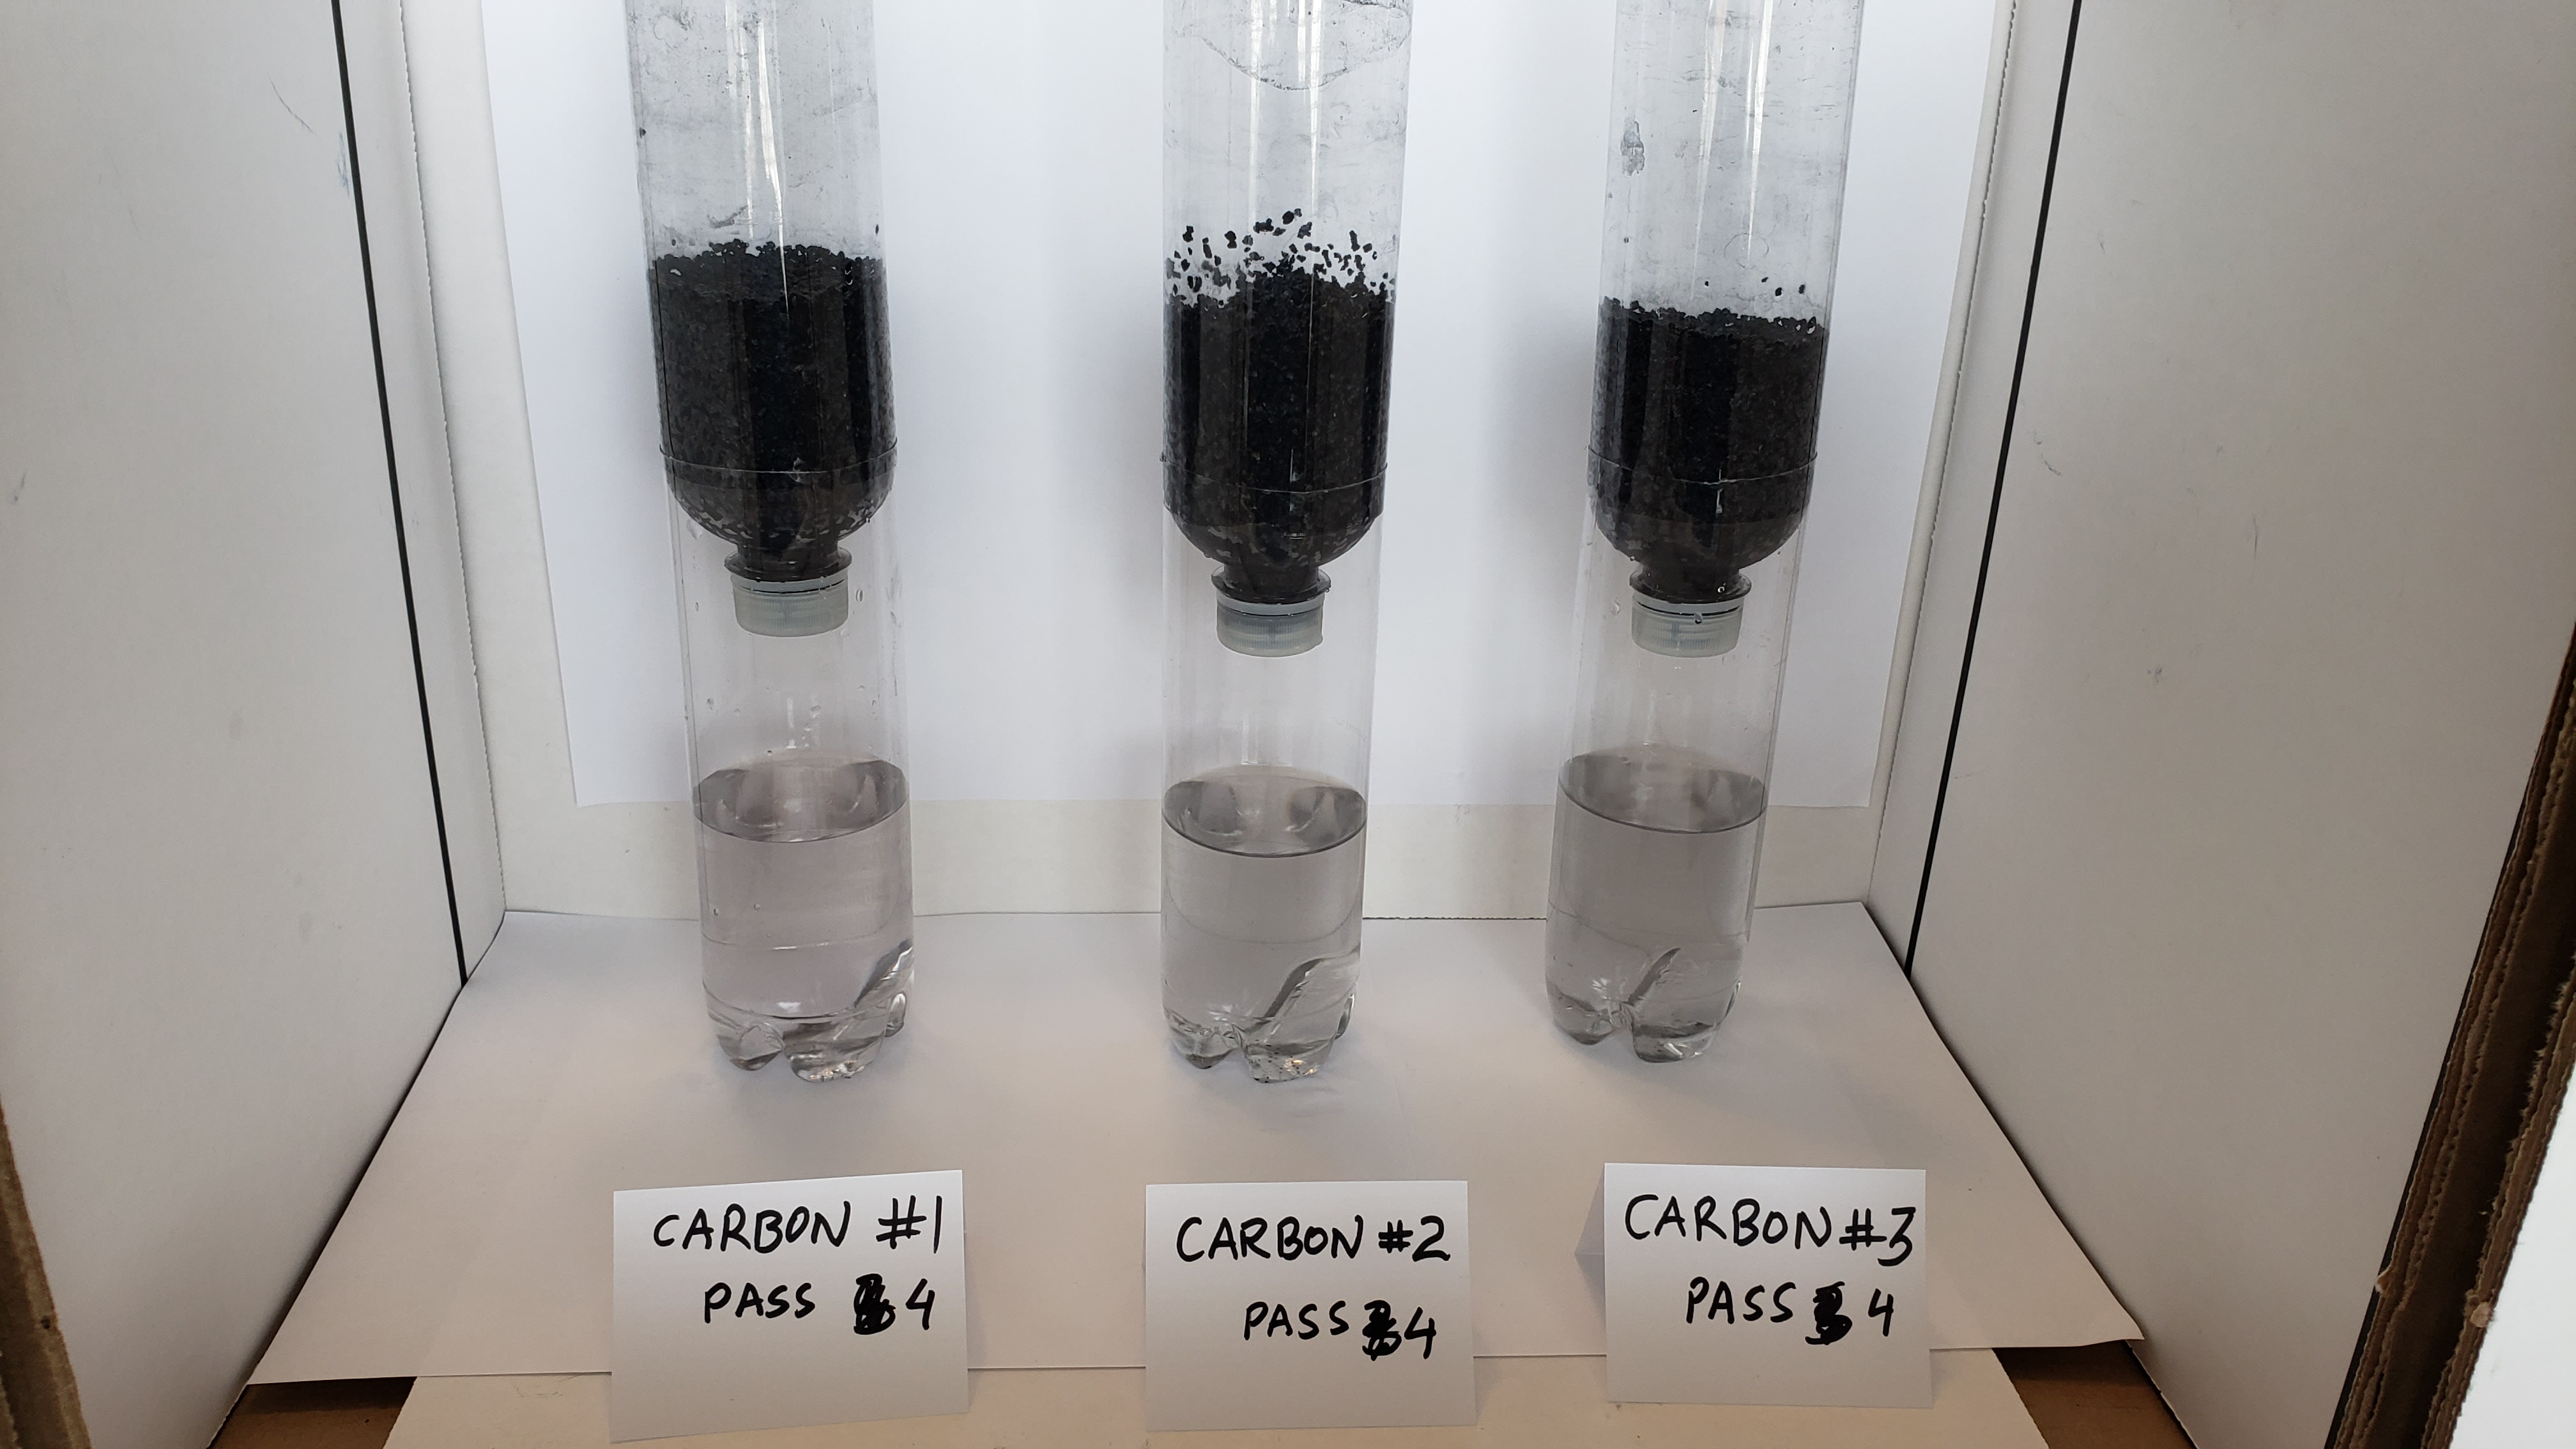
All of the pink was gone. But there was some grey color maybe from the carbon. We made a big carbon filter with a coffee filter too to get rid of the grey
Trial 1
Trial 2
Trial 3
Pink is gone and water is clear
STAGE 1 OBSERVATIONS - POTTING SOIL
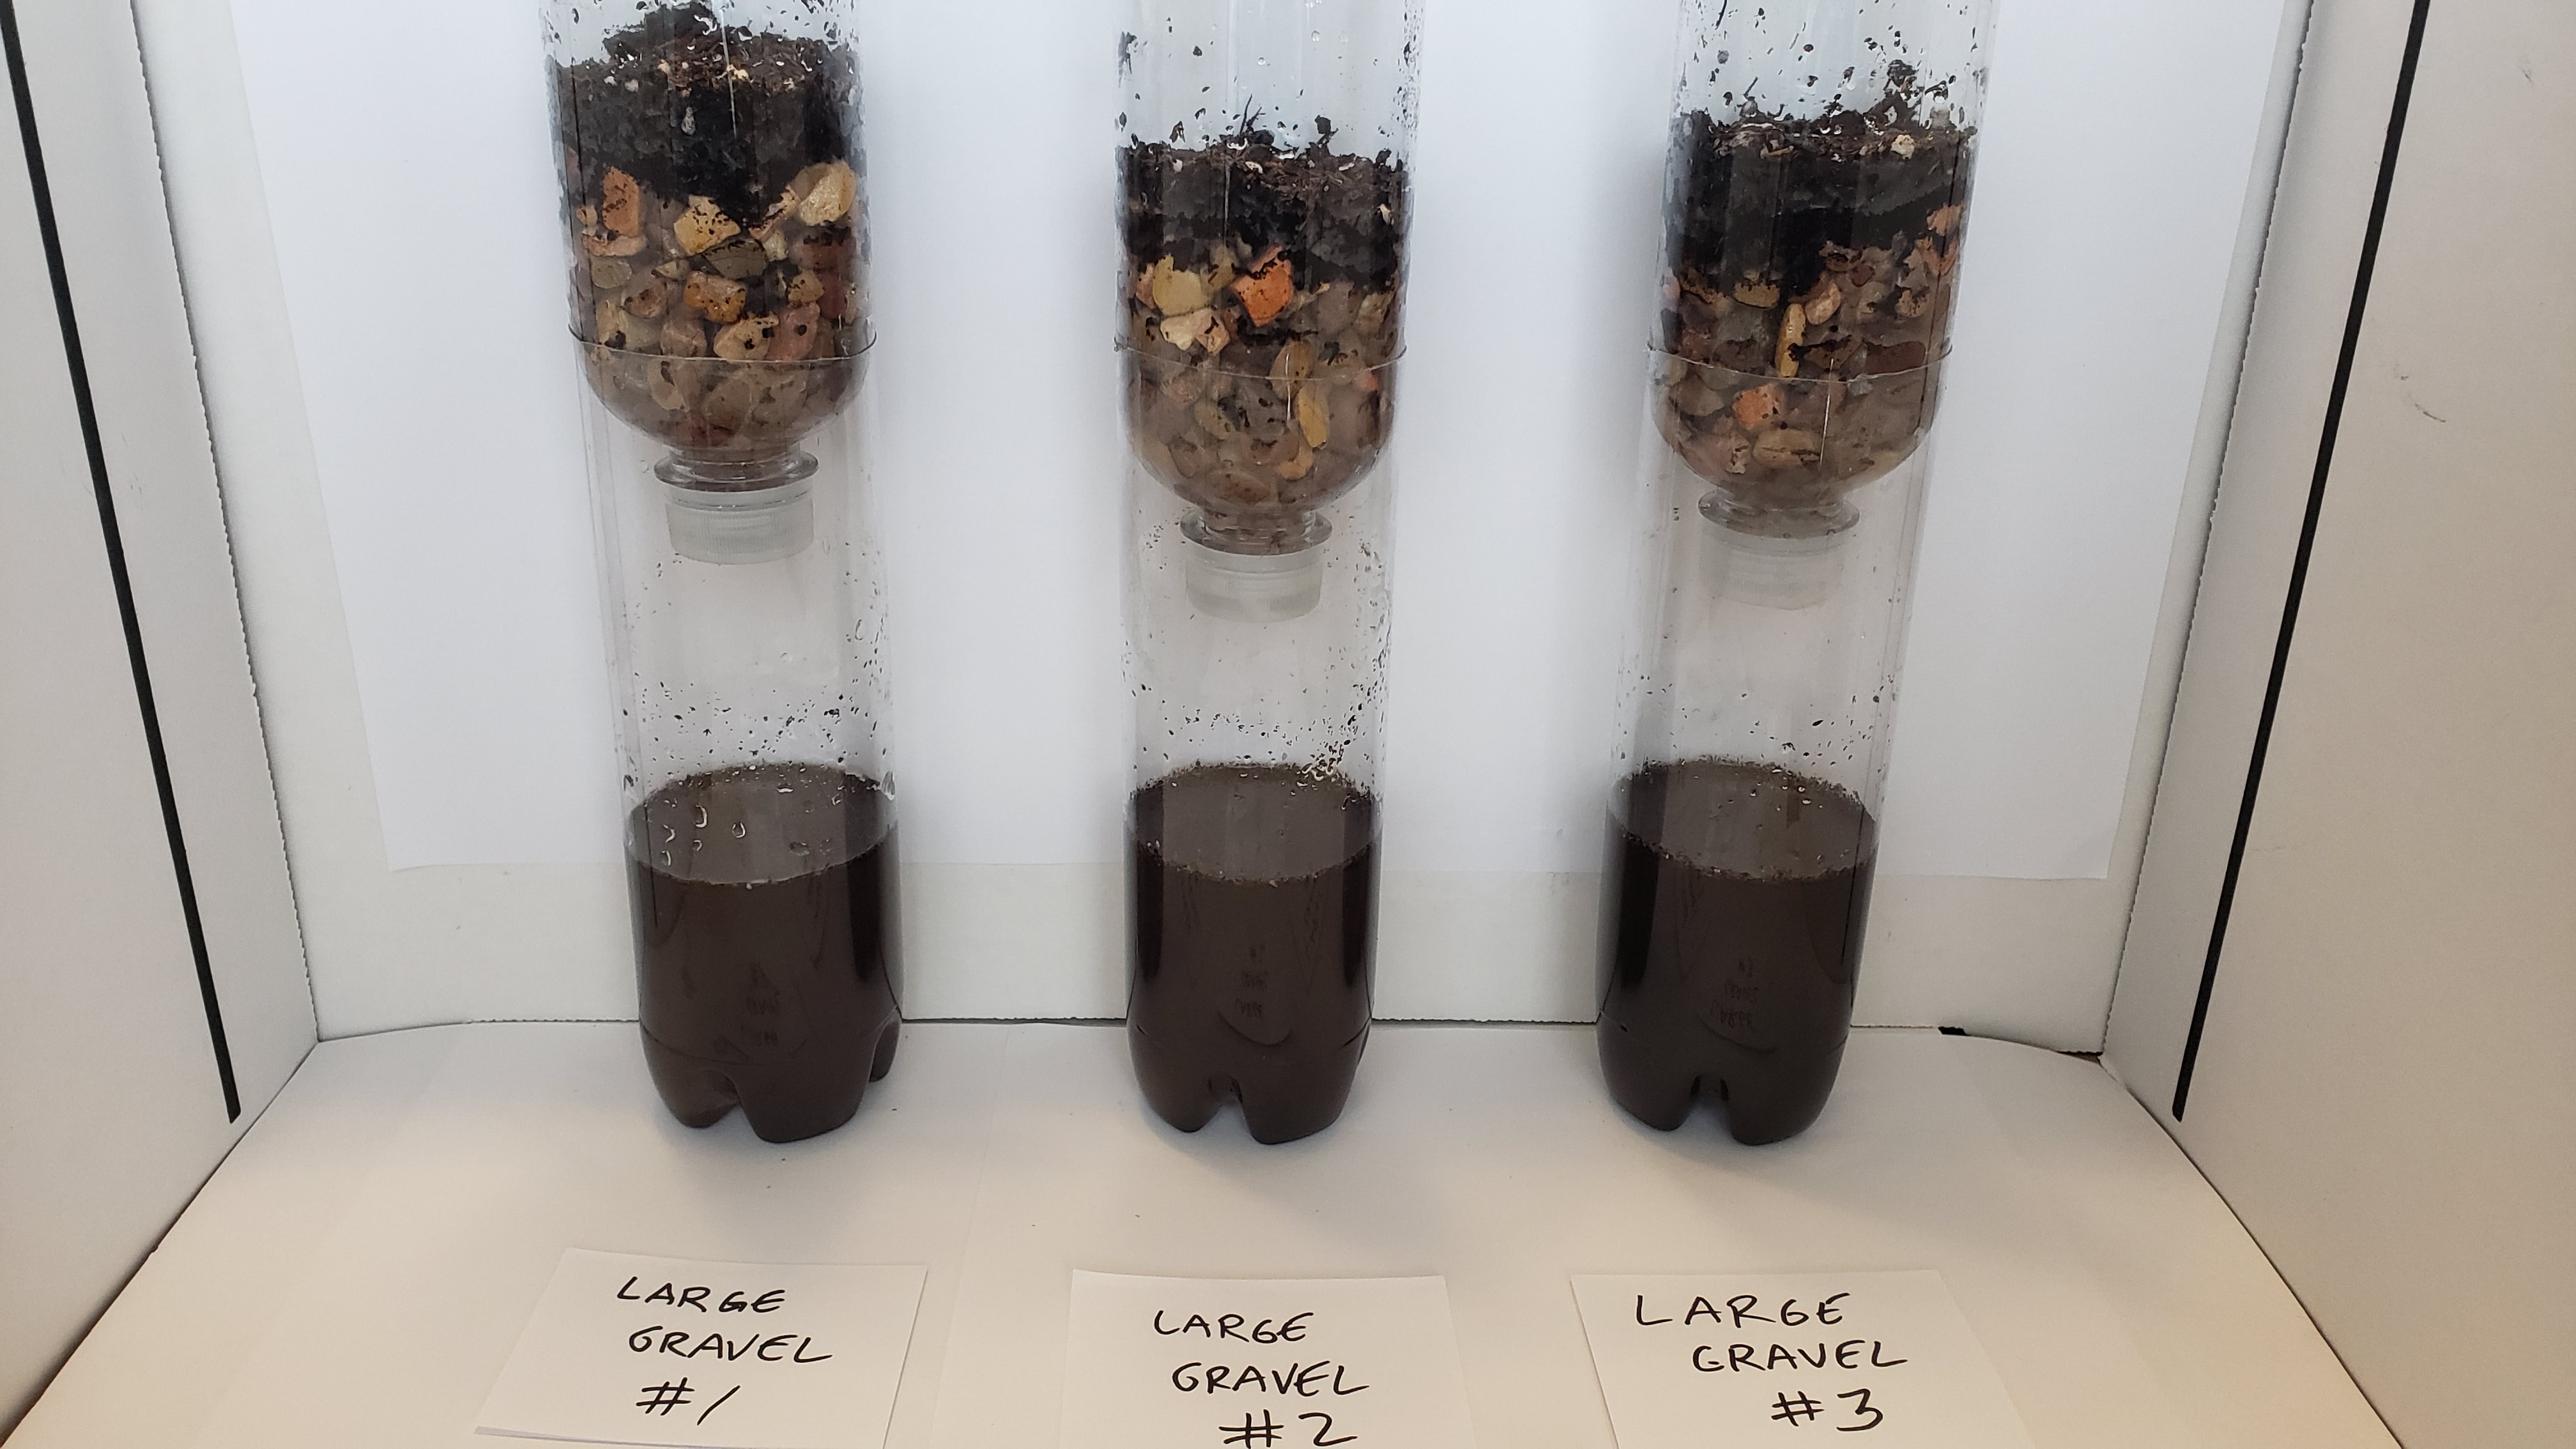
When we poured the potting soil water into large gravel the big pieces like twigs and perlite stayed on top of the big gravel. The water coming out had some dirt chunks in it. The water was brown but less than what we poured in. So big gravel can get rid of big chunks and some brown colour.
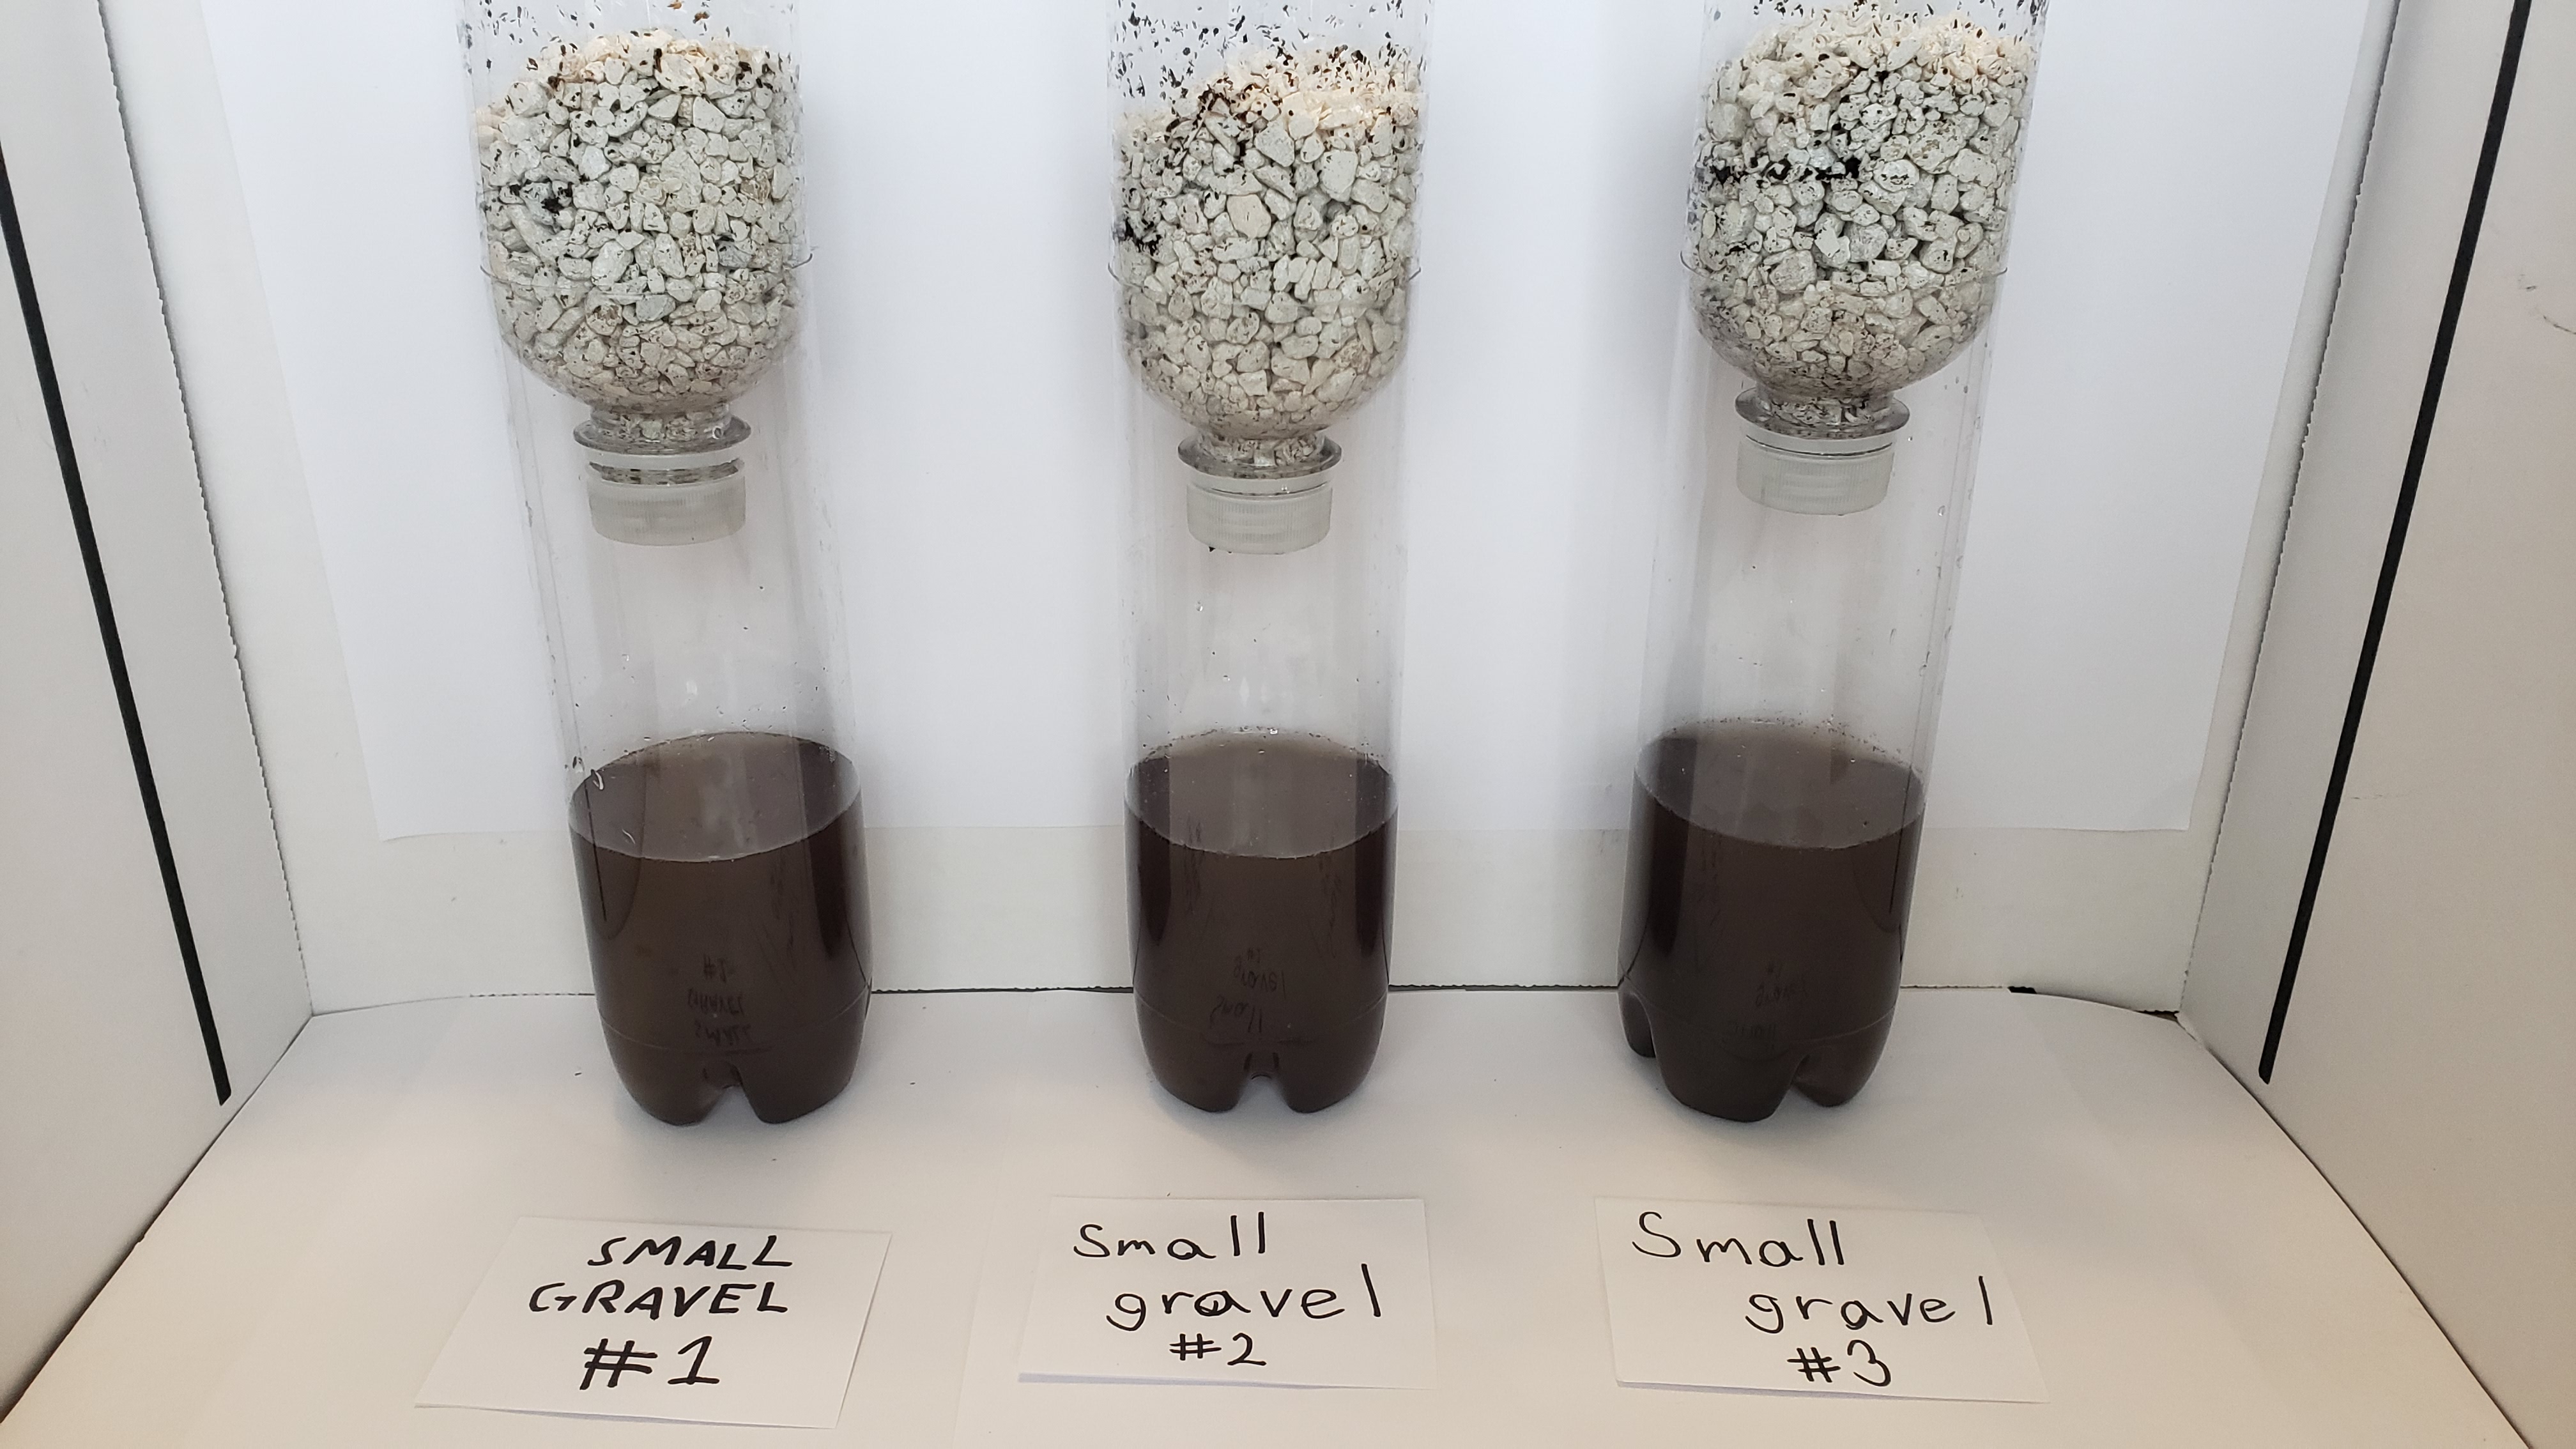
When we poured the potting soil water into small gravel the big pieces like twigs and perlite stayed on top of the small gravel. The water coming out had some small dirt chunks in it. The water was brown but less than what we poured in. So small gravel can get rid of big chunks and some brown colour.
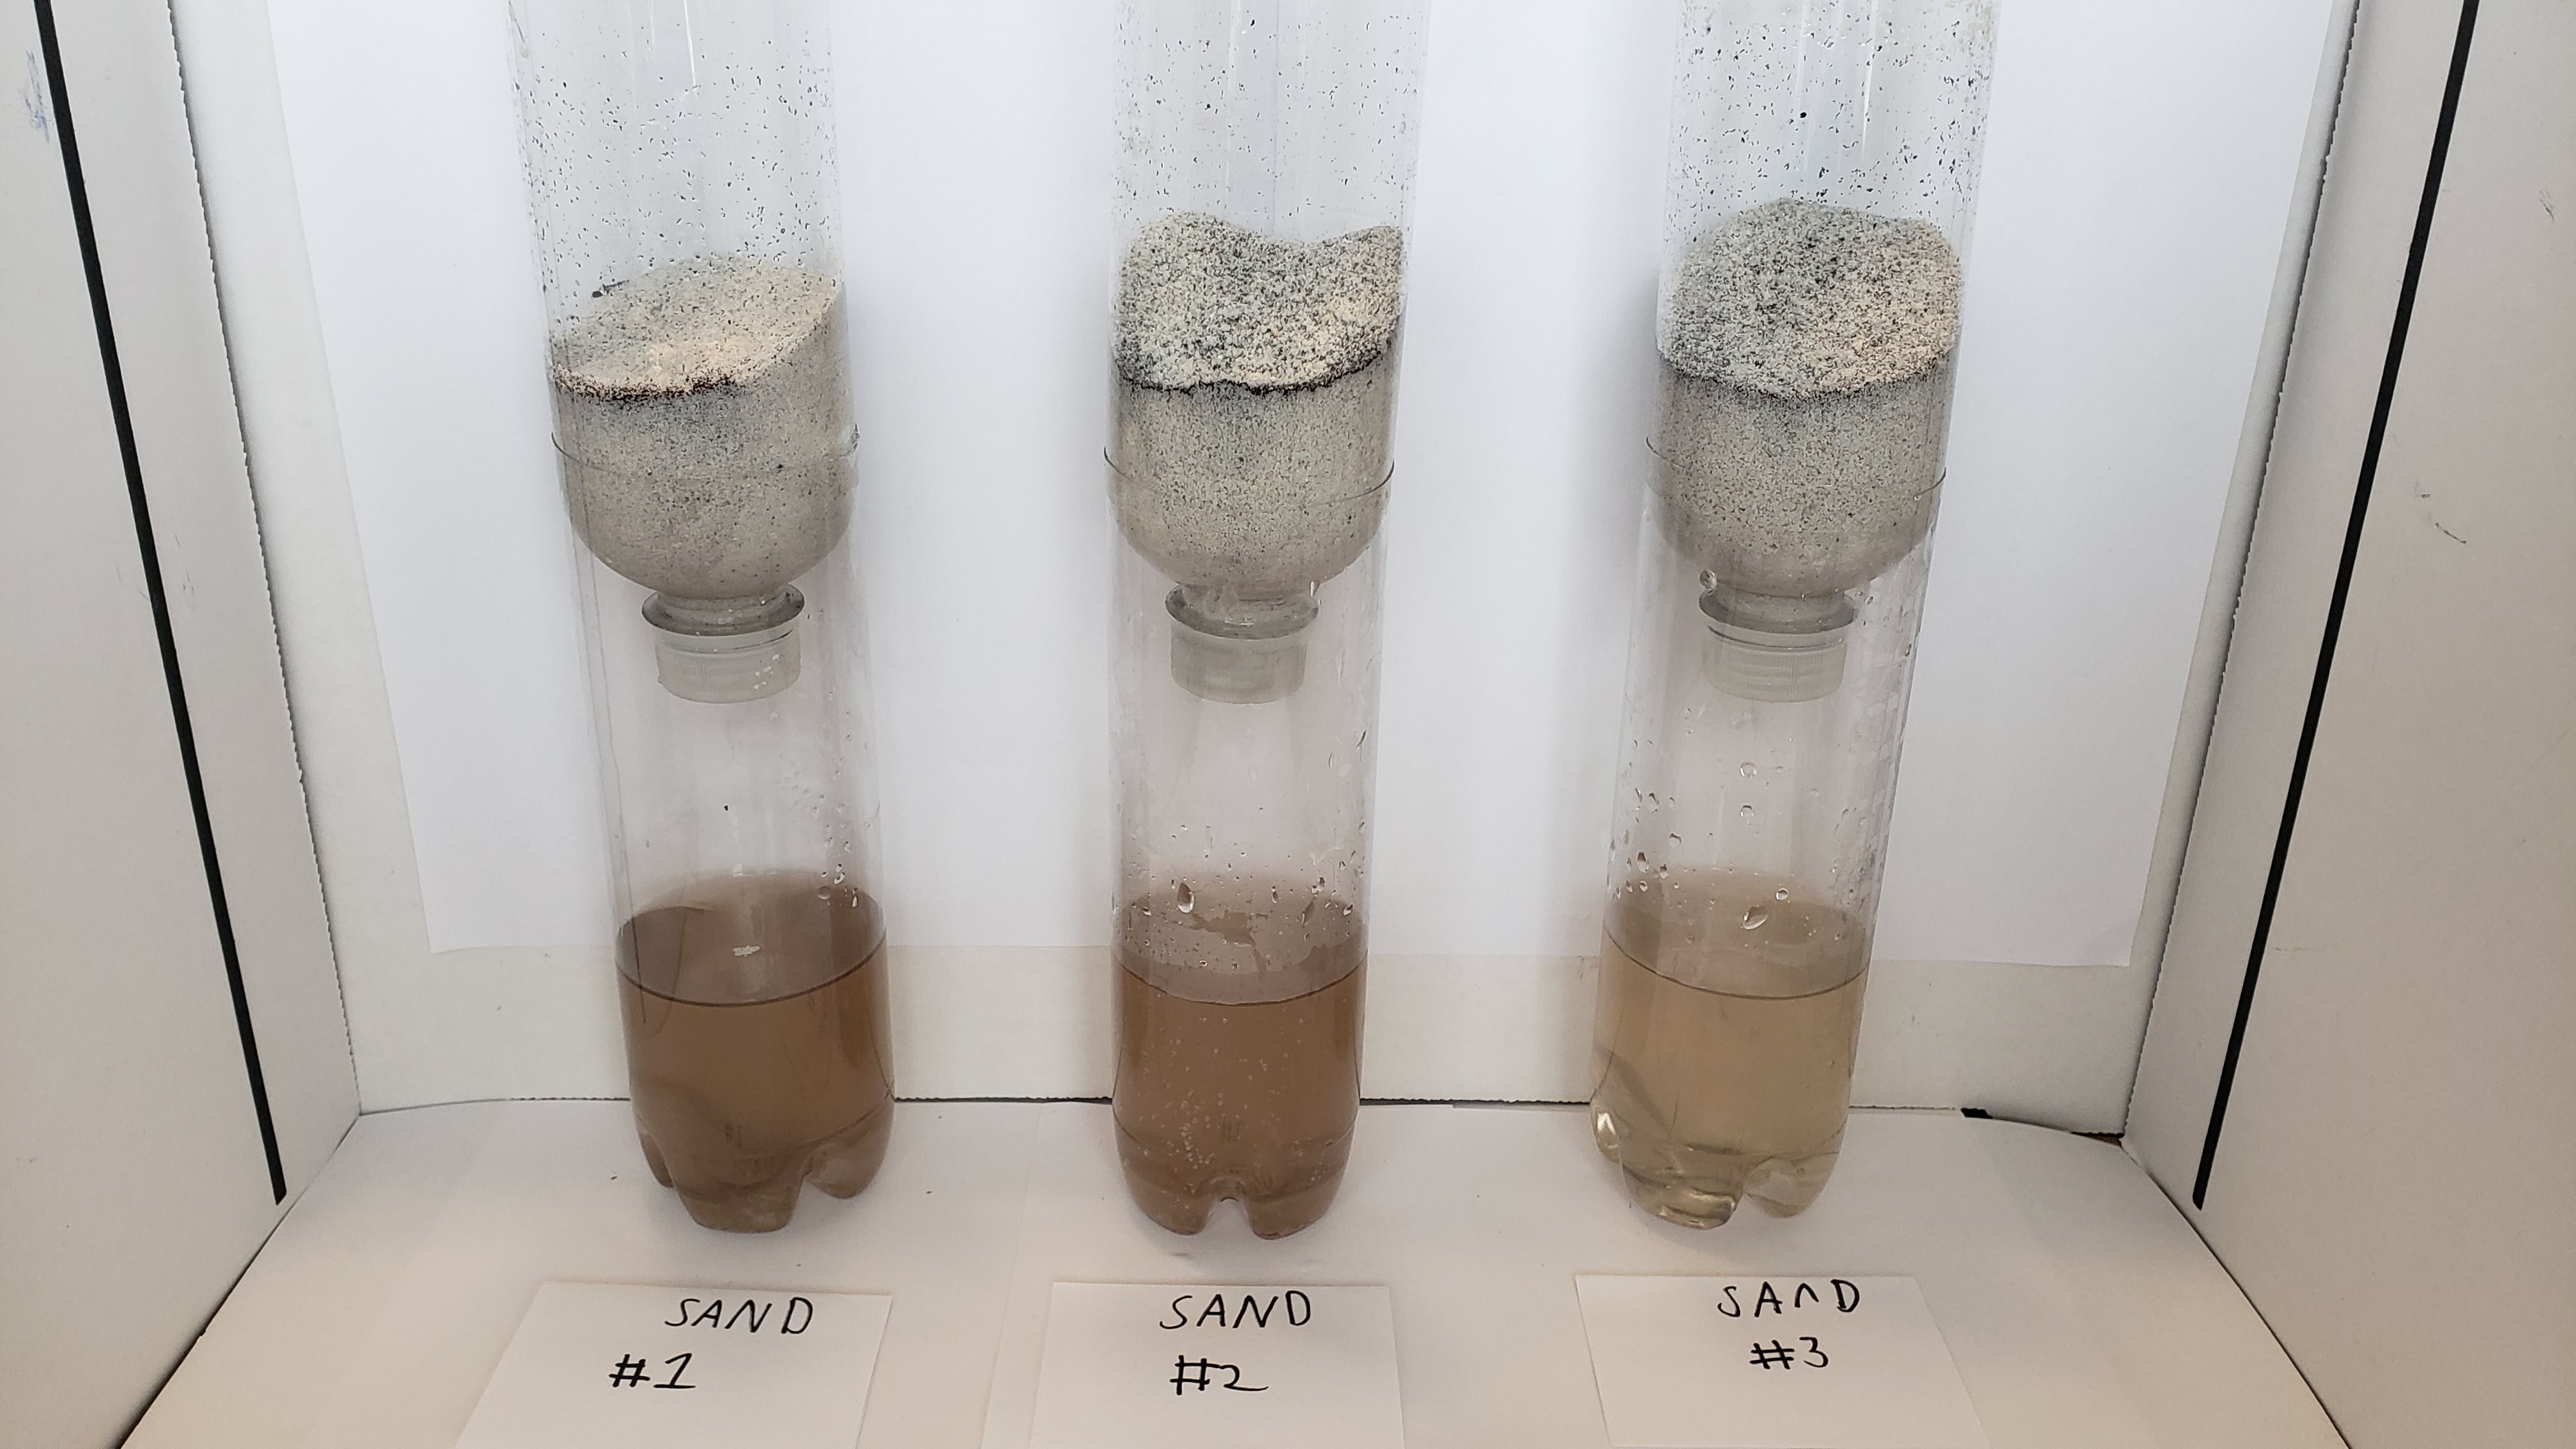
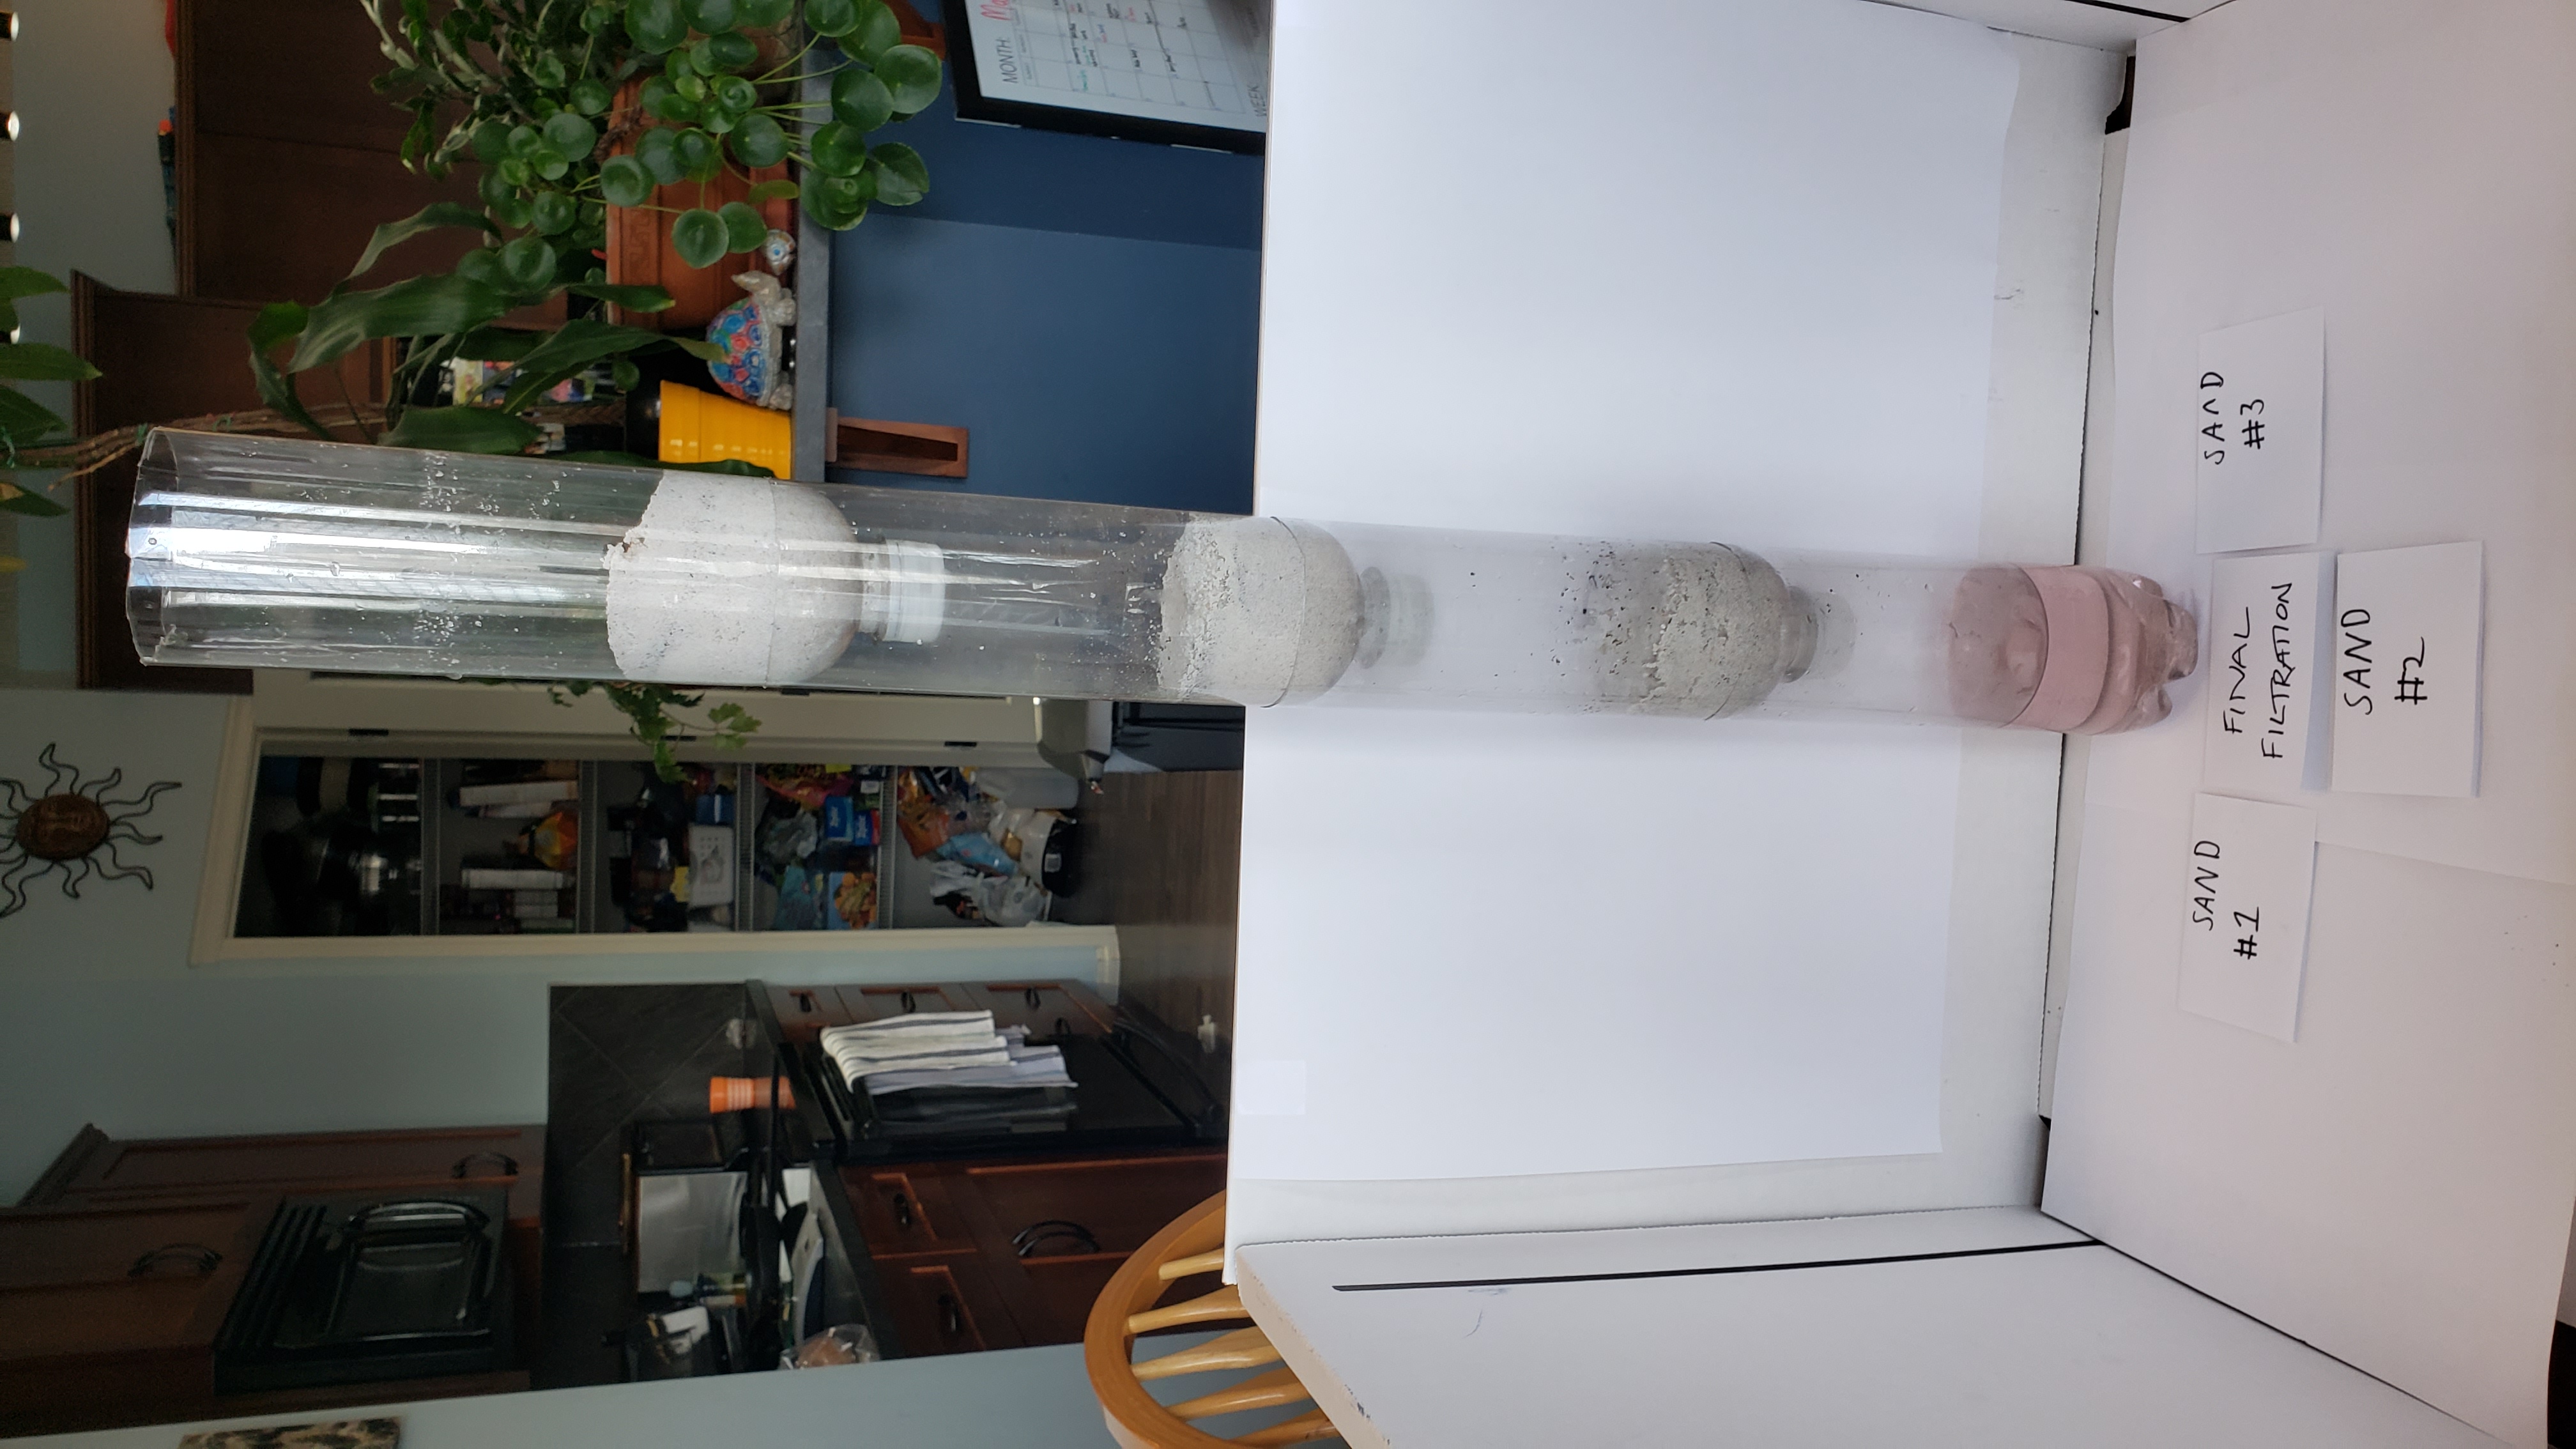
When we poured the potting soil water into sand the big pieces like twigs and perlite stayed on top of the sand. The water coming out did not have any dirt chunks in it. The water was not very brown. So sand can get rid of big chunks and small chunks and a lot of brown colour.
When we poured the potting soil water into active carbon the big pieces like twigs and perlite stayed on top of the active carbon. The water coming out did not have any dirt chunks in it. The water was not very brown. So sand can get rid of big chunks and small chunks and a lot of brown colour.
When we poured the potting soil water into coffee filter the big pieces like twigs and perlite stayed in the filter and the small chunks of dirt. The water coming out had very small floaties, and was still less brown but not much but more than active charcoal. So coffee filter can get rid of big chunks and small chunks and some brown colour.
STAGE 2 OBSERVATIONS
STAGE 2 - POTTING SOIL
In stage 1 we didn’t make very clean water looking drinkable. So we decided to do a bunch of filters one after another to see if that cleaned it more.
When we poured the potting soil water into two large gravel filters in a row. The big pieces like twigs and perlite stayed on top of the big gravel on the top one. Some of the chunks were removed in the second one. The water coming out had some small dirt chunks in it. The water was brown but less than what we poured in.
Then we took the water out of the big gravel, and poured it into two small gravel filters in a row. The water coming out had no dirt chunks in it but small dirt. The water was brown but less than what we poured in.
Then we took the water out of the small gravel, and poured it into three sand filters in a row. The water coming out had no dirt in it. The water was still brown but a lot less.
STAGE 2 - DIRTY WATER
We tested if we can get rid of potting soil and red dye in a dirty water mixture.
When we poured the potting soil water into two large gravel filters in a row. The big pieces like twigs and perlite stayed on top of the big gravel on the top one. Some of the chunks were removed in the second one. The water coming out had some small dirt chunks in it. The water was brown but had some pink in it.
Then we took the water out of the big gravel, and poured it into two small gravel filters in a row. The water coming out had no dirt chunks in it but small dirt. The water was brown but less than what we poured in.
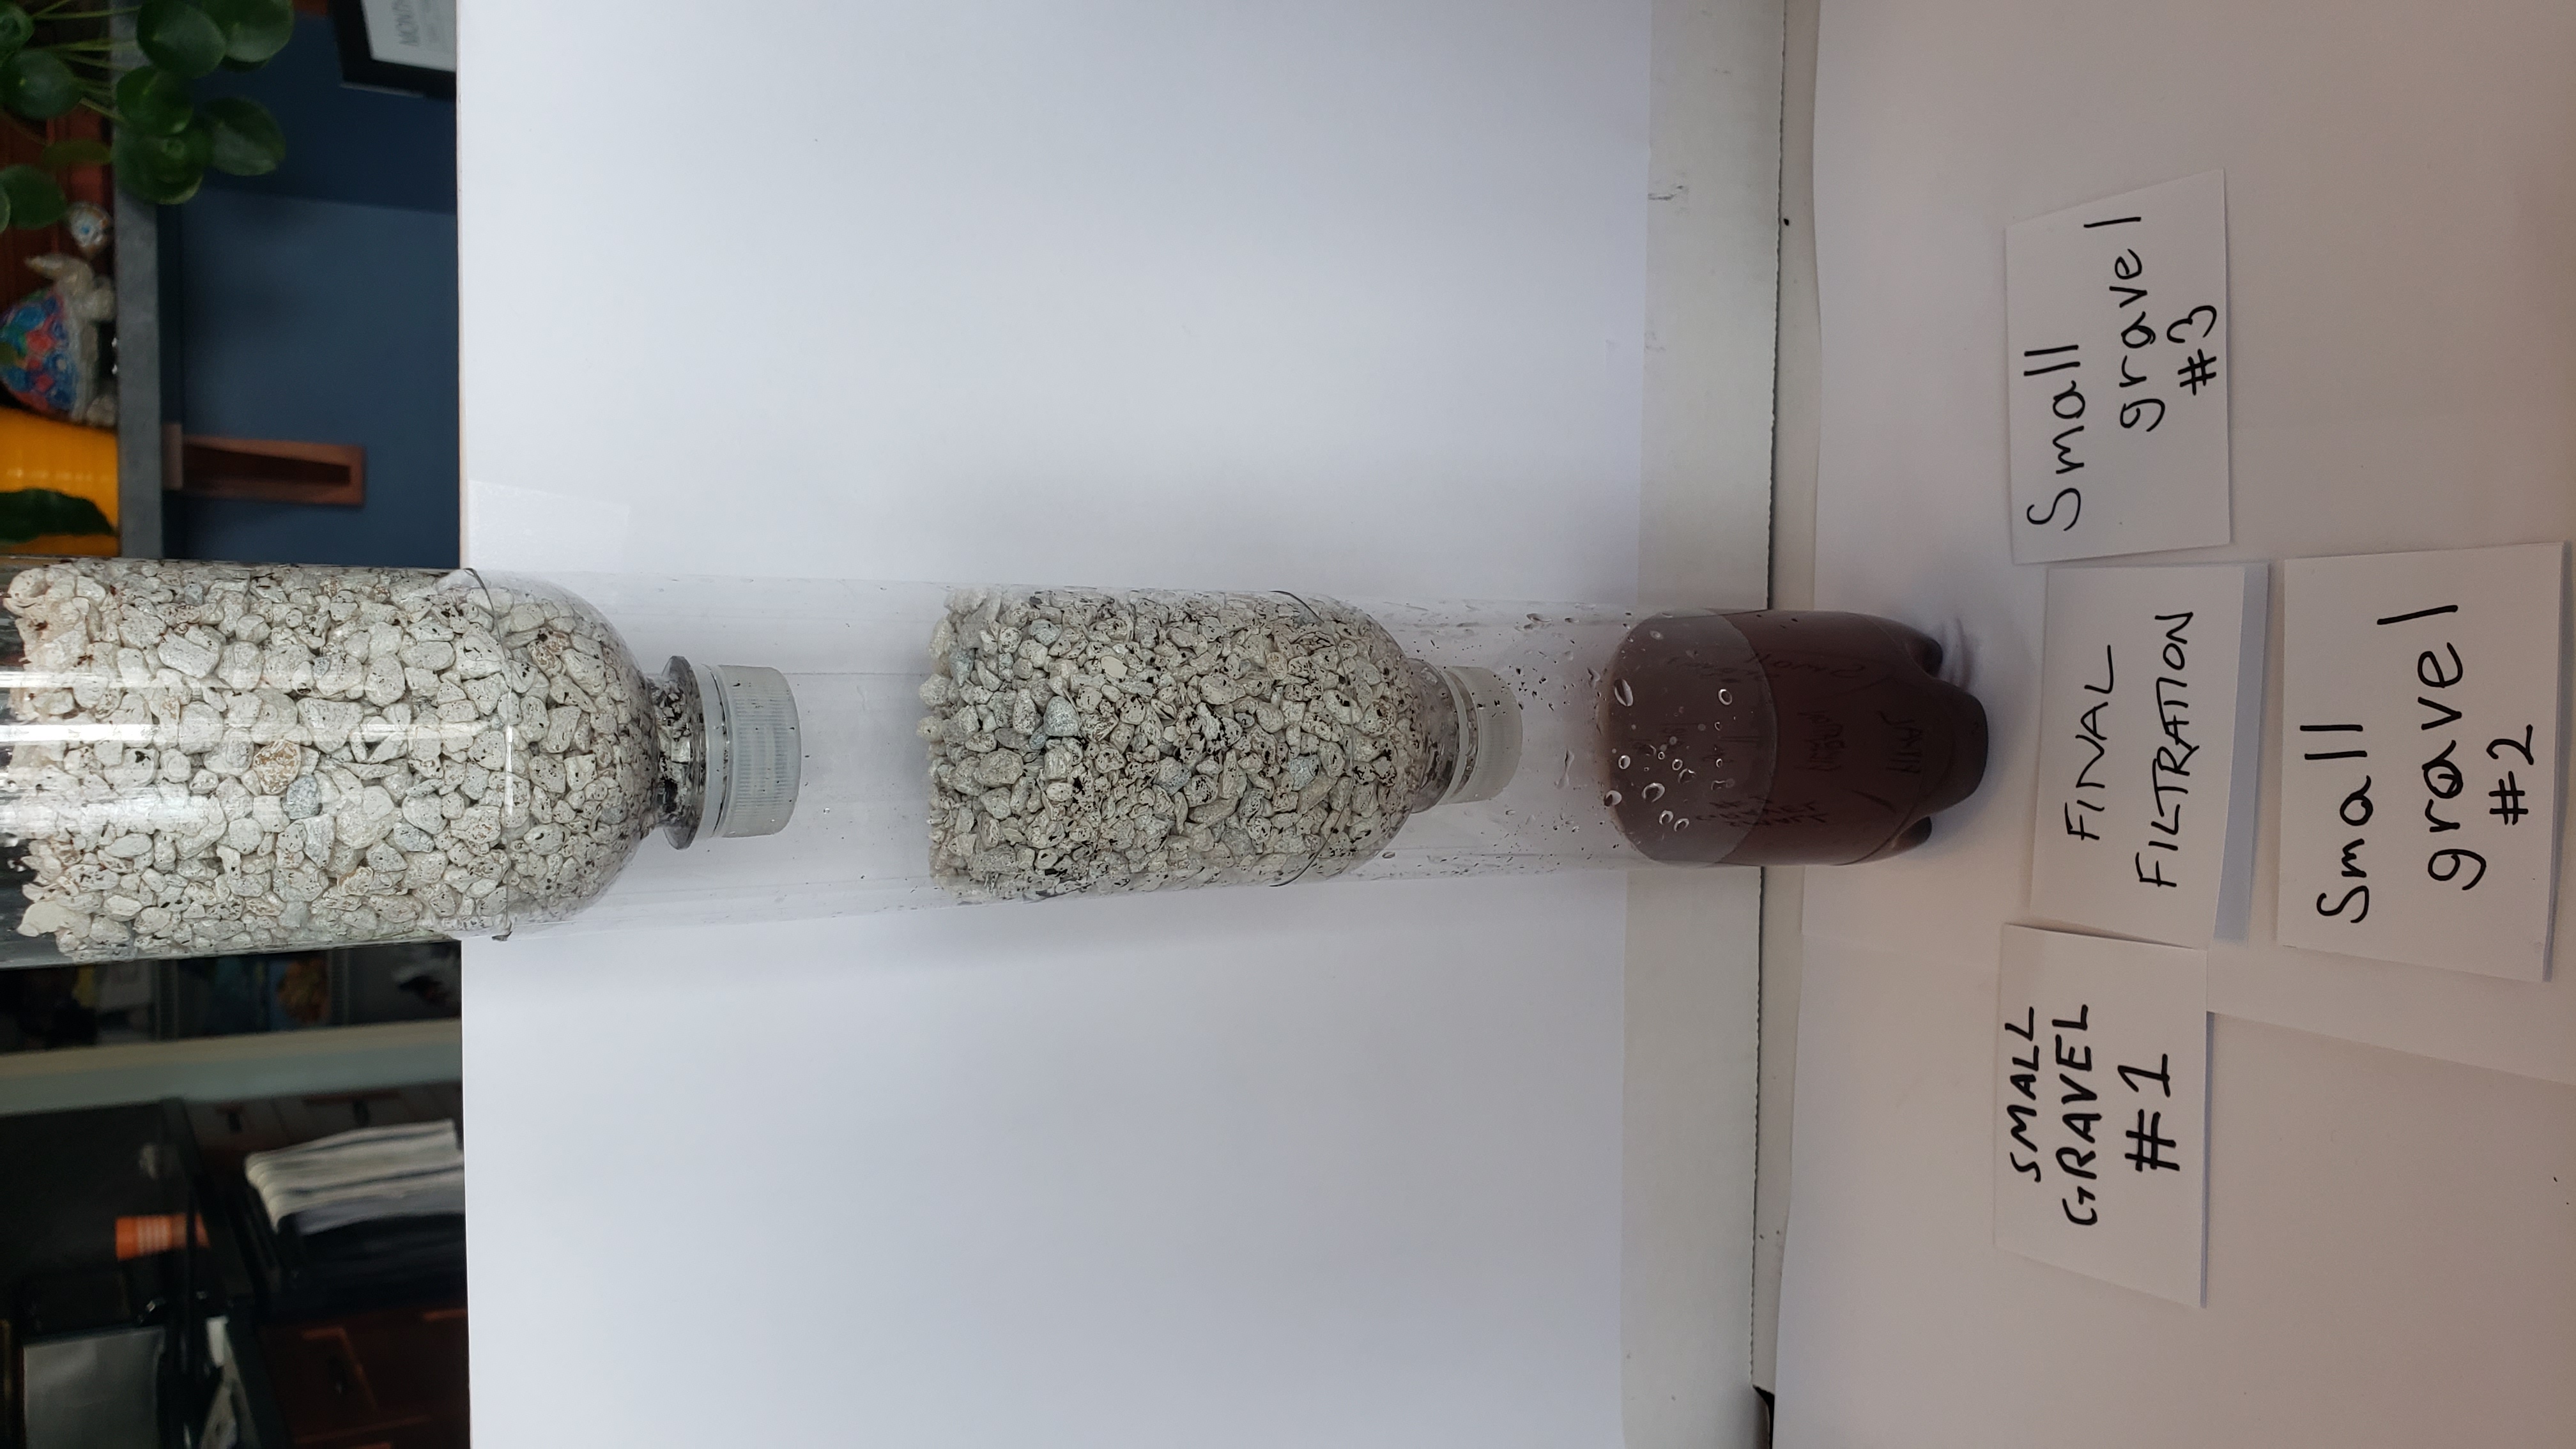
Then we took the water out of the small gravel, and poured it into three sand filters in a row. The water coming out had no dirt chunks in it but small dirt floaties. The water was mostly pink..
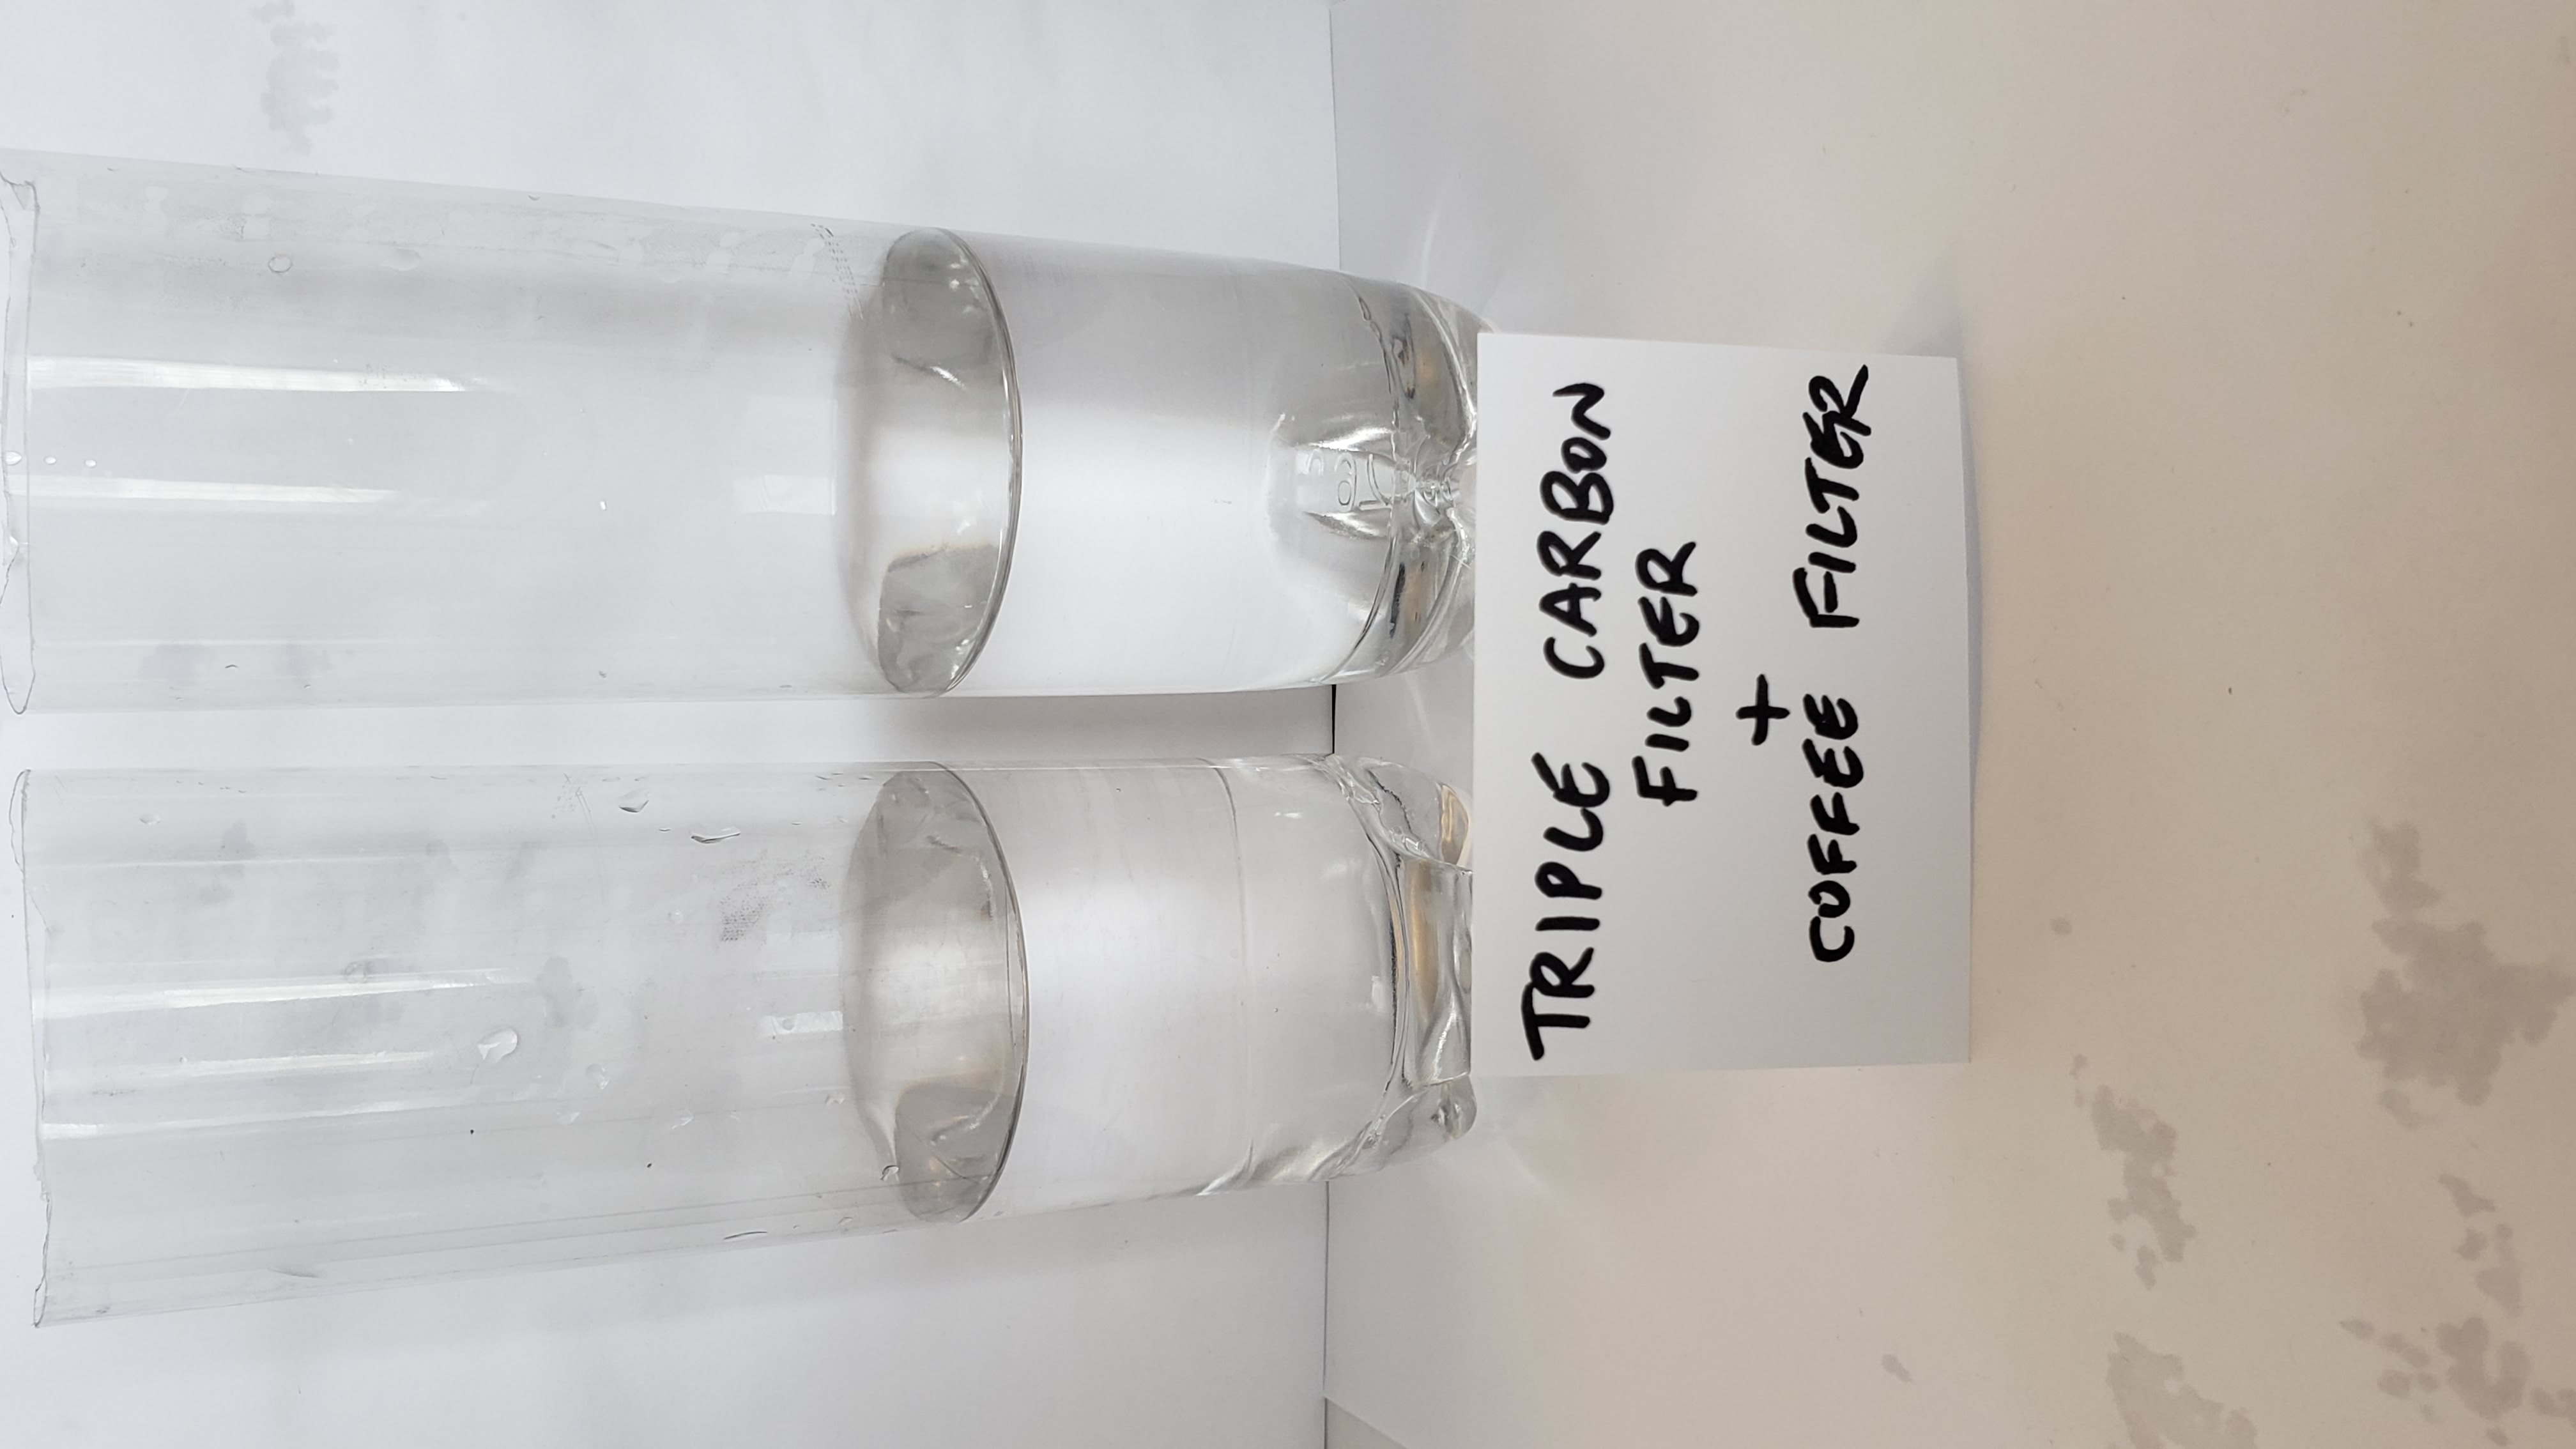
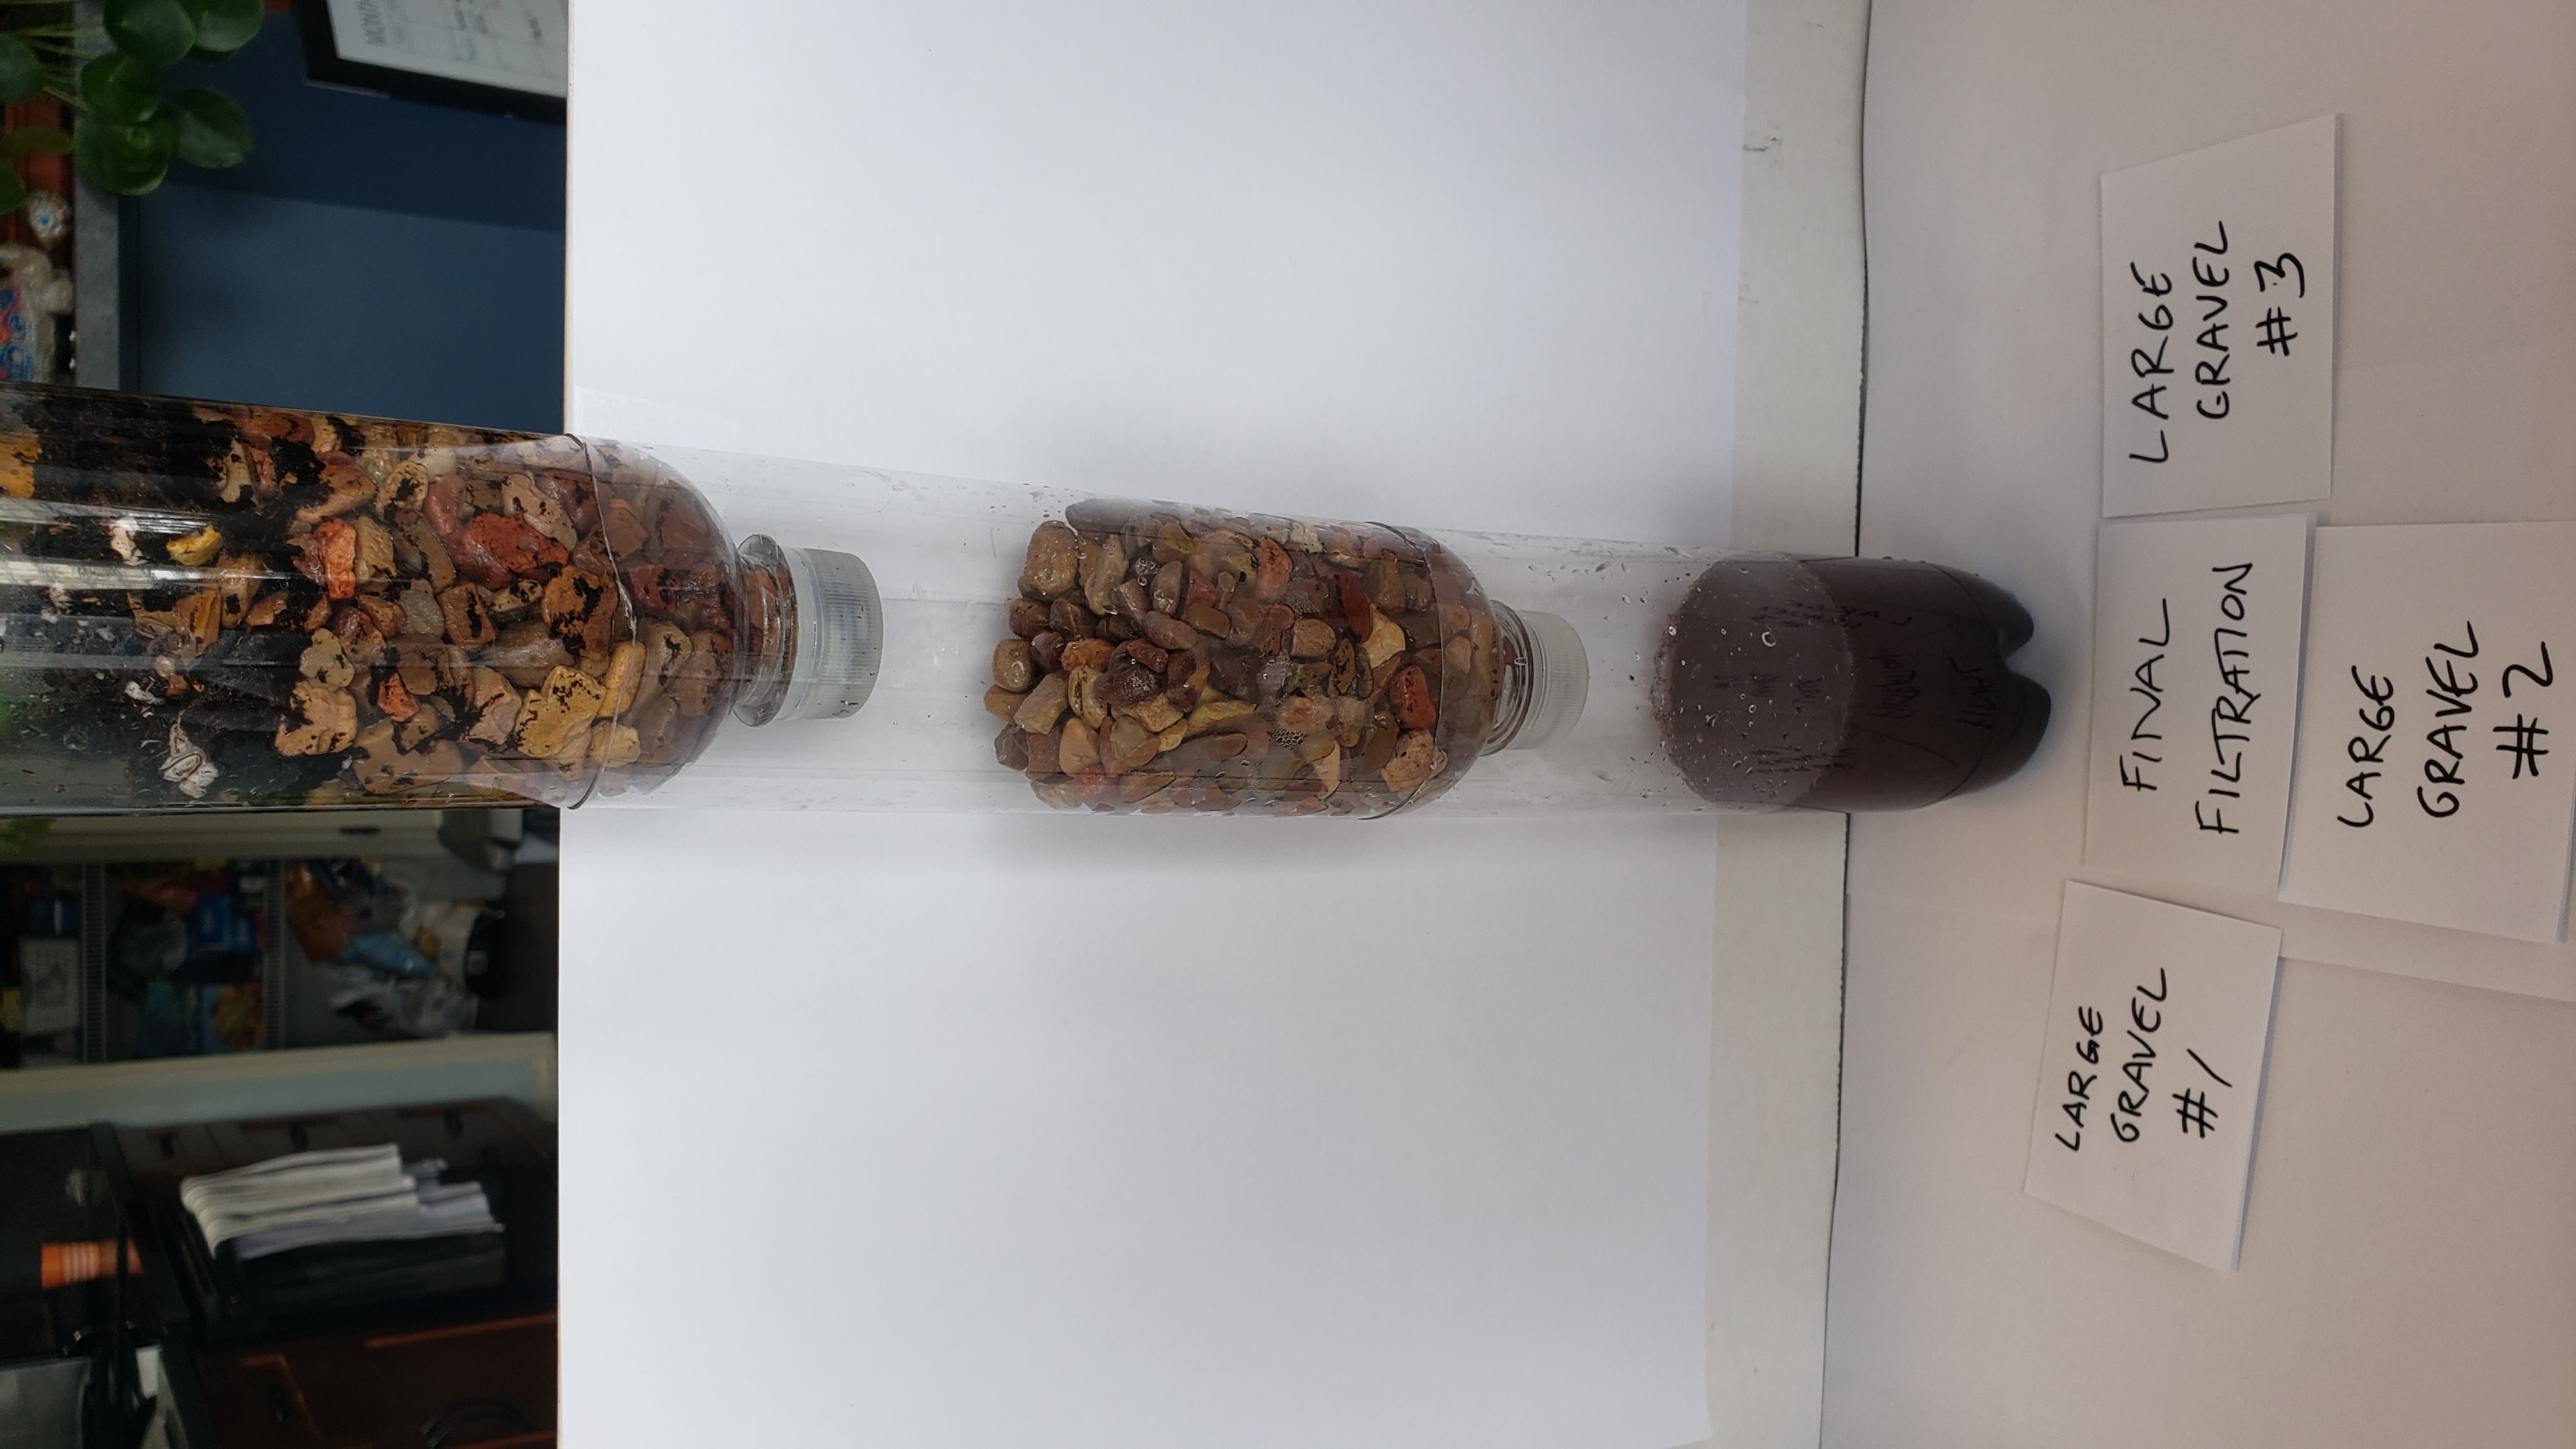
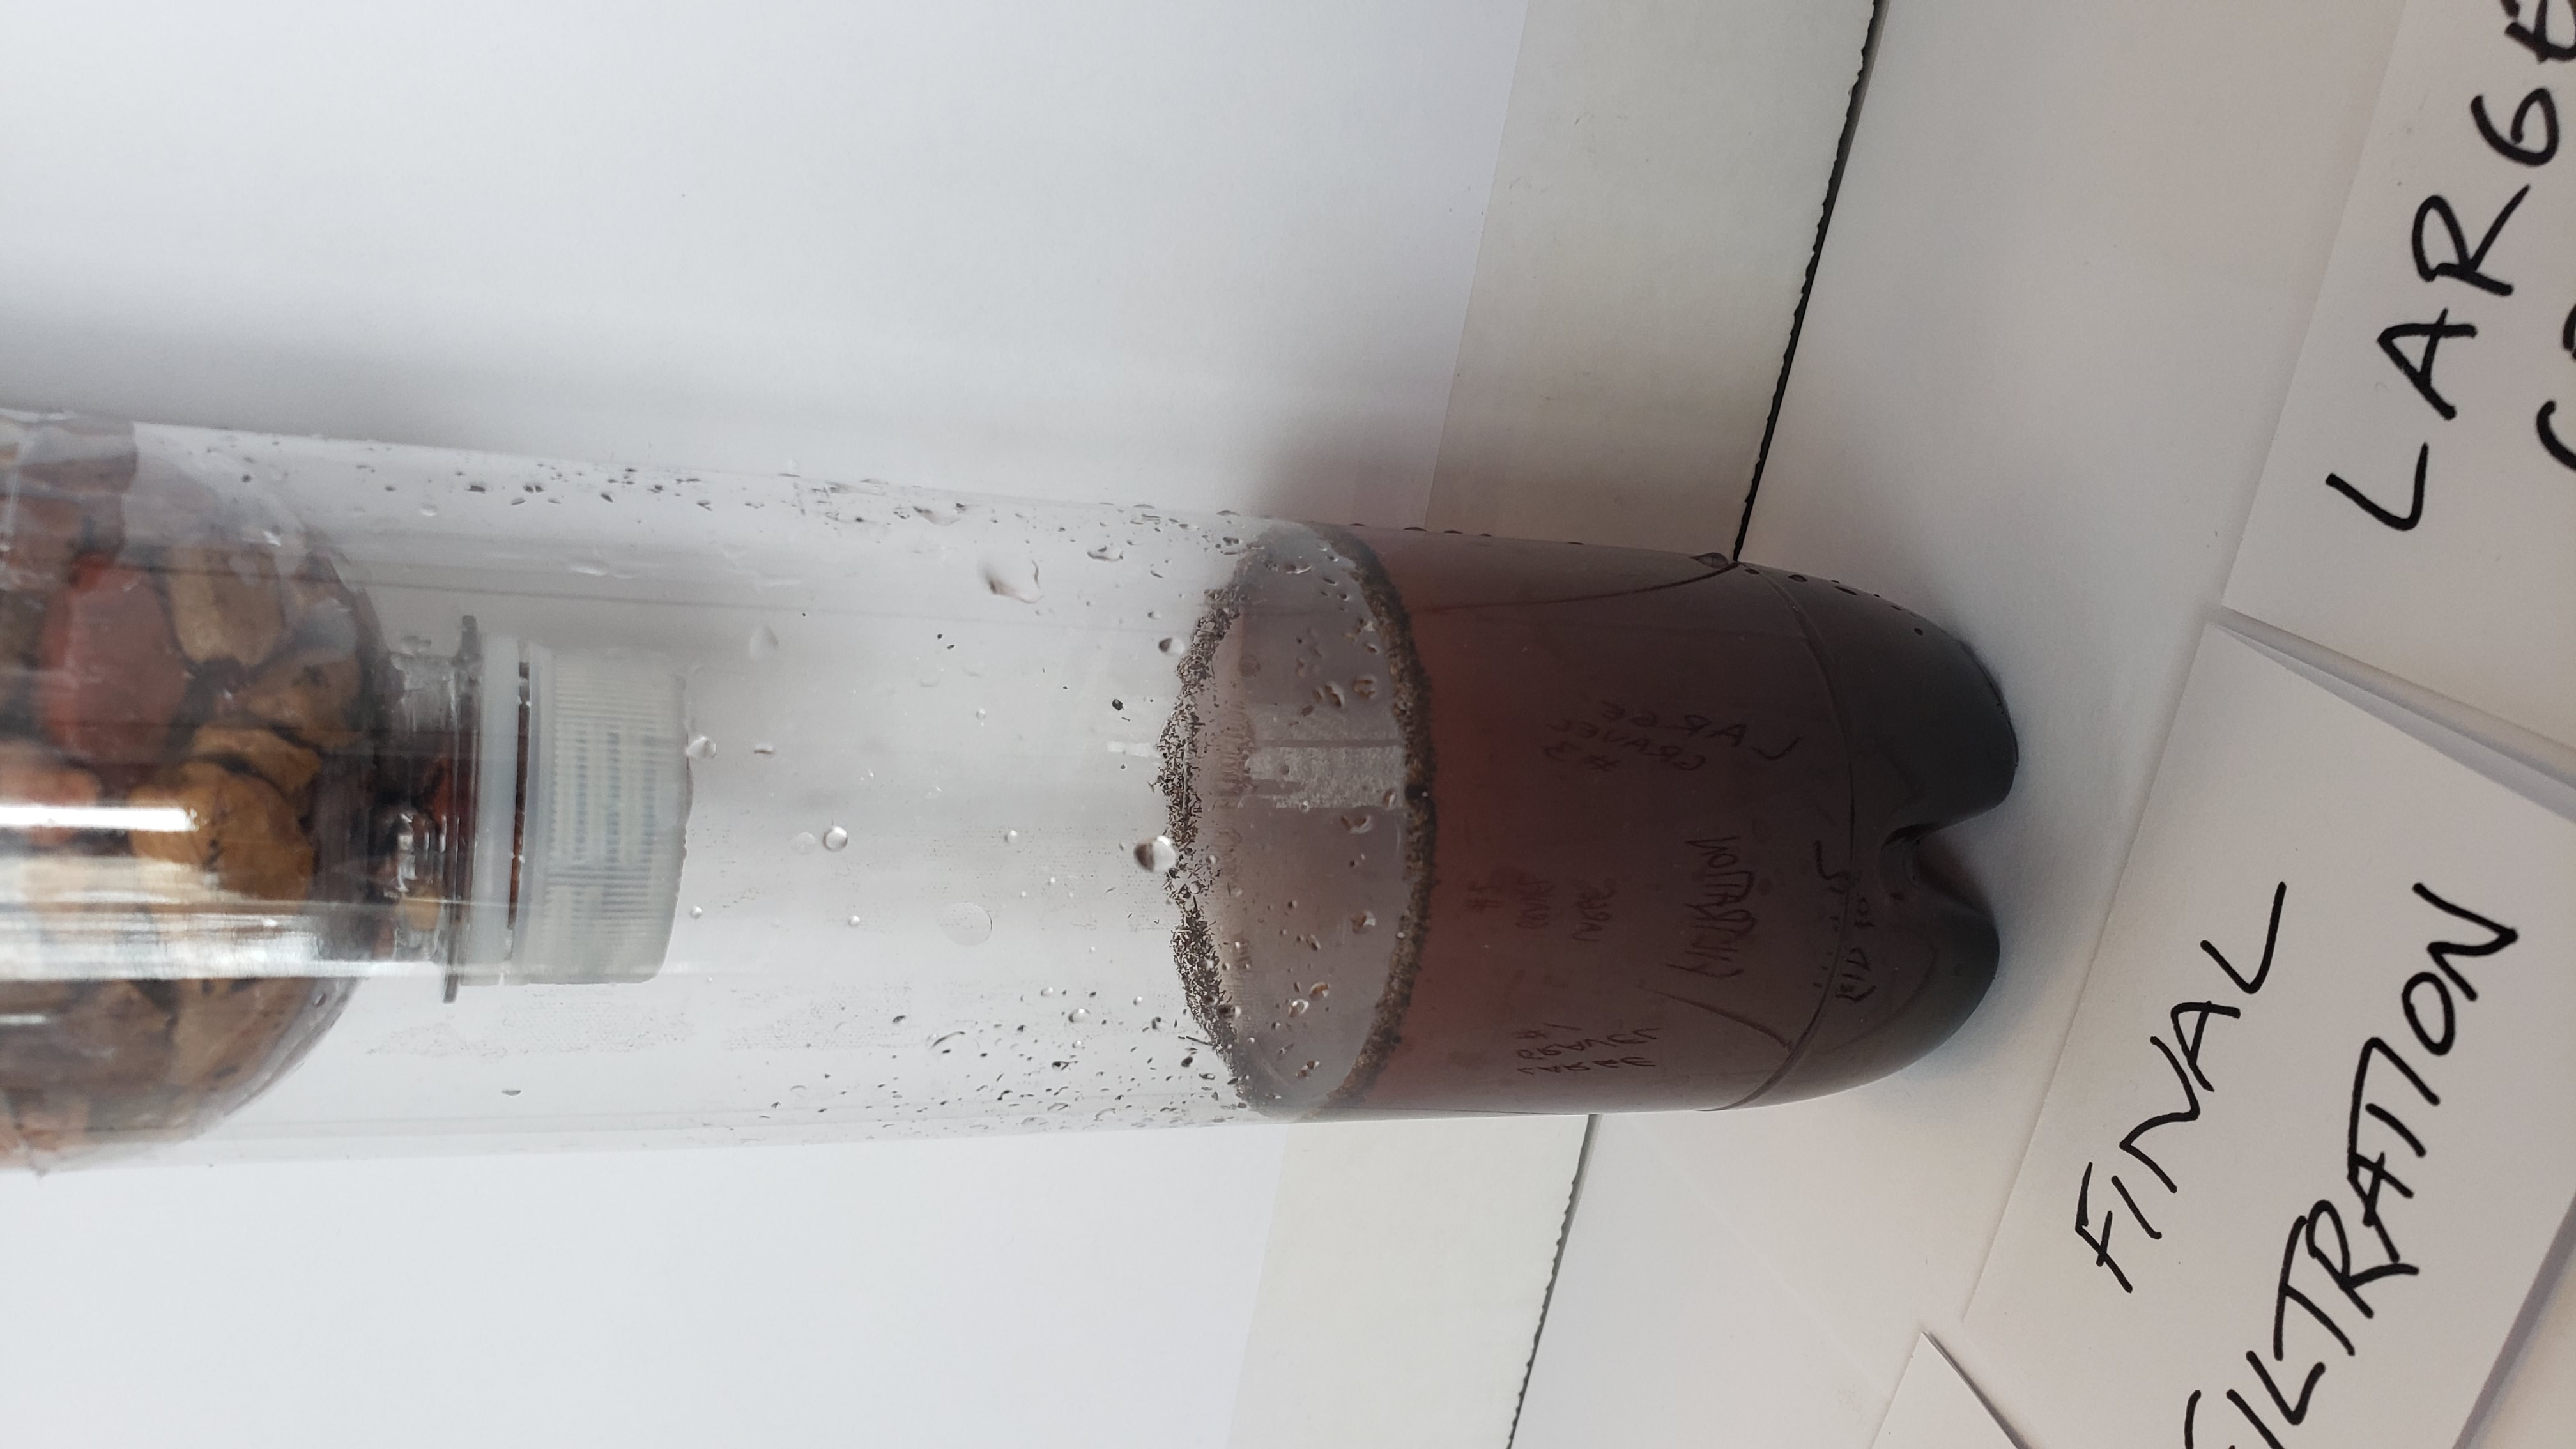
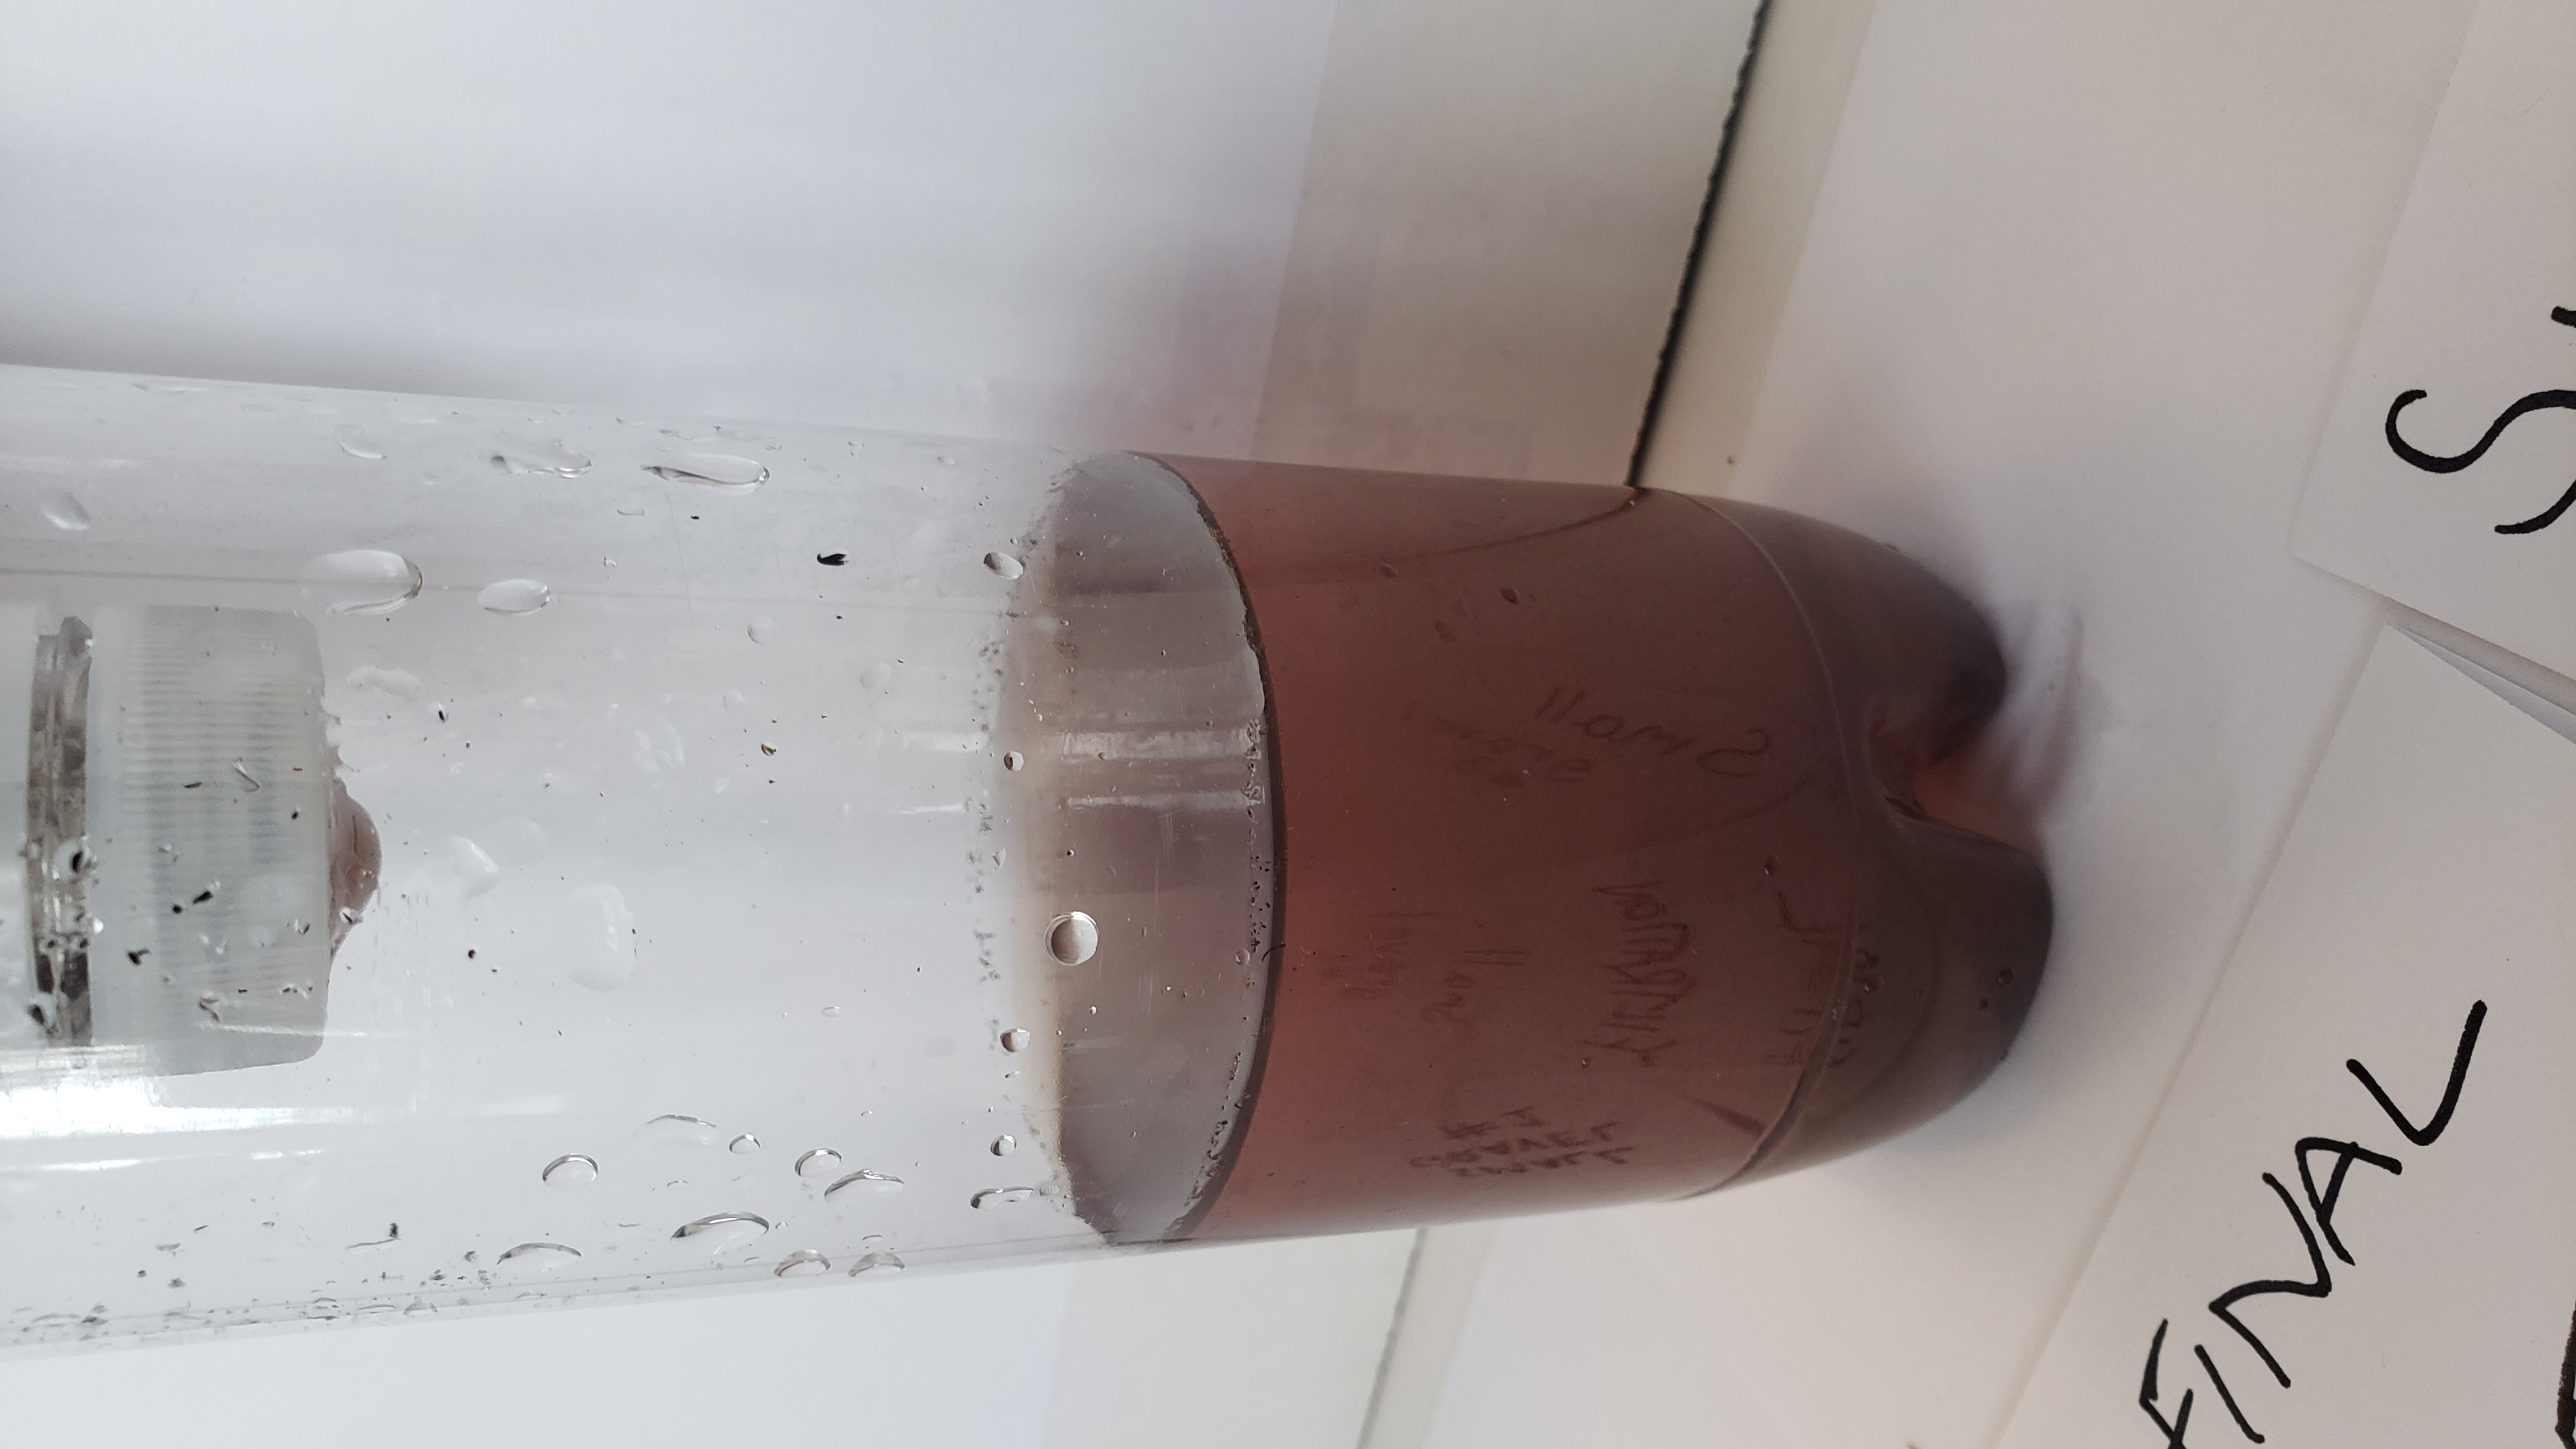
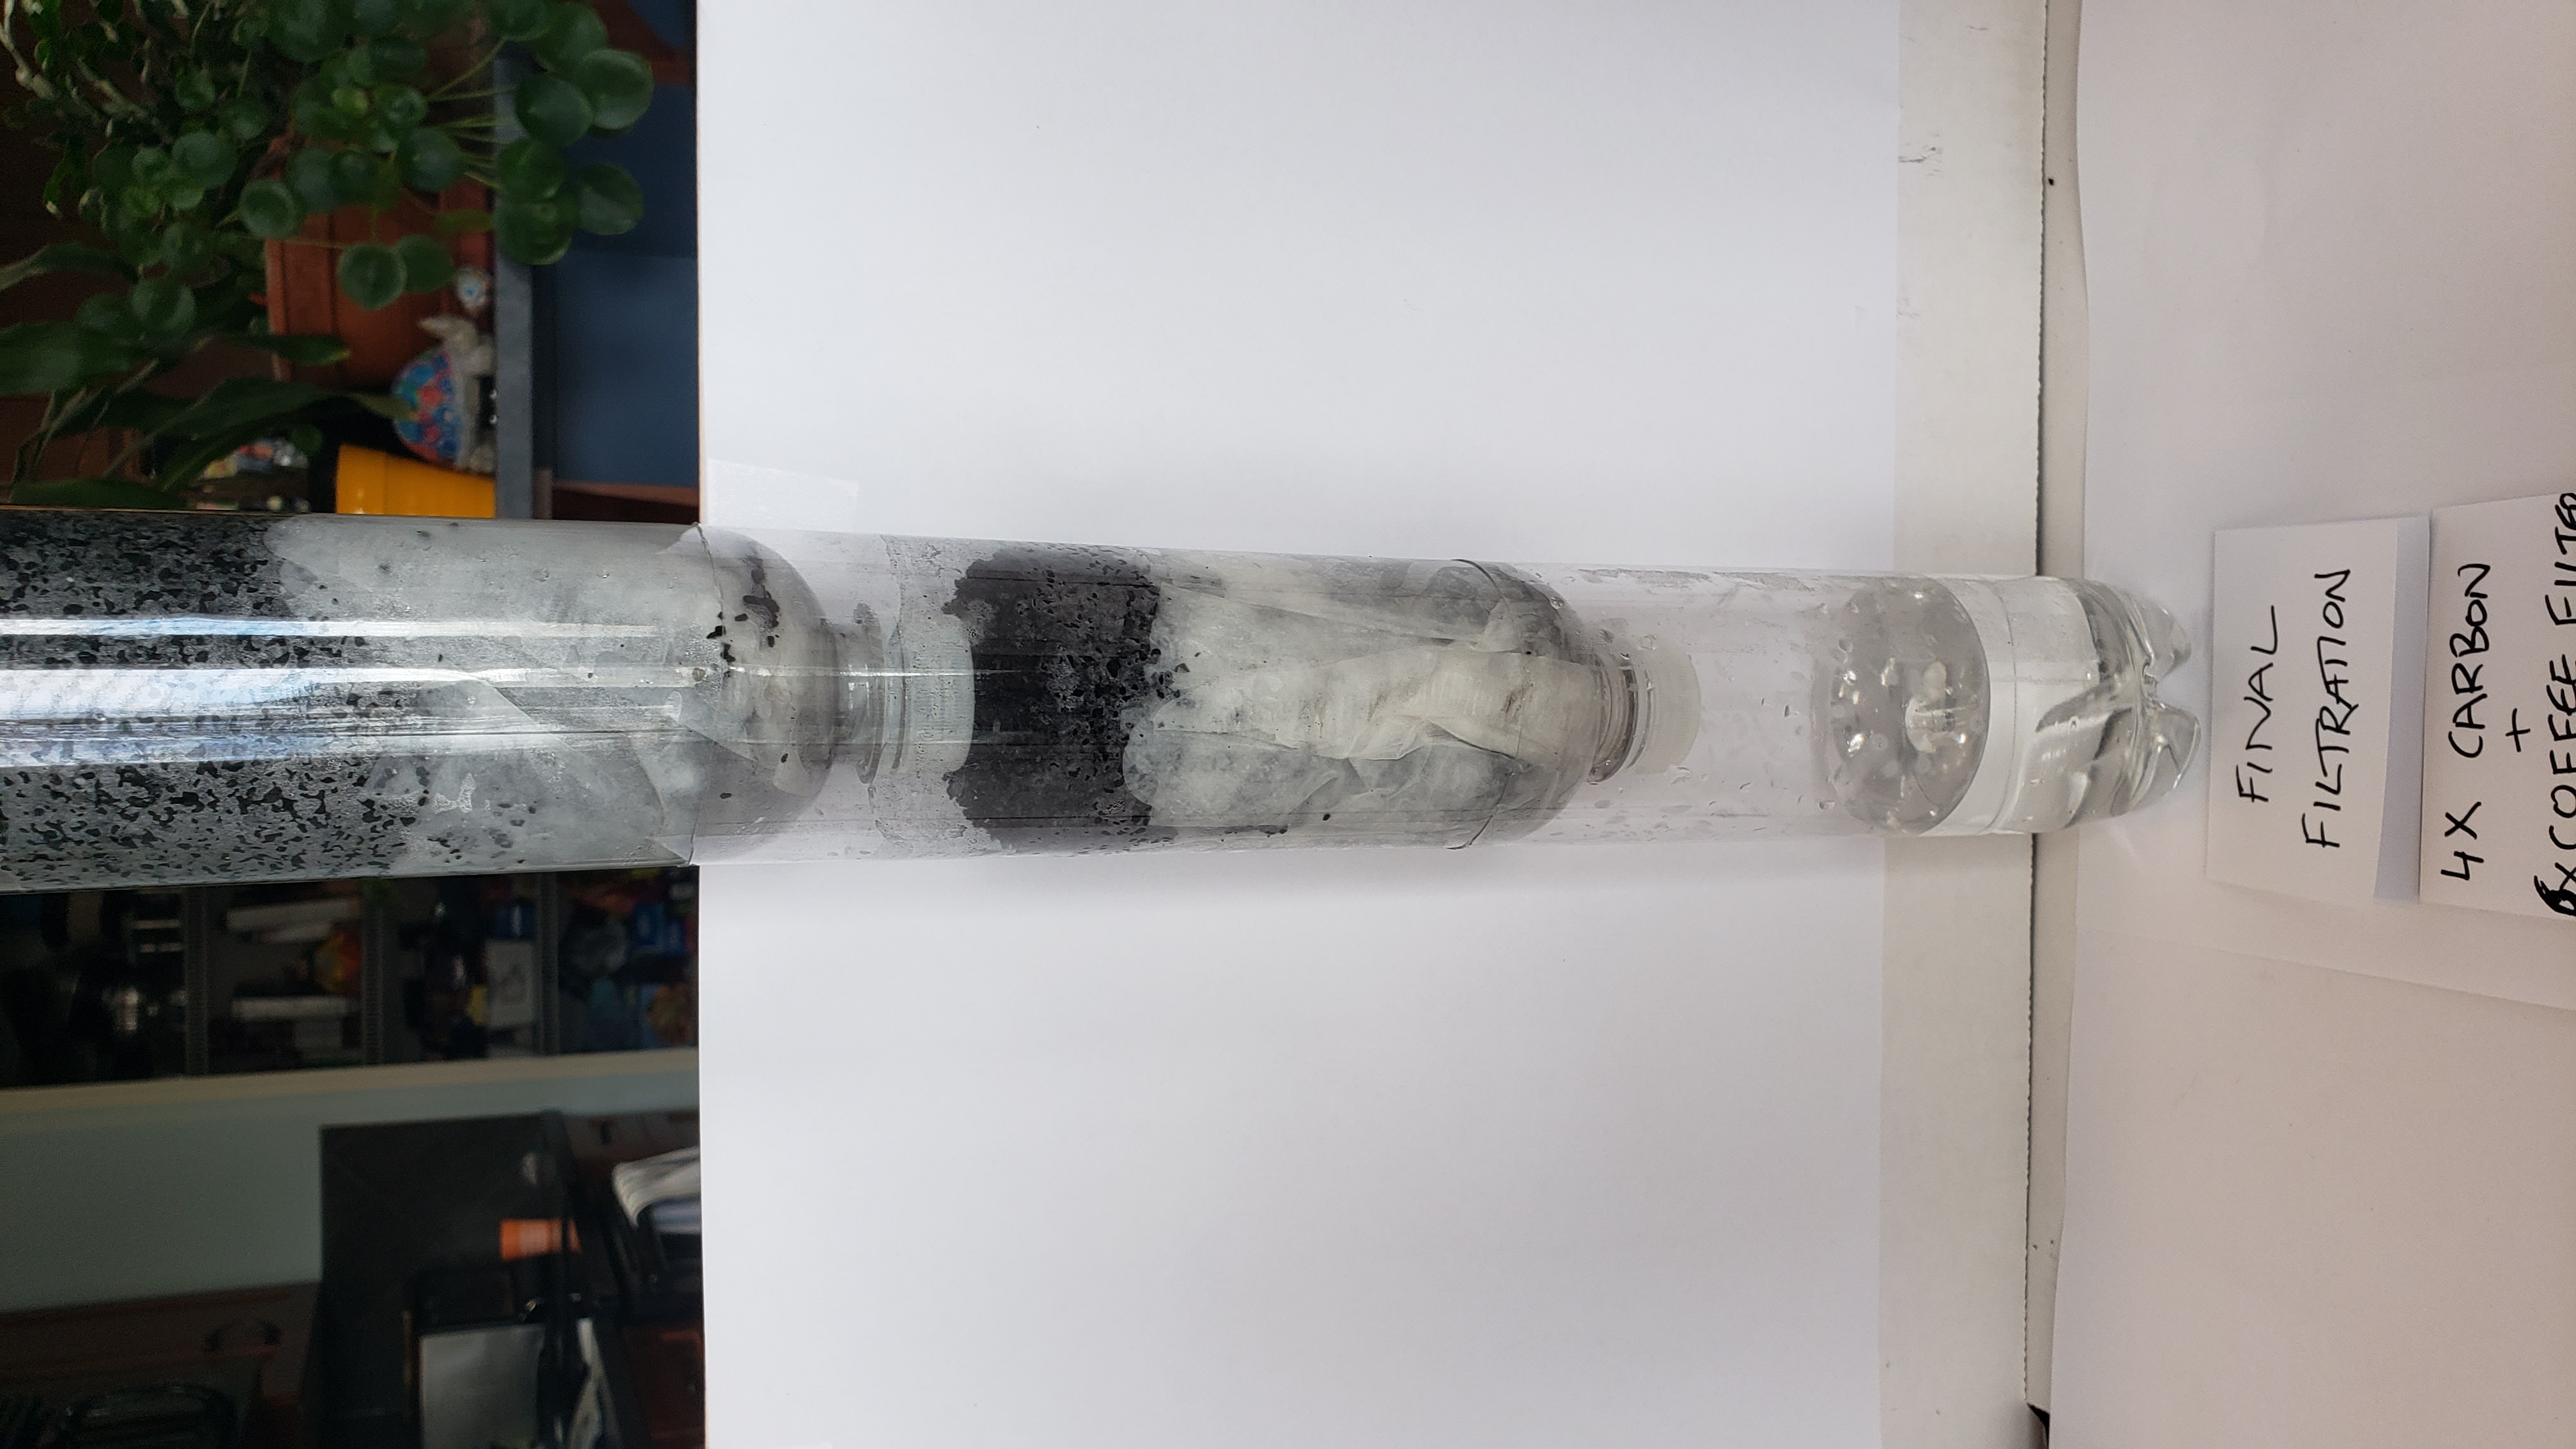
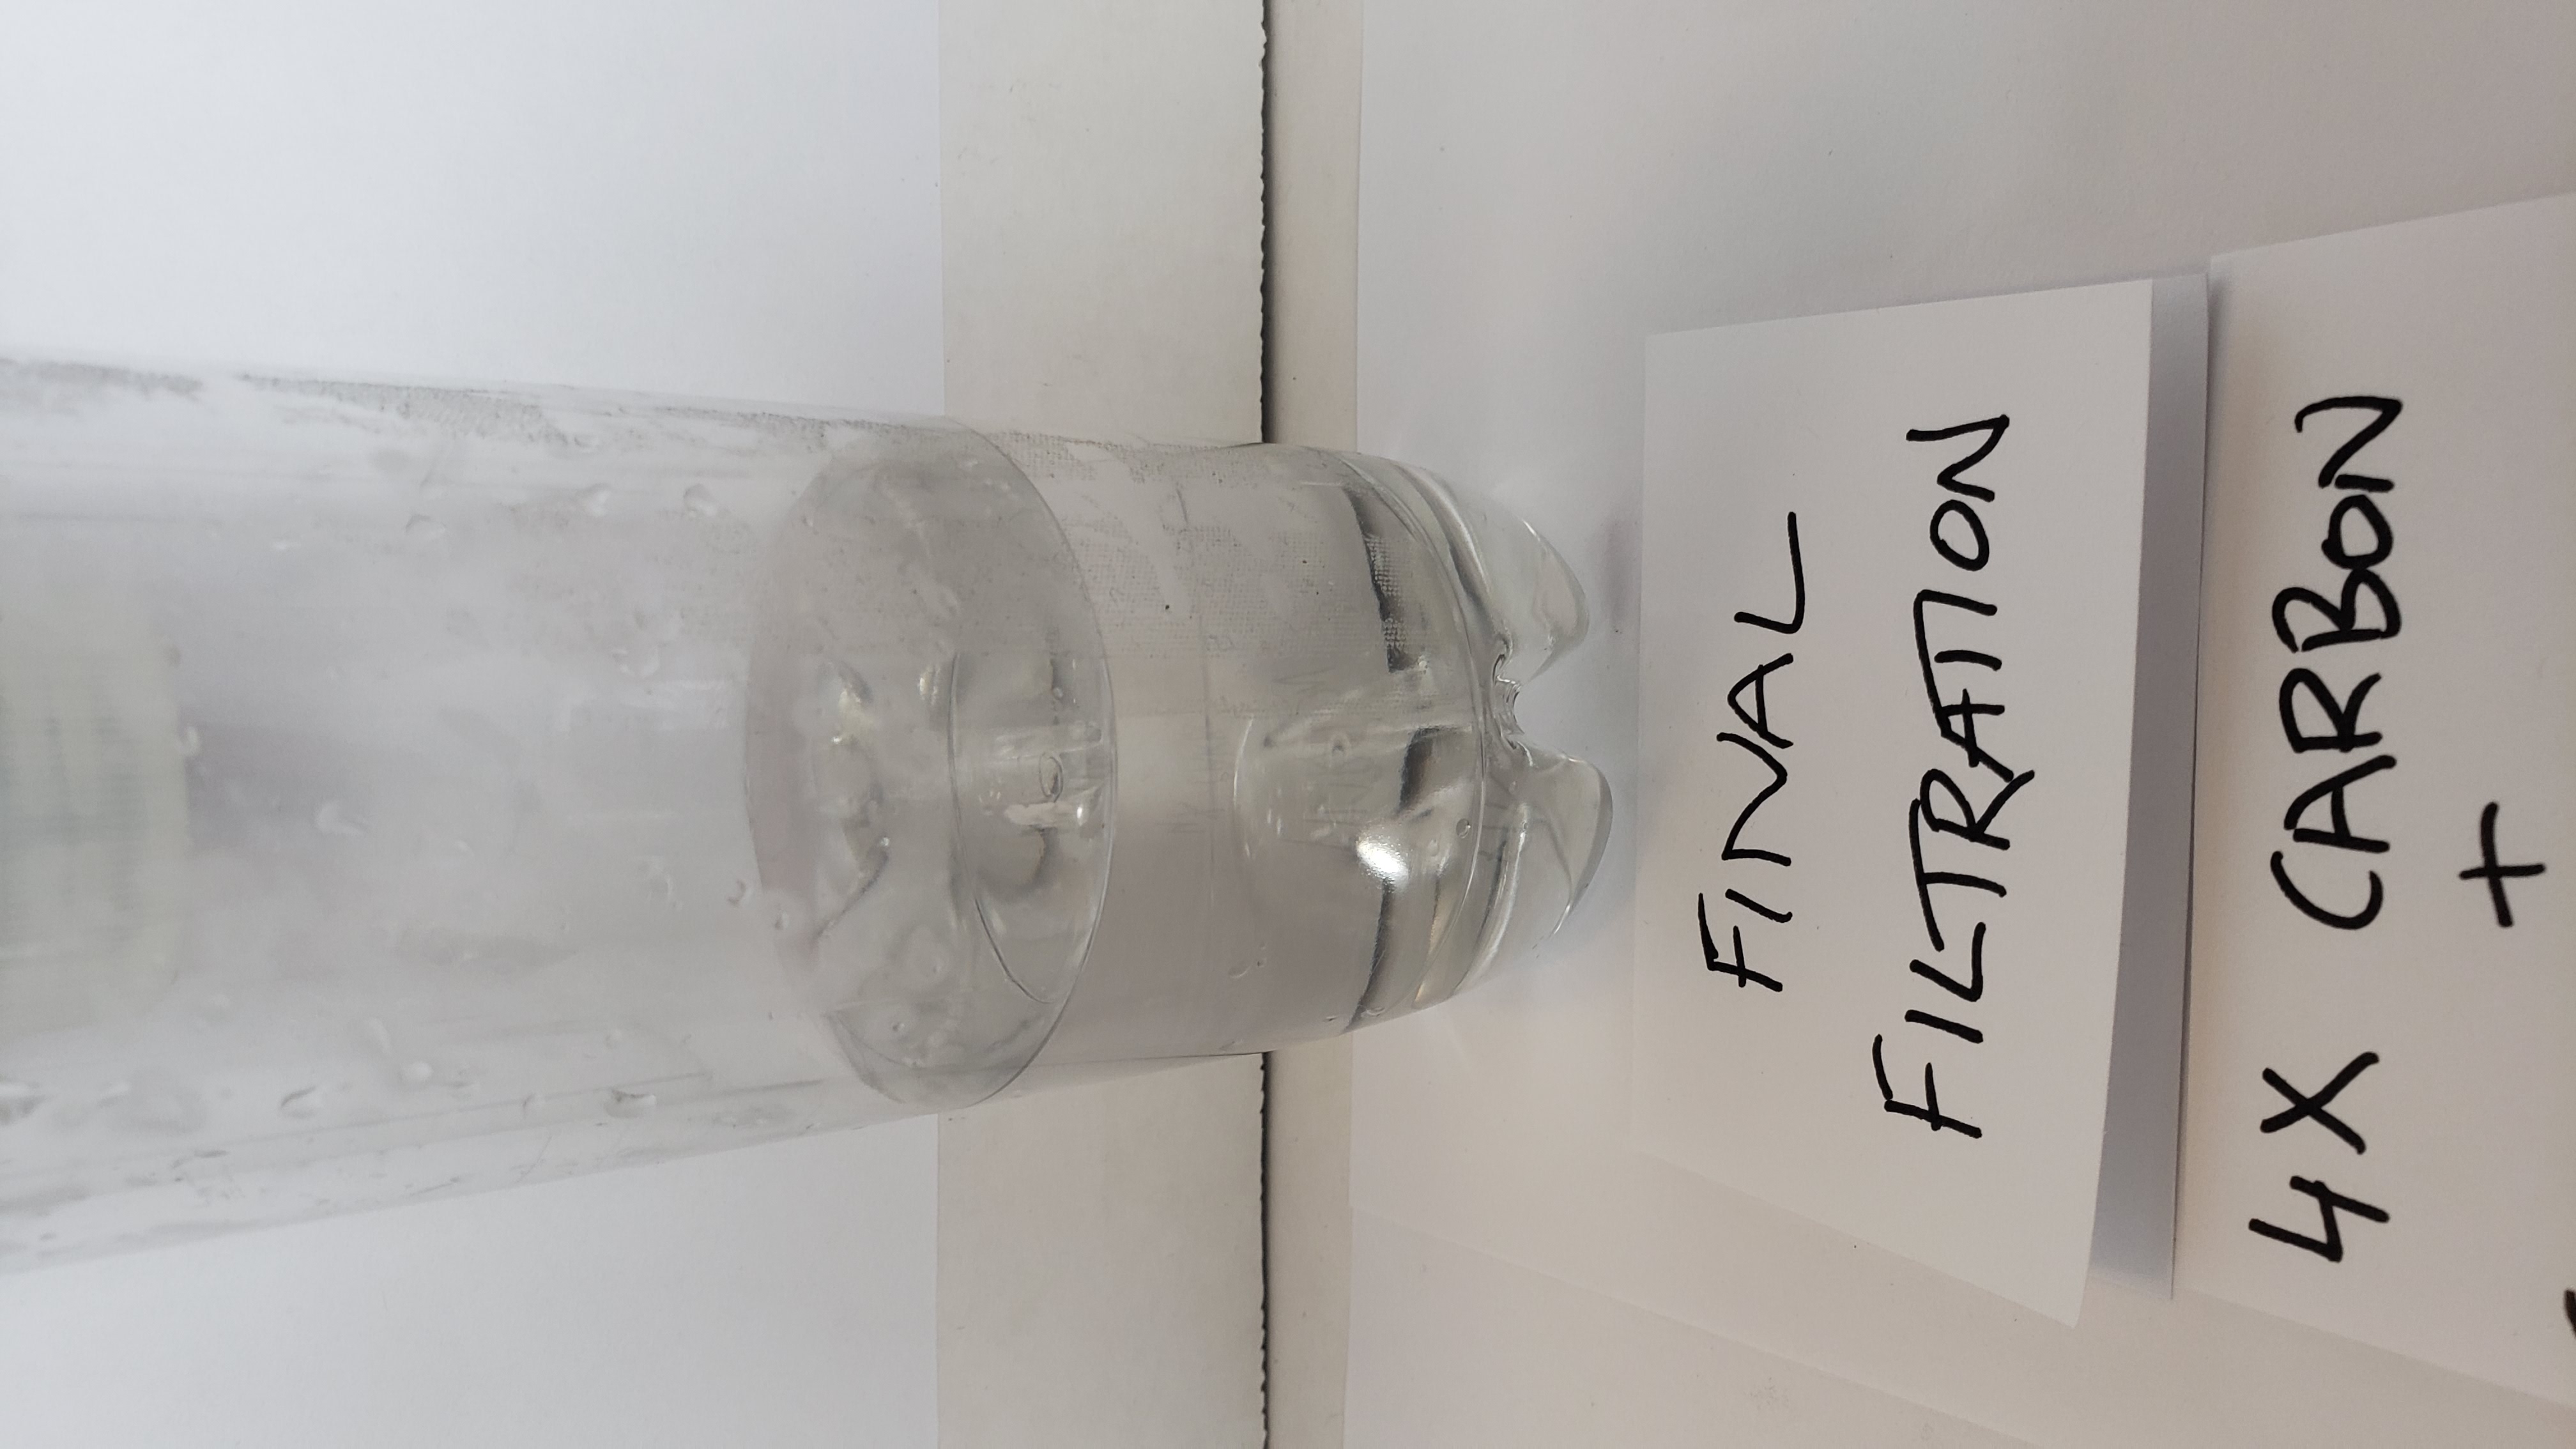
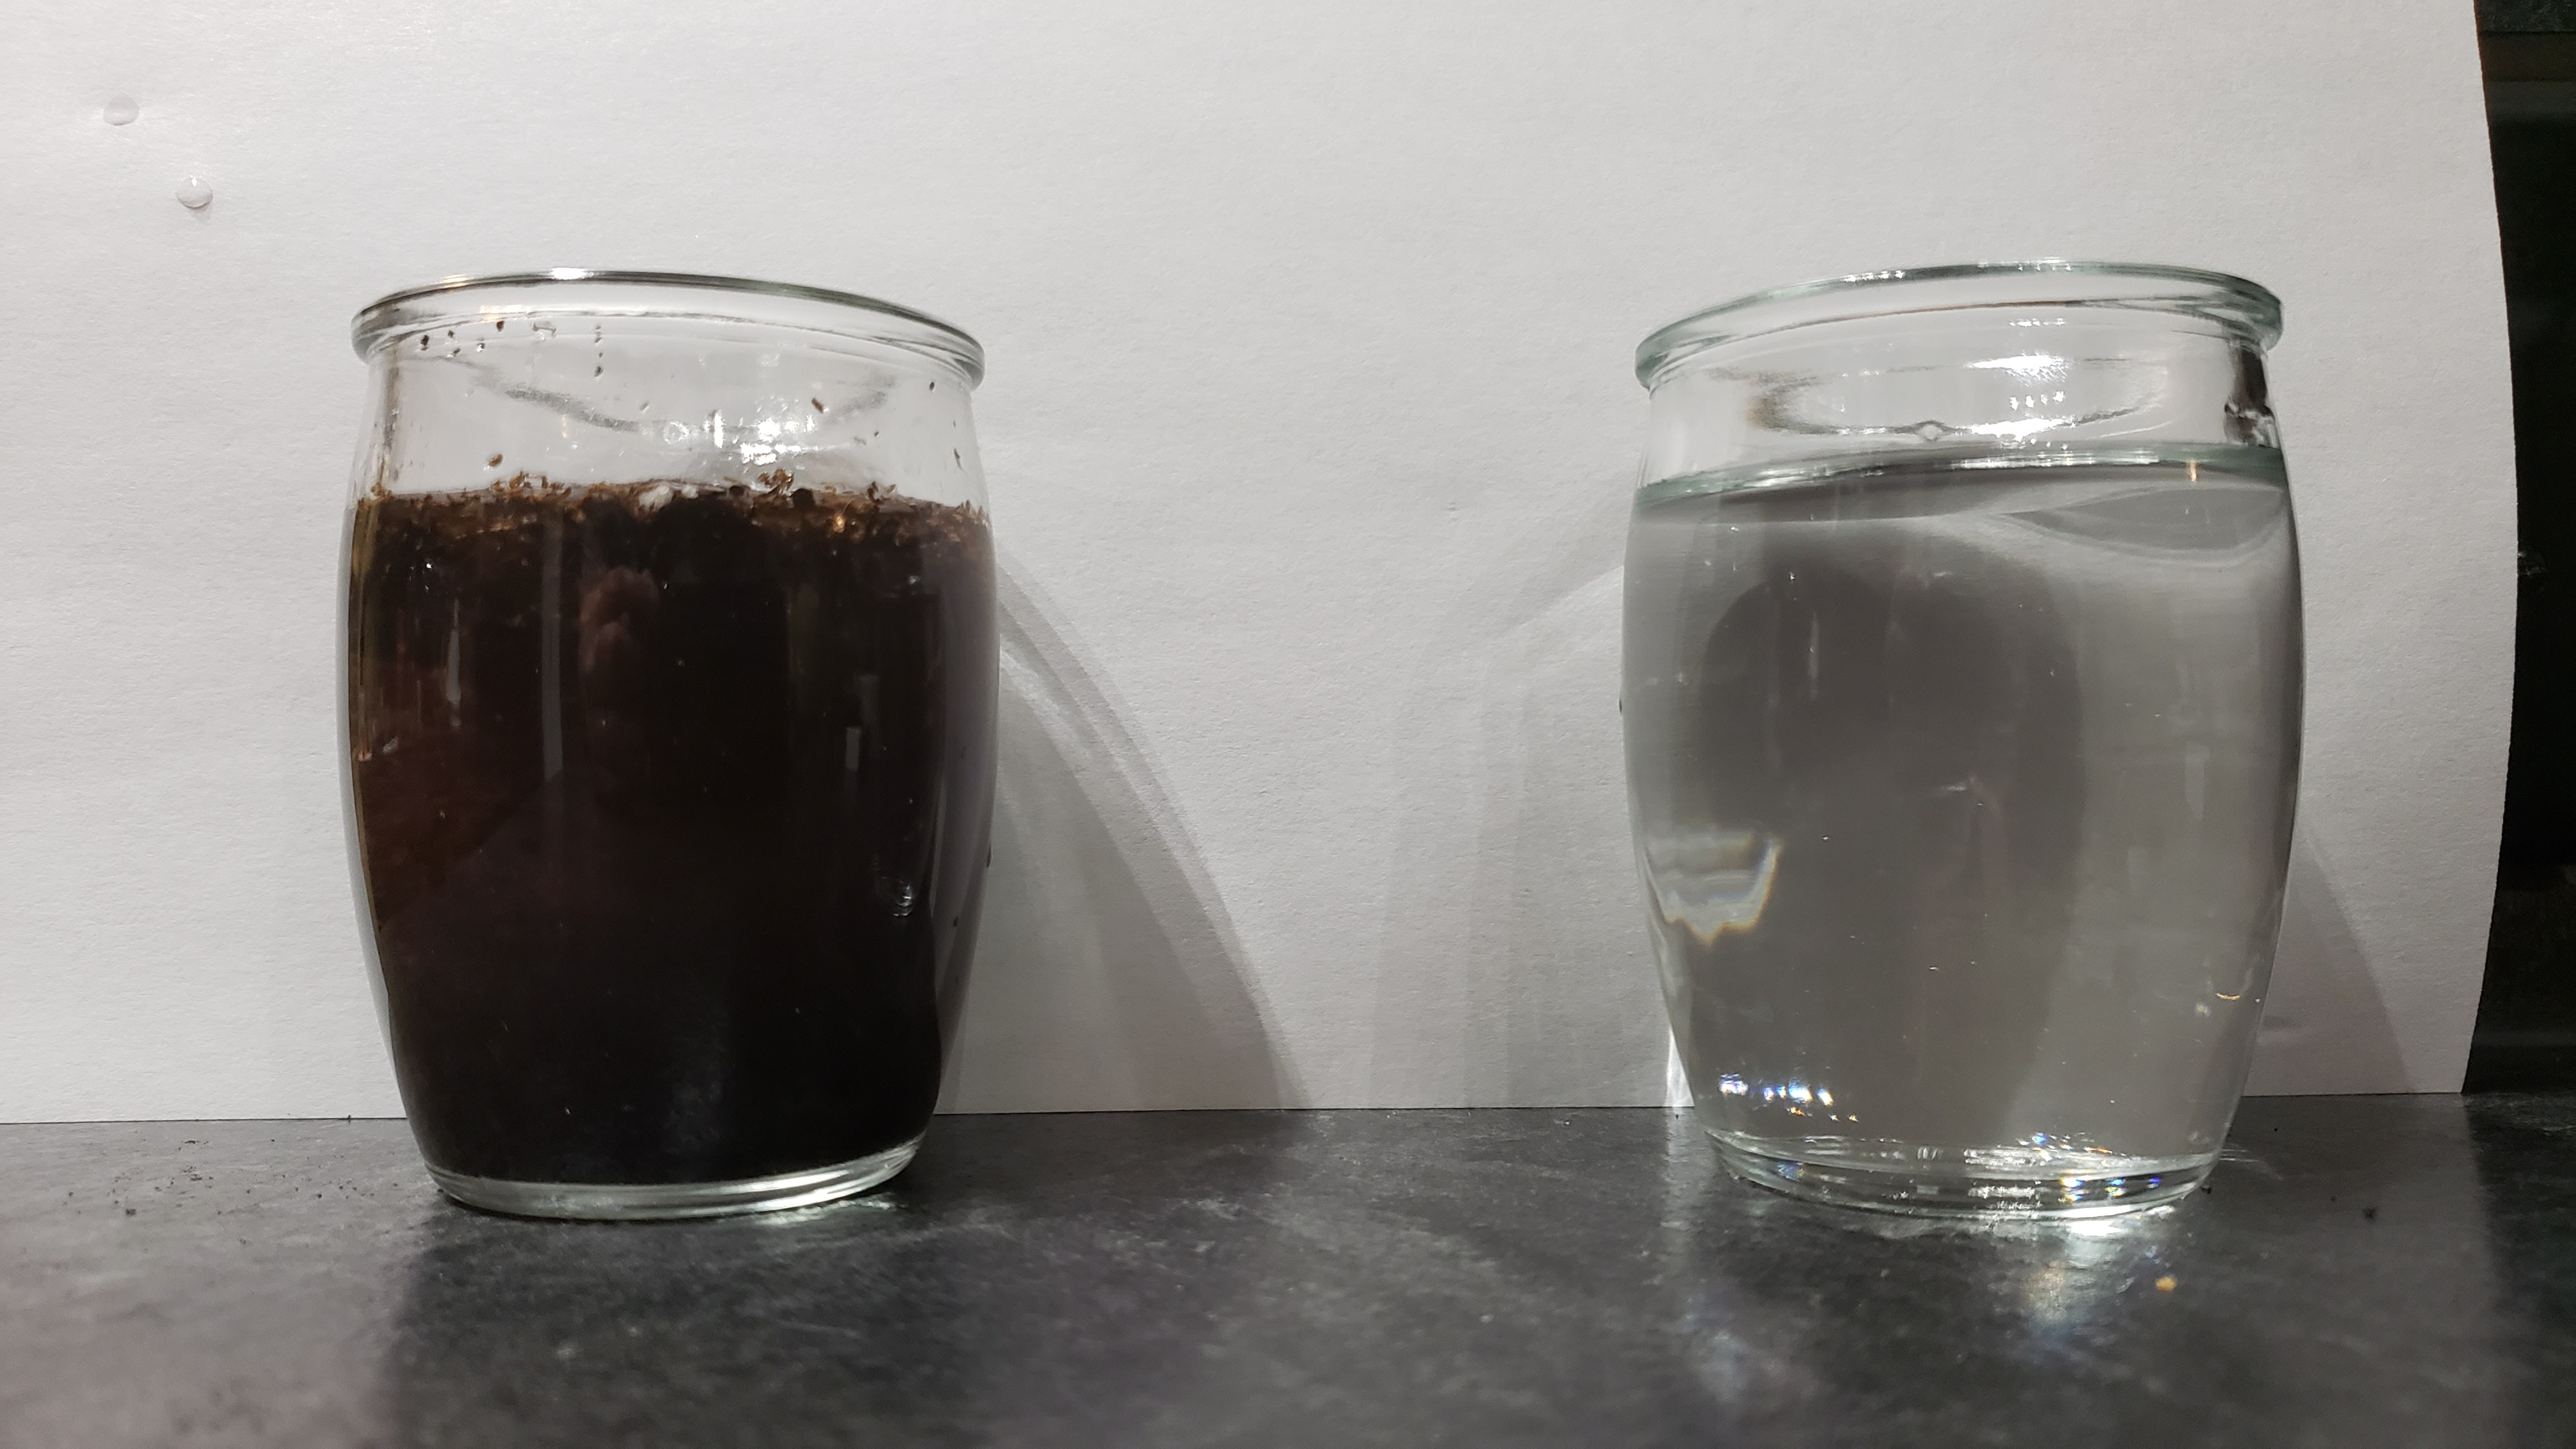
Then we took the water out of the sand filter, and poured it into two active carbon filters in a row. Each filter had two times of the activated carbon in the filters in stage 1. Each filter also had three coffee filters.The water coming out had no dirt and was clear and had no color not even pink.
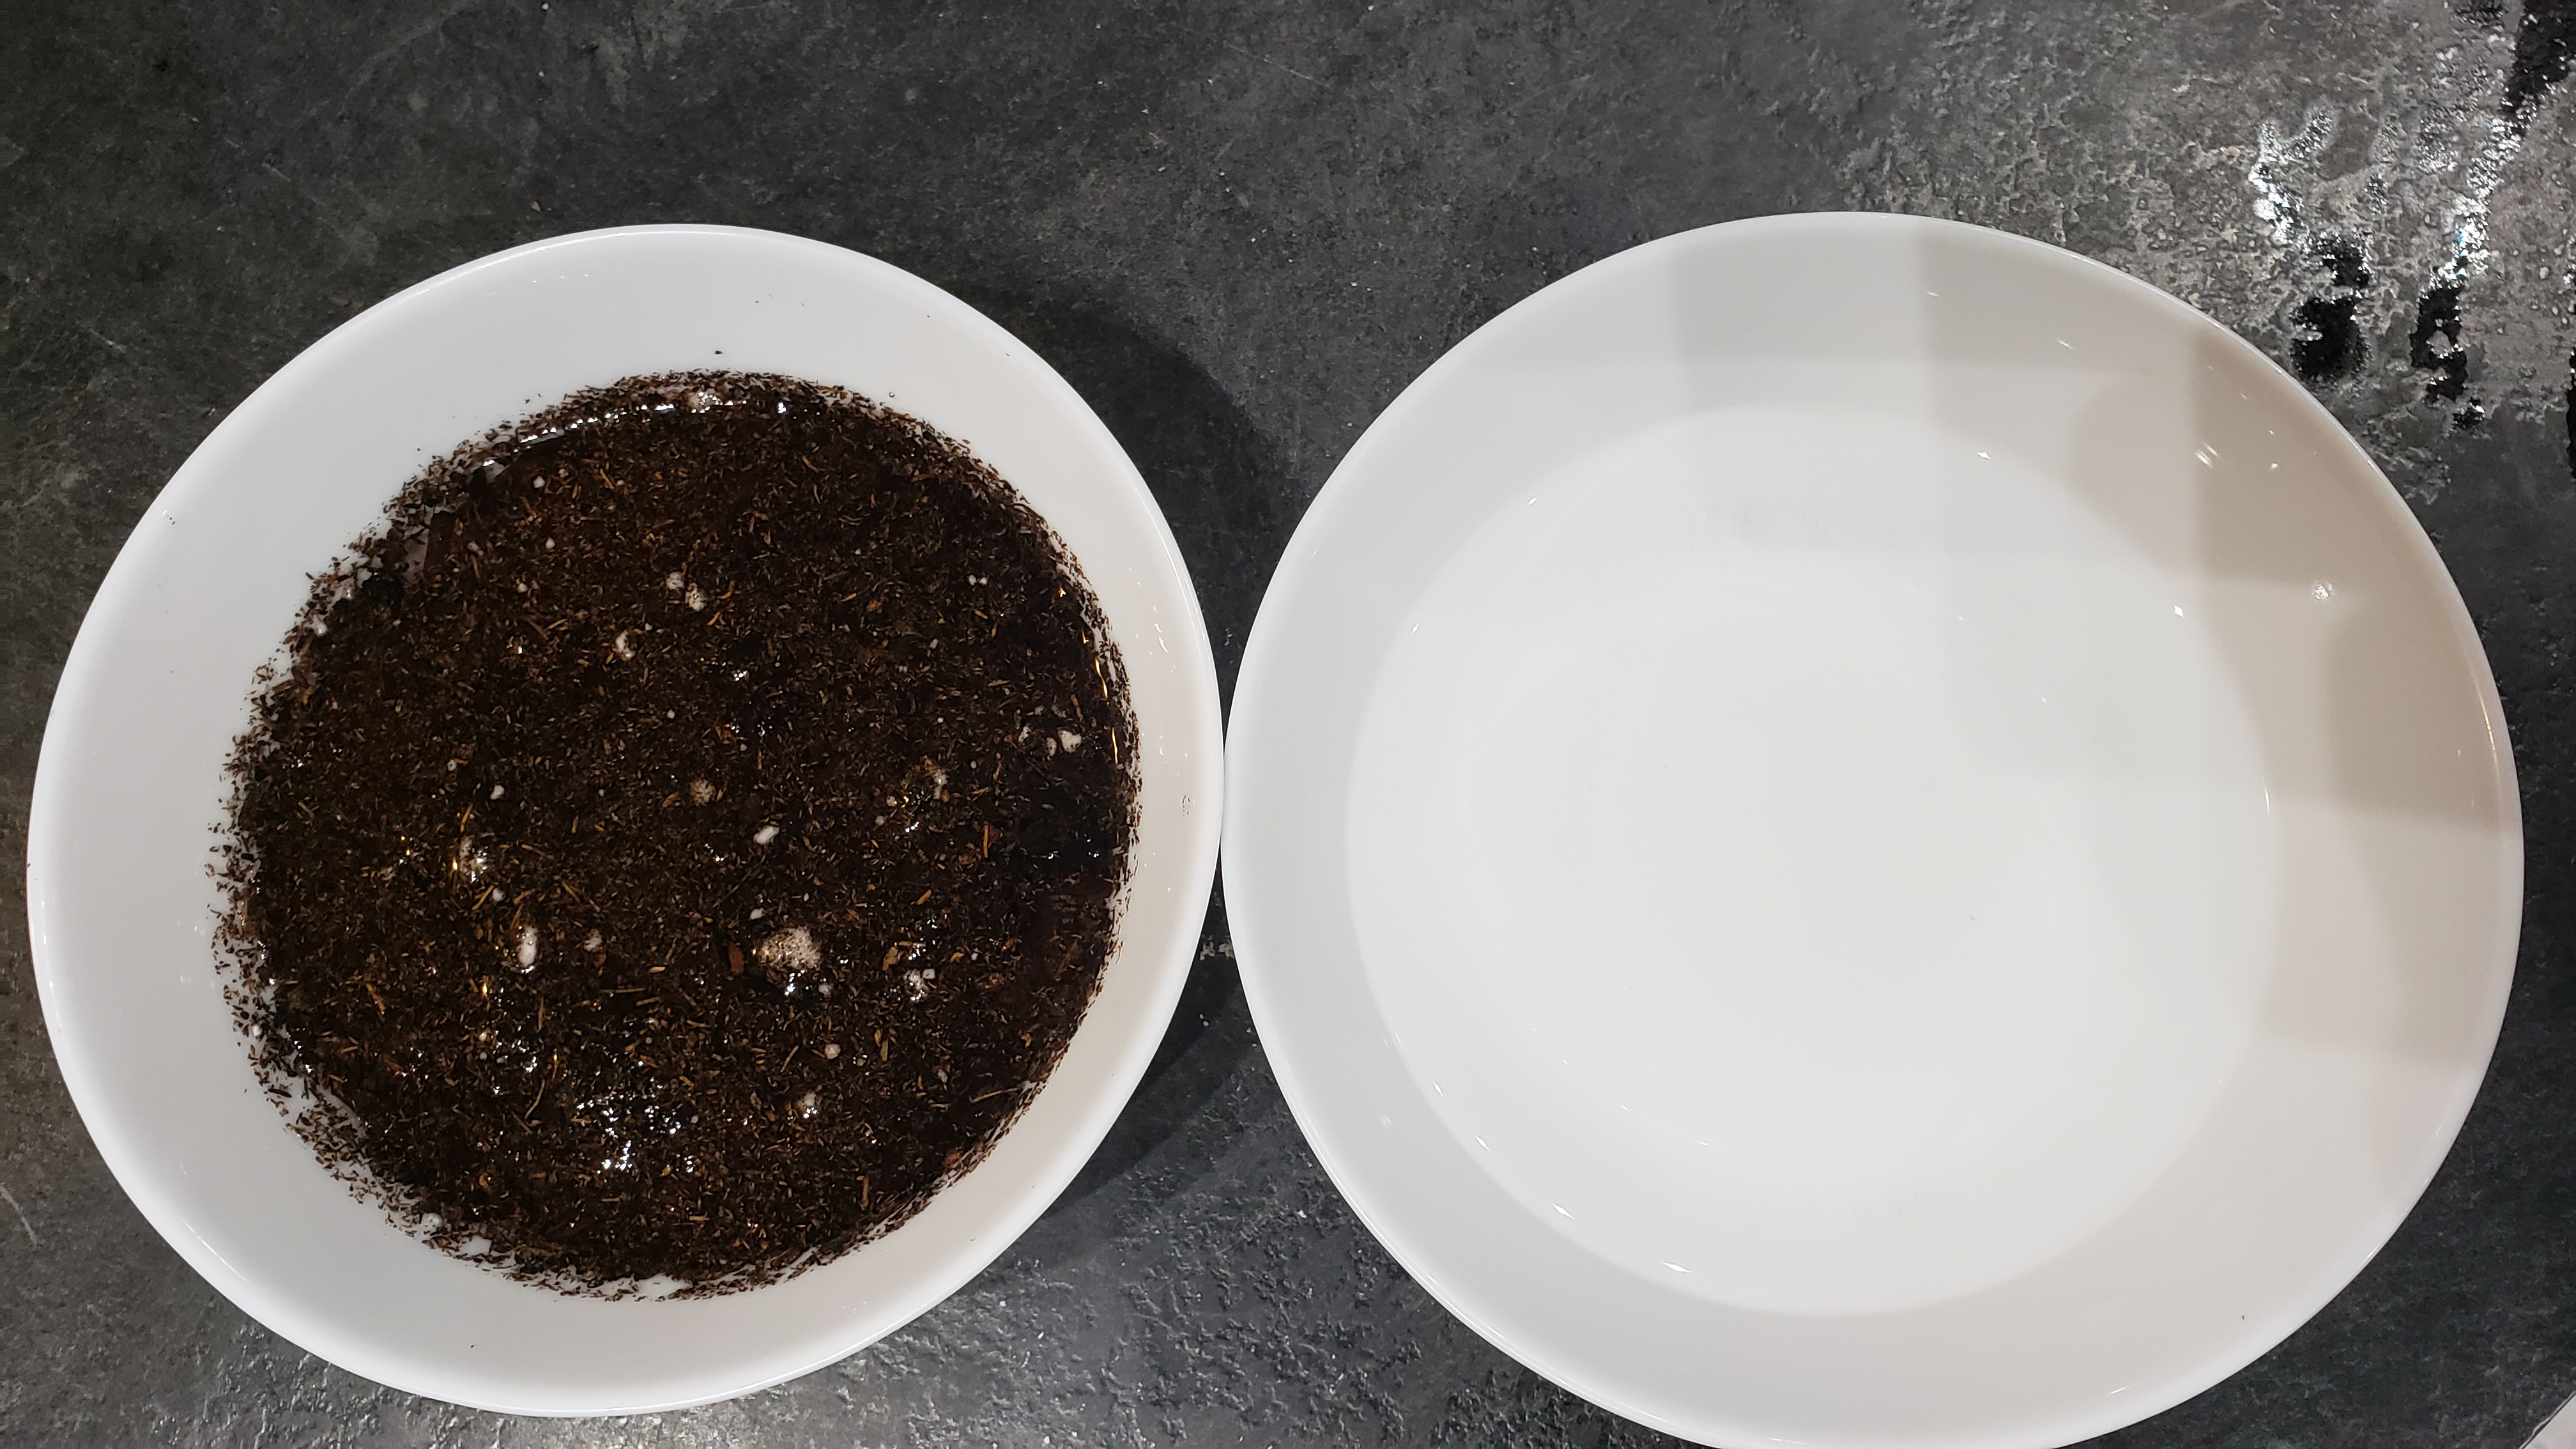
Here is the starting dirty water compared to the final clean water from our filter
Analysis
When we started, we notest that when we poured red water into the filter materials, that not a lot of it would come out. We thought that this was because the red dye water was staying in the holes between the filter materials. These holes are called pores. So then we thought we should wet the filter materials before we pour stuff on them. So then we wet them with clean water before our science experiments.When we ran the clean water through the filters and then poured the red water down it took the clean water out and it mixed in with the red water so it looked clean, but we found out and learned you have to wash it with red water first.
We also found out that some filter materials like zeolite and activated carbon has colour that comes off them. So we washed all the large gravel and small gravel and sand and zeolite and limestone and activated carbon and sponge before using them in the filter.
ANALYSIS - Red Dye
We learned that the only thing that really worked to remove red dye from water was the activated carbon, but there was still a bit of red dye that would stay in and that got us thinking what if we could make the water touch the activated carbon for longer and that is where we got the idea to make the water go through the filters 4 times to see what would happen. So we ran it through and we notest that the red dye was gone from the water.
|
STAGE 1 RESULTS - RED DYE |
|||||||
| Filter Material | Trial | Mass of Water in (g) | Volume of Water in (mL) | Mass of Water out (g) | Volume of Water out (mL) | Time to filter (s) | Observations |
|
Big gravel |
1 | 199 | 200 | 196 | 200 | 9 | Color did not seem to change |
| 2 | 198 | 200 | 195 | 200 | 10 | same as above | |
| 3 | 198 | 200 | 188 | 200 | 6 | same as above | |
| Average | 198 | 200 | 193 | 200 | 8 | ||
|
small gravel |
1 | 200 | 200 | 200 | 200 | 13 | slight reduction in colour with little sediment in water |
| 2 | 201 | 200 | 200 | 200 | 13 | same as above | |
| 3 | 189 | 200 | 200 | 200 | 11 | same as above | |
| Average | 197 | 200 | 200 | 200 | 12 | ||
|
Limestone |
1 | 200 | 200 | 199 | 200 | 10 | slight reduction in colour |
| 2 | 199 | 200 | 199 | 200 | 15 | same as above | |
| 3 | 199 | 200 | 198 | 200 | 16 | same as above | |
| Average | 199 | 200 | 199 | 200 | 14 | ||
|
Coffee Filter |
1 | 200 | 200 | 200 | 200 | 53 | no colour came out |
| 2 | 200 | 200 | 201 | 200 | 49 | same as above | |
| 3 | 201 | 200 | 201 | 200 | 42 | same as above | |
| Average | 200 | 200 | 201 | 200 | 48 | ||
|
Sand |
1 | 200 | 200 | 203 | 200 | 60 | No colour removed |
| 2 | 200 | 200 | 203 | 200 | 67 | same as above | |
| 3 | 200 | 200 | 203 | 200 | 81 | same as above | |
| Average | 200 | 200 | 203 | 200 | 69 | ||
|
Cheese Cloth |
1 | 200 | 200 | 198 | 200 | 22 | No colour removed water got stuck in cloth |
| 2 | 200 | 200 | 195 | 200 | 30 | same as above | |
| 3 | 200 | 200 | 196 | 200 | 23 | same as above | |
| Average | 200 | 200 | 196 | 200 | 25 | ||
|
Activated Carbon |
1 | 201 | 200 | 203 | 200 | 27 | slightly less pink |
| 2 | 198 | 200 | 200 | 200 | 30 | same as above | |
| 3 | 199 | 200 | 202 | 200 | 33 | same as above | |
| Average | 199 | 200 | 202 | 200 | 30 | ||
|
Sponge |
1 | 201 | 200 | 197 | 200 | 60 | did not take out any colour |
| 2 | 201 | 200 | 199 | 200 | 60 | took out a little bit of colour | |
| 3 | 201 | 200 | 198 | 200 | 120 | same as number 1 | |
| Average | 201 | 200 | 198 | 200 | 80 | ||
|
Zeolite |
1 | 200 | 200 | 204 | 200 | 81 | came out more cloudy |
| 2 | 200 | 200 | 202 | 200 | 85 | same as above | |
| 3 | 201 | 200 | 182 | 200 | 96 | same as above | |
| Average | 200 | 200 | 196 | 200 | 87 |
ANALYSIS - Potting soil
For the potting soil we only used the big gravel and small gravel and sand and activated carbon and coffee filters. We notest these were enough to clean the potting soil out of the water. The large stuff like twigs and perlite got stuck on top of gravel because it was too big to go in. The medium stuff was mostly trapped in the spaces between the large gravel rocks.The sand trapped most of the small dirt particles in their pores because not that much dirt was noticeable in the water at the end.
|
STAGE 1 - POTTING SOIL |
|||||||
| Filter Material | Trial | Mass of Water in (g) | Volume of Water in (mL) | Mass of Water out (g) | Volume of Water out (mL) | Time to filter (s) | Observations |
|
Sand |
1 | 175 | 172 | 160 | 160 | 50 | cleanish |
| 2 | 172 | 171 | 170 | 170 | 52 | same as above | |
| 3 | 178 | 175 | 172 | 172 | 95 | cleanest one | |
| Average | 175 | 173 | 167 | 167 | 66 | ||
|
Coffee Filter |
1 | 160 | 160 | 159 | 159 | 82 | no difference |
| 2 | 170 | 170 | 160 | 160 | 32 | same as above | |
| 3 | 172 | 172 | 166 | 166 | 32 | same as above | |
| Average | 167 | 167 | 162 | 162 | 49 | ||
|
Activated Carbon |
1 | 159 | 159 | 150 | 150 | 30 | slightly cleaner |
| 2 | 160 | 160 | 153 | 153 | 32 | same as above | |
| 3 | 166 | 166 | 154 | 154 | 33 | same as above | |
| Average | 162 | 162 | 152 | 152 | 32 | ||
|
Large Gravel |
1 | 199 | 200 | 175 | 173 | 12 | less dirt came out |
| 2 | 200 | 200 | 177 | 174 | 10 | same as above | |
| 3 | 200 | 200 | 180 | 177 | 8 | same as above | |
| Average | 200 | 200 | 177 | 175 | 10 | ||
|
Small Gravel |
1 | 175 | 173 | 174 | 172 | 11 | took a little dirt |
| 2 | 177 | 174 | 172 | 171 | 10 | same as above | |
| 3 | 180 | 177 | 175 | 177 | 16 | same as above | |
| Average | 177 | 175 | 174 | 173 | 12 |
ANALYSIS - Dirty Water (Potting Soil and Red Dye)
When we were doing the experiment with red dye we had to run the water through the filter four times before the red dye went away, we did not think much of it at first but later when we were doing the experiment with potting soil and red dye we had to run the water through the filter at least 4 times before it was cleaner. So the red dye experiment gave us the idea to make the dirty water go through each filter at least three times. So we did one experiment where we stacked 3 gravel filters on top of each other but got scared because it was very tall and could fall over. So we took the 3 bottles for the large gravel and we poured 1 of the bottles into the other two bottles so we only had two bottles. We also thought it would be good to put activated carbon on top of coffee filter because the coffee filter can slow things down and make the water stay with the active carbon for longer to get rid of more pink.
|
STAGE 2 - POTTING SOIL AND RED DYE |
|||||||
| Filter Material | Trial | Mass of Water in (g) | Volume of Water in (mL) | Mass of Water out (g) | Volume of Water out (mL) | Time to filter (min:s) | Observations |
|
Large gravel |
1 | 203 | 200 | 156 | 156 | Took out large chunks and some medium chunks of dirt. Water was brown with some pink. Had some small stuff in it | |
| 2 | 200 | 200 | 195 | 195 | Same as above | ||
| 3 | 202 | 205 | 181 | 181 | Same as above | ||
| Average | 202 | 202 | 177 | 177 | |||
|
Small gravel |
1 | 200 | 200 | 156 | 156 | Took out medium and small stuff. Still some dirt in the water. Water is pinkish | |
| 2 | 195 | 195 | 190 | 190 | Same as above | ||
| 3 | 181 | 181 | 174 | 174 | Same as above | ||
| Average | 192 | 192 | 173 | 173 | |||
|
Sand |
1 | 203 | 200 | 156 | 156 | Took out all dirt. Water was pink. | |
| 2 | 190 | 190 | 180 | 180 | Same as above | ||
| 3 | 174 | 174 | 168 | 168 | Same as above | ||
| Average | 189 | 188 | 168 | 168 | |||
|
Carbon with coffee filter |
1 | 200 | 200 | 156 | 156 | Water was clear | |
| 2 | 180 | 180 | 171 | 171 | Same as above | ||
| 3 | 168 | 168 | 163 | 163 | Same as above | ||
| Average | 183 | 183 | 163 | 163 |
Conclusion
The hypothesis was correct, we were able to take the red dye out from the water and the dirt out of the water using filter materials, the water looked drinkable [we did not drink the water].
Application
This work could help to clean water in aquariums. This could also help to make clean water in places that don’t have tap water. In the future, if we get lost we can maybe filter water we find using small rocks and sand and maybe make sort of drinkable water if we're desperate.
Sources Of Error
- When we would make the potting soil water, some of the dirt formed into chunks and when we would weigh the water it would also weigh the dirt chunks.
- To continue with the dirt whenever we would pour it out of the bottle some of the dirt would stay behind.
Citations
- https://www.jpl.nasa.gov/edu/learn/project/make-a-water-filter/
- https://www.lovetoknow.com/parenting/kids/homemade-water-filter-science-project
- https://www.youtube.com/watch?v=7IDRRklol8Q
- https://www.energy.gov/energysaver/articles/water-our-most-precious-resource
- https://www.eea.europa.eu/signals-archived/signals-2018-content-list/articles/clean-water-is-life-health
Acknowledgement
My dad [Arin Sen, Khylen’s dad] helped us. He cut the bottles for the filters and drilled the holes in the caps. He also showed us how to use a scale. He taught us about science and answered our questions about the project.