The Plant In space
Grade 6
Presentation
No video provided
Hypothesis
My hypothesis is that the microgravity plant will grow quicker. The reason why I think the microgravity will grow quicker is because it has a diffrent approach on how to grow a plant, and that the soil can be know to grow specific plants quick but is also known for growing specific plants slower. I think the microgravity will also produce more nutrients. What if the soil is the the problem to growing plants slowly? So I want to see if my hypothesis will be correct and if the microgravity plant will have better growth and will be healthier than a soil plant.
Research
The arudino Clinostat
Science buddies
The arduino clinostat is the thing the that will simulate the microgravity. How it simulates microgravity is that it rotates the seeds in the petri dish constantly. And that being said it makes microgravity because the constant change of direction. More information about the arduino clinostat is that it is mostly just used to simulate microgravity. Another More Scientific way that the arduino clinostat simulates microgravity is that it tilts the seeds on its axis. And that makes it inclined. An arduino clinostat is a mechanism that simulates non gravity and is also a mechanism that has not fully been studied and completely focused on. An arduino clinostat is a great and fun experiment for plant growing and a very different and interesting way to grow plants with the seeds just being contained and just having light to grow the seeds.
About soil
soil and plant nutrition
With soil growth we all know the basics. You plant seeds in soil and everyday give it its specific amount of water and light that the seeds will need to grow a plant. Other things that planting seeds in soil are useful for is it filters water, provides habitat for insects,bacteria and many more and it also provides a foundation for engineering products. That is just a few of the many things soil can do and help for our environment and planting seeds in soil. Another thing is also with planting seeds in soil is that it produces oxygen from the plant of tree it turns into. Soil is a very common thing to find almost wherever you go. It is a thing that will be everywhere because it is soil. Soil is a very good way to plant seeds and grow trees. But what happens if there is a better faster safer way to grow a plant?
What is microgravity?
Nasa- defintion of microgravity
What is microgravity? Micro means small so microgravity means the condition where gravity seems to be very small. Microgravity is not the same as zero gravity because they are not falling towards the earth they are falling around it.
The seed I am using
The seed I will be planting in the soil and microgravity is the cress seed. A little bit about the cress seed is that the cress seed contains chemicals that can possibly help lower blood sugar.
Climate change
The united nation and vital signs of the planet facts- climate change
Climate change is a very serious issue. Climate change means long-term changes in temperatures and weather patterns. These climate changes may be natural, but since the 1800s, human activities have been a big problem of climate change, mostly due to the burning of fossil fuels and gas.Climate change is changing and impacting our planet in many different ways. Average temperatures are increasing, snow lines are drawing back, glaciers are melting, sea levels are rising and lowering, and severe weather is happening way more often. Why is this happening? This is happening because… Carbon dioxide! Carbon dioxide is the main cause of human-induced climate change. It has been releasing in vast quantities from the burning of fossil fuels and it is a very long-lived gas, which means it continues to affect and change the climate system. There are other reason for climate change but this is a main reason humans are also another one.
Problems with soil
common soil problems- what are disadvanateges of soil quoara.
Problems with soil are that soil can cause soil contamination,erosion,low organic content and poor drainage. There are obviously many other reasons and problems with soil but these ones are for me main problems. A big threat today to soil is soil erosion if you don't know what erosion means it means that water, wind, and other natural forces cause rocks and earth to wear away. Soil has many disadvantages even though it is a good source to produce oxygen it has disadvantages like soil can be blown away by natural forces such as water and wind. Soil can also become compacted, making it difficult for plant roots to puncture and for water. Other problems with soil is that when it is compacted or flooded with water there is no room for the plant or tree to thrive.
Information about the Arduino Clinostat
How does the Arduino Clinostat simulate microgravity? It constantly has the petri dish moving. When a plant is growing the gravitational pull is brining and showing the plants roots wear to grow. With the microgravity it does not show the plant which way to grow its roots. There is no gravitational pull to show the seed where to go so it just grows wherever. That is how it simulates microgravity. The constant change of direction. With the Arduino Clinostat as soon as you place the seeds in the petri dish you can see the growth of the seeds in 24 hours! Then in 1-2 days you can see the plant roots start to grow fully and see the plant start to grow throughout the rest of the days. You can also have different type of rotations to grow the plant. There is the 360 rotation the 90 degree rotation and the rotation where each day you do one 360 rotation and do that each day at the same time.
The roots of a plant
About the roots of a plant and tree. Roots are something a plant and tree needs to live. Roots produce and give a plant and tree nutrients, water and many other things, but how do roots know which way to grow? How do they know to grow in the soil? The answer is the gravitational pull. Gravity somehow shows roots the way to grow. Another things roots do is they anchor trees and plants. It's mostly for trees because when a tree is first growing the roots grow underground but they can also grow on top of soil to where we can see the roots coming from the tree.
What is seed germination?
Seed germination is when a plants seed grows from a seed into a seedling. How all seeds can germinate is when provided water, oxygen and proper temperature for your plant. I know you are now thinking the microgravity plant does not use water or soil so how can it germinate? The microgravity plant can still germinate but the experiment needs to be controlled with the right hardware, seeds can germinate. What does needing to be controlled with the right hardware mean? This means for people who have a more advanced growing system for the arduino clinostat or for the climate around the plants growing in microgravity is that it needs to be a perfect temperature for germination to happen with LEDS. It can't be to warm or too cold. For the people that are just doing the climate around the plant in microgravity research about your plant and its climate.
Microgravity and Soil
After seed germination happens do you have to put the seeds that are growing in microgravity back in soil? It is optional. It all depends on if you want to continue the experiment and see what happens or take the seeds out and put them back in the soil. You can keep the seed in the petri dish after seed germination but it might get a little cramped for the plants when they start to grow bigger. Scientists recommend not taking a germinated seed out of soil and transporting it to another place to grow or washing it. With the microgravity plant I say continue growing the seed in microgravity even after it germinates just to see the growth and if it is better. Once conducted that experiment once you can do the same experiment but once the seed germinates transport it to the soil. Then she which one is better for you or if it works to keep the seed that has germinated in the petri dish.
Seed germination
How do you know the seed has germinated? How you know the seed has germinated is when the seeds absorb lots of moisture within 2 days. Which means for example one day you give your plants lot of water and in a few hours you go back to check up on it and when you touch the top of the soils surface and it is dry all the sudden, and it continues to be like this within the next 2 days. The plant will also produce a root and you should see a leaf grow within four days for the plant to germinate. You will most likely not be able to see the root when it grows because it will grow underground unless you are growing it in the microgravity. You will be able to see the leaf in the microgravity and soil.
Variables
- Dependant variable: My dependant variable is the plant, because it changes and grows.
- Independent Variable: The independent variable is also the seeds because they change and grow.
- Controlled Variables: Arduino Clinostat (the thing that holds the seeds and spins them) The soil (for the growth of the normal plant) and the petri dish
Procedure
For soil plant:
- Go to walmart and buy small set of planting cups or buy a single small planting cup to place your seeds in.
- Buy soil from walmart
- Buy seed from walmart
- Apply soil to the top of the cup
- Then dig 3 tiny holes with your finger into the soil that has just been placed
- Place the the 3 seeds in each of the 3 holes just made
- Then put slightly more soil on top of the 3 holes
- Place the cups in an area will they will receive sun
- Then water plant every next day. For example: Water plant Monday skip tuesday and then water it again wednesday.
- Give plant 1 full tablespoon of water when you do decide to water the plant
For Arduino Clinostat:
- Search arduino clinostat online and go to the website science buddies, then open amazon on a new tab.
- Look at science buddies kit it provides and if you want to but the science buddies one or the ones of amazon.
- If you chose to do one of amazon look through the kit to see if it has the exact materials that the science buddies kit has. ( is also okay if it has extra pisces or slightly different pieces)
- Order the Arduino Clinosts that you chose to buy.
- When it arrives go back on the science buddies website that had information about the Arduino Clinostat.
- It will provide instructions on how to build your knew arduino and how to code it.
Steps to build the arduino clinostat { These insructions are all from Science buddies since I cant write the insrtuction differently so all credit goes to Science buddies for helping me with this expirement and instructions}
1. Make the following connections on the breadboard (Figure 4).
Connect the Arduino 5V pin to the power bus (+) on the breadboard.
Connect the Arduino GND pin to the (-) bus on the breadboard.
Put the potentiometer in the breadboard. Make sure the three pins are in three different breadboard rows.
Connect one of the potentiometer outer pins to the power bus.
Connect the other outer pin to the ground bus.
Connect the middle pin to Arduino analog input pin A0.
Important: since this experiment needs to run continuously for long periods of time, you will need to leave your Arduino plugged into external power. You can just leave it plugged into the USB port on your computer after uploading your code, or you can plug it into a separate USB charger. Do not use a 9 V battery for this project, as running the motor continuously will kill the battery quickly.
Steps to build the arduino clinostat ( all instructions from science buddies)
2.Connect the servo motor to the circuit. Your servo motor has three wires. Check your servo motor's documentation to confirm the color coding for the wires. The servo shown in Figure 4 has the following connections. Your servo may be different.
Orange: signal (Arduino pin 8)
Red: power (breadboard power bus)
Brown: ground (breadboard ground bus)
Open the Arduino IDE.
Plug your Arduino into your computer with the USB cable.
Make sure you have the correct board and port selected under Tools.
Copy and paste the following code into the IDE, save it, and upload the file to your Arduino.
Steps to build the arduino clinostat ( all instructions from science buddies)
// code to control continuous rotation servo with potentiometer
#include <Servo.h>
Servo myservo; // create servo object to control a servo
int pot; // variable for potentiometer analog reading, 0-123
int speed; // variable for servo speed, 0-180.
// servo is STOPPED at speed = 90
// full speed in either direction at 0 or 180.
// this is NOT the servo's angular position
void setup() {
// setup code that only runs once
myservo.attach(8); // use pin 8 to control the servo
void loop() {
Steps to build the arduino clinostat ( all instructions from science buddies)
// code that loops repeatedly
pot = analogRead(A0); // read analog voltage from potentiometer
speed = map(pot, 0, 1023, 0, 180); // convert analog reading 0-1023 to speed 0-180
myservo.write(speed); // send control signal to servo
4. Turn the potentiometer. You should be able to use it to control the motor's speed. The motor should stop when the potentiometer is approximately in the middle. If your motor does not work, carefully double check all of your wiring.
Turn the motor off for now.
Build a frame or support for your clinostat. The frame should support the motor so it is mounted horizontally, high enough in the air that it can rotate a petri dish without the petri dish hitting the ground. Figure 5 shows an example.
Make sure you press the servo horn onto the motor's shaft, as shown in Figure 6. You will use this to attach the petri dish.
A support frame for the clinostat made from scrap wood. The motor is attached to the tall piece of wood with double-sided foam tape.
For the petri dish and agar solution
- Go on amazon and search petri dish with agar solution.
- Each petri dish set will contain at least 11 petri dishes depending on the one you select they will also contain cotton swabs for other experiments. You will not need to use the cotton swab.
- When you receive your petri dish pack take the agar solution out
- Get a small pot out
- Measure 1.5 g of agar-agar.
- Then put 100 mL of tap water in the pot.
- Boil the agar-agar solution until it is clear (approximately 1–2 minutes). Stir the agar solution while boiling to prevent lumps from forming
- Top: the agar-agar solution will be cloudy when you first start to boil it. Bottom: the solution should become clear within a couple minutes.
- Wait for five minutes for the solution to cool down.
- Fill the petri dishes about halfway with the agar-agar solution. Make sure the complete bottom surface of each petri dish is covered
Observations
For soil plant
Day 1 (Thursday): No growth in any of the 4 plants
Day 2( Friday): No growth in any of the 4 plants
Day 3 (Saturday): No growth in any of the 4 plants
Day 4 (Sunday): No growth in any of the 4 plants
Day 5 (Monday): No growth in any of the 4 plants
Day 6 (Tuesday): No growth in any of the 4 plants
Day 7 (Wednesday): In pot 1 a plant sprouted with no leaves and is 5 mm in height, for the other 3 plants there is not growth in them.
Day 8 (thursday): Pot 1 seed grew and is now 12 mm and has produced 5- 6 leaves, as for the other plants there is no growth in them.
Day 9 (friday): Pot 1 grew in height and in leaves, there are about 5-6 leaves and in height is 16 mm.
Day 10 (saturday): Pot 1 plant has gotten bigger in height is 22 mm and has 6 leaves. The plant in pot 2 that had just sprouted is now 10 mm with 5-6 leaves.
Day 11 (sunday): Pot 1 has gotten bigger in height and has same amount of leaves, in height is now 28 mm and has 6 leaves, another plant in pot 1 has sprouted and is now 2 mm, the first plant to grow in pot 2 is now 17 mm and has 5-6 leaves.One seed in pot 3 has started to sprout, 2mm
Day 12 (Monday): Pot 1 plant is now tall and still has 6 leaves, in height it is 37 mm and for the second plant in pot 1 it has 6 leaves and is 14 mm, another plant has sprouted in pot 1 and is 2 mm with no leaves, in pot 2 the first plant to grow has 6 leaves and is 25 mm and for the second plant in pot 2 it is 11 mm and has 5-6 leaves, the third pot’s plant is 12 mm and has 5-6 leaves.
Day 13 (Tuesday): The one seed that had sprouted a while ago is taller and is now 47mm, the second plant to sprout grew in height,25mm. And the 3 plant to sprout grew in height, 11mm and has produced one more leaf. In Pot 2 plant one continues to grow and is starting to divide into two shoots 32mm, second plant is taller and now has 6 leaves, 16mm. In pot 3 the plant continues to grow 19mm, and has 5 leaves
Day 14 (wednesday): The first plant to sprout continues to grow, 53mm and the second plant to sprout continues to grow, 30mm and it has divided into two shoots. Plant 3 to sprout continues to get taller 16mm. In pot 2, plant one continues to get taller and each shoot is growing, 40mm, the second plant is taller, 25mm and it looks like its going to divide into two shoots as well. In pot 3, the plant has continued to grow, 28mm, still only plant in this pot.
Day 15 (thursday): In Pot 1, the first plant grew and a third shoot is starting to grow from it as well (with more leaves) 64mm. The second and third plants continue to grow, 37mm & 20mm. In pot 2, plant 1 has grown taller, 45mm. Plant 2 has grown taller and the two shoots are more pronounced, 37mm. In Pot 3, the plant has grown taller, but still hasnt divided like the other plants have, 39mm.
For micogravity plant:
Due to cost and limeited amount supplies {petri dishes and agar solution + the fast growth of the micorgravity plant and the fragility of the seeds I need to conduct this part of the expirement closer to the science fair so that the plants don't die before beacsue I can't run this expirement multiple times and the cost of expirement material, because the arudino clinostat needs to run 24h a day for it to be micorgravity once I stop the matchine it can change the results}
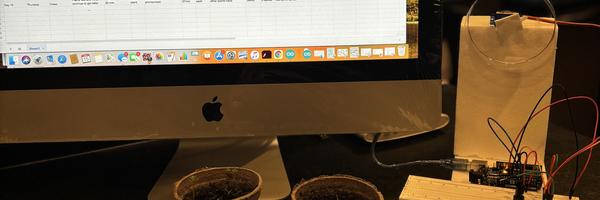
I have my arduino clinostat set up and ready to go and the soil plants as you can see is ready.
Analysis
For the soil plant:
For my plants it took and averdge of 9-10 days to see the plant break through the soil. Once they started growing the growth was either rapid or slow, ceratain plants seemed to thrive while others seemed to struggle, I noticed that all the plants grew with leaves almost immedietly and dividied into 2 shoots later on.
For the micoegravity plants:
I have not done the analysis for the micorgravity plant as said before because materials are limited and that I cant have the motor going for a month.
Conclusion
I think that the microgravity plant will be the one to grow quicker than the soil plants. I think this because I will be able to see seeds sprouting immedietely due to being planted in argar solution and in a clear petri dish vs the potted plants that are in an container and soil. After running the clinostat, I will be able to tell if this method of growing plants is faster by compairing the growth rates (in size mm) compared to the growth of the sprouts from my potted plants
The reason why I am saying I think is becasue I can not yet conduct this expiremnt due to the arduino clinost sensitivities. The materials are expensive, I only have limited supplies (of argar and petri dishes), the matchine needs to run 24h a day once I start the experiment, so it won't be possible for me to run it straight for a month. I also worry for the plants dying due to being planted in argar vs soil.
Application
How my question could help in the future is we all know deforestation is happening and what if at some point in the future all our trees and plants are gone, and we have no oxygen. I think my idea is futuristic because it could help produce trees and plants in the future and it can be maybe be a huge thing in the future that might even be a way that we will be producing trees and plants. I also think my question could help beacuse it can bring more recognition into trying to focus on growing plants in a possibly healthier and better way for our environment to where it can have a large impact on trying to make our world cleaner and helping trying to create less climate change.
Sources Of Error
What could have gone wrong with the experiment or what would have changed the results was the arduino clinostat. The arduino for the microgravity plant could have not functioned well or the coding could have been incorrect and programmed to do something else that would not make the plant grow. Another thing that could have gone wrong was that the plants did not grow, they would have not been able to grow in the microgravity and I would have had no experiment.
Citations
https://www.sciencebuddies.org
Soil and Plant Nutrition: A Gardener's Perspective
https://extension.umaine.edu › ... › Soils
University of Maryland Extension
https://extension.umd.edu › resource › common-soil-p...
Vital Signs of the Planet - Effects | Facts – Climate Change
https://climate.nasa.gov › effects
What are the disadvantages of soil? - Quora
https://huntington.org › educators › plant-parts-patterns
Is it a problem if a germinating seed is taken out of the soil ...
GARDEN CRESS - Uses, Side Effects, and More - WebMD
https://www.webmd.com › ingredient mono-453 › gard...
Germinating Seeds - WVU Extension - West Virginia University
https://extension.wvu.edu › news › 2021/02/01 › germin...
How Do Plants Grow in Microgravity? - JAXA
JAXA | Japan Aerospace Exploration Agency
https://global.jaxa.jp › special › kibo › takahashi_e
https://www.nasa.gov › growing-plants-in-space
Measuring seed germination - IRRI Rice Knowledge Bank
http://www.knowledgebank.irri.org › fact-sheets › meas...
Acknowledgement
I would like to thank my mom Melissa Lee for assisting me with building my Arduino Clinostat, making sure I had the correct materials for my project and assisting me with the coding.
I would like to thank all the websites I used to collect my information for my project.
I would also like to acknowledge my wonderful grade 6 teacher Srita. Rivas and Sra. Encalada for helping me do my project correctly and letting me know what to write and apply to my project.
I would like to thank my family for giving me moral support
Attachments
No Log Book Provided
View Extra Attachment: report/data/exhibit/etc(may download a file)