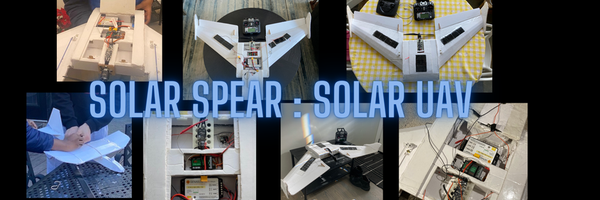
Solar Spear: Efficient Solar UAV
Grade 9
Presentation
Problem
Can we create a highly maneuverable, off-the-grid, solar-efficient UAV?
Method
1. Identify type of flying being done. Is it speedy aircraft, or a slow flyer?
2. Identify power requirements for that type of flying.
3. Identify solar cells that can suitable power the aircraft to your needs
4. Find aircraft that can meet these designs, or design something.
5. Repeat steps 1-4, until you have found a perfect match of cells, power, and aircraft.
6. Put the aircraft together and take it for a flight without solar cells.
7. Once you have gotten experience flying your plane, put on the solar panels, an wire up the electronics.
8. Test the aircraft on the ground
9a. Fly the plane and get a feel for the new weight distribution
9b. Make any changes that will benefit the plane. This includes reinforcing, fixing, and adding features. If the plane crashes, identify the point of failiure and fix it. Some points of failiure are necessary though.
10. Collect data from the plane, such as flight time, charge time, flight time without solar cells, and more.
Analysis
Improvements:
To begin with, there could be more solar panels. We couldn’t do this however, due to the cost of buying new solar cells and installing them. We could have also made the plane bigger and fit more high-efficiency solar panels. The reason we didn’t do this was because of cost, as the solar panels would be expensive, and the motors and battery would make it even more expensive. Along with the fact that a larger form factor could be slower, less maneuverable, and would require more expensive materials. We could upgrade to having 24 solar cells on the plane, which would significantly bring down the charging time to 3.6H; this is because each 1.5V panel outputs 200mA, which means three groups of 8 panels wired in series could output 600mA of current.
Testing:
To test our design, we went to a field and flew until the battery ran out. Most of our improvements came from the crashes, however. For example, the constant breaking of the winglets caused us to reinforce them. This ended up also being a worse fix, as it was one of the reasons the wing completely broke off iteration 2. The broken wings were fixed by adding carbon fibre rods. Similar things were proven to be a point of failure and were fixed provided it was not too expensive. One of our biggest assets of this project is that we weren't afraid of flying, this allowed us to fly, break, fix, and repeat.
Applications:
A perfect prototype could be used in all forms of surveillance, with long-range FPV and more. This prototype could only be used for short-range FPV due to the cheap camera and transmitter. A little more time and funding could lead this project to become the standard for UAVs.
Data:
The battery is rated at 2200mAh, which is the capacity of the battery for the battery. To estimate how long it will take to charge, we can use the formula Battery Capacity (mAh) ÷ Charge Current (mA) = Charge time. So if we take 2200mAh ÷ 200mA = 11H, certa inly not very efficient. Now, when tested, the battery voltage went from 10.12V to 10.56V in about 3H of time in daylight (sufficient to charge), which means the voltage approximately goes up by 0.14V per hour. Clearly quite a lot of room for improvement.
Analysis
The battery can be safely discharged to 3.3 volts per cell. The battery is fully charged to 4.2 volts. This means that the battery needs to charge 0.9 volts. If the 0.14 volt charged per hour rate is constant, this means that the battery will charge in 6.5 hours.
But how is the original estimated charge time 11 hours? This occurs because you can only discharge the cells to 3.2V (If you don’t want to damage the battery), Essentially, the calculation accounts for the completely discharged battery to be charged. This number could be improved, however, by increasing the number of solar panels as mentioned before.
Conclusion
Conclusion:
The plane did not successfully solve all the aspects of the problem. It was not as efficient as we wanted, since the solar panels did not give enough power to efficiently charge the UAV. It was, however, highly maneuverable and off-grid, as the solar panels could charge the plane, albeit taking a long time. In the end, as we were selected for CYSF, we decided to make one last plane that was the best.
Citations
Riley, D. [rctestflight]. (2019, October 1). SOLAR Plane V4 Flying WInd [Video]. YouTube. Retrieved February 10, 2024, from https://www.youtube.com/watch?v=SwbJJoe09DI
Solar Glider Project. (2020a, January 15). Power supply of a solar powered aircraft [Video]. YouTube. Retrieved February 3, 2024, from https://www.youtube.com/watch?v=AtUCj9whVq4
Bixler, J. [FliteTest]. (2016, October 5). FT Spear - BUILD | Flite Test [Video]. YouTube. Retrieved January 13, 2024, from https://www.youtube.com/watch?v=B5dqMtpdbcU
Wright, L. [Lee Wright]. (2020, May 25). The *ULTIMATE* BMS Guide [Video]. YouTube. Retrieved March 13, 2024, from https://www.youtube.com/watch?v=fecYPsSDvAQ
Davereap. (n.d.). KFm wings a basic explanation. Flite Test. https://www.flitetest.com/articles/kfm-wings-a-basic-explanation
Acknowledgement
This project was inspired by rctestflight's video. In the video, he made a solar plane that became a base of our knowledge. We made changes to the design, such as intially making a plane from Flite Test. We also made the plane more speedy and maneuverable, as infinite flight was not one of our goals. The final design uses the kf airfoil, and has a similar shape.
We used one of Flite Tests foam wing designs, for our initial planes. We ended up not using their design for our final plane, to make sure everything worked together. Nevertheless, we used several of their products to make this plane.
Finally, our parents who helped fund this project and helped us with design choices, recording airplane flights, and more.