Bioplastic Blueprint: Reinventing ABS
Grade 8
Presentation
No video provided
Hypothesis
Research
What is a Bioplastic?
When someone refers to a plastic, they are talking about one of the countless materials made by large complex molecules made of a consistent and a repeating subunit, usually a hydrocarbon monomer that has formed a polymer. At the moment, most plastics are oil based and for good reason. Oil is cheap and readily available for use. Right now, the most popular type of plastic is called polyethylene. This plastic is made of oil and because of the advancement of injection molding techniques can be used for practically anything (Rober, 2020).
Bioplastics are exactly this, a polymer but in this case they are derived from plants. In fact the first plastic was a bioplastic called Celluloid. Though we are not aware of it, bioplastics are used relatively often, especially in 3d printing. In 3d printing there are two primary plastics used, ABS and PLA. PLA is actually very useful and is sometimes a better material due to its lower melting point (ThinkBioplastic, 2019).
There is some confusion around bioplastics because of there being two main types, biobased plastics, and biodegradable plastics. Biobased refers to its origins but doesn't necessarily mean that it is biodegradable in comparison to biodegradable plastics which are consistently biodegradable but aren't necessarily derived from plants (ThinkBioplastic, 2019).
Recipe List
Some Modifications Made to Recipes
Recipe #1: How To Make A Bioplastic In Your Kitchen
URL:
Base Ingredient: Cornstarch
Materials:
- Measuring cups (cup, tsp).
- Plastic bag (1).
- Microwave (1).
Ingredients:
- Cornstarch, 1 cup (≈ 119.998 g)
- Water, 1 cup (≈ 236.588 ml)
- Vegetable Oil, 1 Tsp (≈ 4.929 ml)
- Food coloring (optional)
Instructions:
- Begin by adding equal parts of cornstarch and water, about a cup of each, into your baggie.
- Next, add a teaspoon of vegetable oil and a few drops of food coloring if you want.
- Then, seal the baggie well. And mix, mash, and massage the baggie until everything is mixed well.
- Open a corner of the baggie, so it can vent, place it on a plate, and set it in the microwave. Cook your baggie for about 25 seconds on high.
- Wait about a minute or so for the baggie to cool.
- Once, the baggie is cool to the touch, remove your cornstarch plastic and mold it into whatever you like!!
Recipe #2: 3 Ways to Make Bioplastic: Using Cornstarch and Vinegar
URL:
https://www.wikihow.com/Make-Bioplastic
Base Ingredients: Cornstarch and Vinegar.
Materials:
- Stove
- Saucepan
- Silicone
- Spatula
- Foil or Parchment Paper
- Toothpick (if needed)
*Quantities will be as much as needed, and will vary with each experiment.
Ingredients:
- Distilled water, 10 ml (≈ 2.029 tsp)
- Glycerol, 0.5-1.5 g (≈ 0.141-0.423 tsp), (must be vegan)
- Cornstarch, 1.5 g (≈ 0.423 tsp)
- White Vinegar, 1 ml (≈ 0.203 tsp)
- Food Coloring, 1-2 drops
Instructions:
- Gather the necessary materials. To make this type of bioplastic, you will need cornstarch, distilled water, glycerol, white vinegar, a stove, a saucepan, a silicone spatula, and food coloring (if desired).These items should be readily available at the grocery store or online. Glycerol is also called glycerine, so try searching for that if you’re having trouble finding glycerol.
- Combine all of the ingredients and stir together. Add all of the ingredients to the saucepan and stir to combine with the spatula. Stir until you get rid of most of the lumps in the mixture. At this stage, the mixture will be a milky white color and quite watery. If you add the wrong amounts of ingredients, just dispose of the mixture and start again.
- Heat on medium-low. Place the saucepan on the stove and set the heat to medium-low. Stir continuously as the mixture heats. Bring it to a gentle boil. As the mixture heats, it will become more translucent and begin to thicken.
- Remove the mixture from the heat when it becomes clear and thick.
- Total heating time will be around 10-15 minutes.
- Lumps may begin to form if the mixture gets overheated.
- Add one-two drops of food coloring at this stage, if you would like to color the plastic.
- Pour the mixture onto foil or parchment paper. Spread the heated mixture onto a piece of foil or parchment paper to let it cool. If you would like to mold the plastic into a shape, it must be done while it is still warm. See the last method for details on molding the plastic.
- Remove any bubbles that you see by poking them with a toothpick.
- Allow the plastic to dry for at least two days. It will take time for the plastic to dry and harden. As it cools, it will begin to dry out. Depending on the thickness of the plastic, it can take longer for it to dry. If you make one small thick piece it will take longer to dry than a thinner larger piece.
- Leave the plastic in a cool, dry place for this process.
- Check the plastic after two days to see if it has fully hardened.
Recipe #3: 3 Ways to Make Bioplastic: Using Gelatin or Agar
URL:
https://www.wikihow.com/Make-Bioplastic
Base Ingredient: Gelatin or Agar (Agar in this case)
Materials:
- Saucepan
- Stove
- Spatula
- Candy Thermometer
- Anything that can heat up the water
- Container for hot water
- Whisk (If needed)
- Foil or Parchment Paper
*Quantities will be as much as needed, and will vary with each experiment.
Ingredients:
- Glycerol, 3 g (≈ 0.845 tsp), (must be vegan)
- Gelatin or Agar, 12 g (≈ 3.381 tsp), (I will be using agar)
- Hot Water, 60 ml (≈ 4.058 tbsp)
- Food coloring (optional)
*Agar is a substance derived from algae that can be used in place of gelatin to make the bioplastic vegan friendly
Instructions:
- Gather the necessary materials. To make this type of bioplastic, you will need gelatin or agar powder, glycerol, hot water, a saucepan, a stove, a spatula, and a candy thermometer. These ingredients should be readily available at your local grocery store.
- Stir together all of the ingredients. Combine all of the ingredients in the saucepan and stir until there are no clumps left. You may need to use a whisk to disperse all of the clumps. Place the saucepan on the stove and start heating the mixture on medium-high heat.
- If you want to color your plastic, you can add a few drops of food coloring at this step.
- Heat the mixture to 95°C (203°F) or until it begins to froth. Put the candy thermometer into the mixture and monitor the temperature until it reaches approximately 95°C (203°F) or begins to froth. If the mixture begins to froth before it reaches temperature, that is okay. Remove it from the heat when it either reaches temperature or starts frothing.
- Continue to stir the mixture while it is heating up.
- Pour the plastic onto a smooth surface covered with foil or parchment paper. After you remove the pan from the heat source, you will need to remove any excessive froth. Spoon it out before pouring the plastic out of the pan. Stir everything to remove all clumps from the plastic.
- If you just want to make plastic for fun, pour the mixture out onto a smooth surface. Make sure the surface is covered with foil or parchment paper so the plastic can be removed easily.
- If you want to mold the plastic into a specific shape, you will need to do it during this step. Refer to the last method on molding for more details and help.
- Leave the plastic to harden for at least two days. The amount of time it will take the plastic to harden is dependent upon how thick the piece is. Generally, it will take at least two days for it to fully dry out and harden. You can make this process go a little faster by using a blow dryer on the plastic. It’s easiest to leave the plastic undisturbed for a few days so it can dry on its own.
- Once the plastic hardens, it can no longer be molded or shaped. If you want to shape it, you must do it while it is still warm and moldable.
Recipe #4: Agar Agar Plant Based Bioplastic
URL:
https://issuu.com/nat_arc/docs/bioplastic_cook_book_3/s/159731
Base Ingredient: Agar Agar
Materials:
- Pot
- Stove
- Stirring Material
- Spoon
*Quantities will be as much as needed, and will vary with each experiment.
Ingredients:
- Flexible Glycerine*, (g) 0.0 1.4 2.7 5.4 (≈ 0, 0.394, 0.761, 1.522 tsp)
- Water, (ml) 40 40 40 40 (≈ 2.705 tbsp)
- Agar, (g) 1.6 1.6 1.6 1.6 (≈ 0.451 tsp)
*(I will probably start with 1.4 g, then move on if it needs to be more brittle. Although, the recipe states that too little glycerine will make it shrink significantly and break, so I will need to take this into account and will probably decide on the quantity of glycerine when designing the experiments)
Instructions:
- Add agar, water and glycerine into a pot.
- Cook over medium heat and stir until the solution starts to boil and becomes viscous.
- With a spoon remove any froth, so that the bioplastic will have a glossy, smooth surface.
- Tape down a wooden frame (I will not be using a wooden frame) on a non-stick surface and pour in the solution.
- After 24 hours, remove the frame from the surface and let it hang dry.
- Once dry, cut out the bioplastic from the frame.
Recipe #5: Corn Starch Plant Based Bioplastic
Citation:
https://issuu.com/nat_arc/docs/bioplastic_cook_book_3/s/159731
Base Ingredient: Corn Starch
Materials:
- Pot
- Stove
- Stirring Material
*Quantities will be as much as needed, and will vary with each experiment.
Ingredients:
- Flexible Glycerine, (g) 0 5 10 20 (≈ 0, 1.409, 2.818, 5.636 tsp)
- Water, (ml) 80 80 80 80 (5.41 tbsp)
- Corn Starch, (g) 1.6 1.6 1.6 1.6 (≈ 0.451 tsp)
- Vinegar, (ml) 15 15 15 15 (≈ 1.014 tbsp)
Instructions:
- Add corn starch, water, glycerine and vinegar into a pot.
- Cook over medium heat and stir for 10 minutes. Continue to heat after the solution becomes viscous to evaporate the excess liquid.
- Tape down a wooden frame onto a non-stick surface. Spoon a thin layer of the mixture into the frame (if it is too thick it will crack as it dries).
- After 24 hours, remove the frame from the surface and let it hang dry.
- Once dry, cut out the bioplastic from the frame.
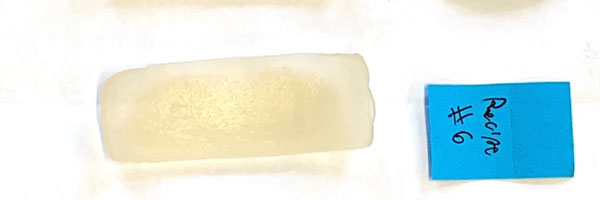
Recipe #6: Hard, Gelatine-Based Bioplastic Recipe
URL:
http://blog.teachersource.com/2020/08/14/diy-bioplastics/
Base Ingredient: Gelatin*
Replacement Chart:
|
Gelatin |
Agar Agar |
|
|
Flakes |
2.5 tsp (about 1 packet) (≈10.655 g) |
1 tbsp (≈12.786 g) |
|
Powder |
2.5 tsp (about 1 packet) (≈10.655 g) |
1 tsp (≈4.262 g) |
Materials:
- Silicone mat or plastic food container lid
- Toothpick, skewer or something similar
- Stirring material
*Quantities will be as much as needed, and will vary with each experiment.
Ingredients:
- Gelatin Powder
- Boiling Water
*Ingredients at a 2 (Gelatin): 5 (Boiling Water) Ratio
*I will try to properly judge this to make a sufficient amount of the plastic for the experiments.
Instructions:
- Dissolve gelatine powder in boiling water (ratio of 2:5 – 2 tbsp. gelatine, 5 tbsp. water).
- Stir until it fully dissolves. If the gelatine does not completely dissolve, add 1 tsp. of boiling water until fully dissolved.
- Pour the liquid onto the plastic lid or silicone mat.
- Place your decorative pieces (e.g. flowers, sequins, insects, etc.) into the liquid and use a toothpick or similar implement to arrange the objects, completely submerge them and pop any air bubbles. * Be careful not to make it too thick. If it’s more than about 1 cm, it may become moldy before it can dry out (I will not be doing this step although I might add food coloring)
- When the gelatine has set (I recommend letting it become rubbery overnight), you can cut a hole in it to hang it or cut it into any shape you wish.
- Leave it to harden – It will need a warm, dry environment to dry out. It can take 1-4 days to cure completely, depending on the thickness.
Recipe #7: Gelatine Animal Based Bioplastic
URL:
https://issuu.com/nat_arc/docs/bioplastic_cook_book_3/s/159731
Base Ingredient: Gelatin*
Replacement Chart:
|
Gelatin |
Agar Agar |
|
|
Flakes |
2.5 tsp (about 1 packet) (≈10.655 g) |
1 tbsp (≈12.786 g) |
|
Powder |
2.5 tsp (about 1 packet) (≈10.655 g) |
1 tsp (≈4.262 g) |
Materials:
- Pot
- Stove
- Stirring Material
- Spoon
*Quantities will be as much as needed, and will vary with each experiment.
Ingredients:
- Flexible Glycerine*, (g) 0.0 1.8 3.6 7.2 (≈ 0, 0.507, 1.014, 2.029 tsp)
- Water, (ml) 60 60 60 60 (≈ 4.058 tbsp)
- Gelatine**, (g) 12 12 12 12 (≈ 3.381 tsp)
*I will probably start with 1.8 g, then move up if need be.
**Agar Agar Powder: 14.4 tsp (≈ 51.103 g), Agar Agar Flakes: 4.8 tsp (≈ 10.221 g)
Instructions:
- Add gelatine, water, and glycerine into a pot.
- Cook over medium heat and stir until the gelatin is dissolved and the solution starts to thicken.
- With a spoon remove the froth, so that the bioplastic will have a glossy, smooth surface.
- Tape down the wooden frame on a non-stick surface and pour in the solution.
- After 24 hours, remove the frame from the surface and let it hang dry.
- Once dry, cut out the bioplastic from the frame.
Recipe #8: Make bioplastic by yourself!
URL:
https://www.youtube.com/watch?v=Cqg-QpaF1lk&t=2s from https://thekidshouldseethis.com/post/how-to-make-bioplastic
Base Ingredient: Corn Starch
Materials:
- Cooking pot
- Hotplate
- Whisk
- Wooden Spoon
- Baking Tray
*Quantities will be as much as needed, and will vary with each experiment.
Ingredients:
- Water 4 tbsp (≈ 59.147 ml)
- Corn Starch 1 tbsp (7.5 g)
- Vinegar 1 tsp (≈ 4.929 ml)
- Glycerin 1 tsp (≈ 3.549 g)
Instructions:
- Add 1 tablespoon of starch and 1 teaspoon of vinegar to 4 tablespoons of water in a cooking pot. Add also 1 teaspoon of glycerin. You can get the glycerine in a pharmacy. If you want to make more bioplastics, you can double, triple, etc. the quantities.
- Stir the mixture thoroughly with a whisk and heat over medium heat. Always keep stirring.
- After a few minutes, the mixture becomes thicker, you have to then replace the whisk with a wooden spoon to continue stirring.
- After more or less 10 minutes you have a sticky and glassy substance in your cooking pot. You can then spread this substance on a baking tray or another suitable surface.
- Wait at least 24 hours for the bioplastic to dry. Then you can pull it off the baking tray.
*Extra Link: https://www.youtube.com/watch?v=8nxuO3SjMQM&t=0s
Recipe #9: Bioplastics-Cooking Bioplastics from Gelatin
URL:
https://materiability.com/portfolio/bioplastics-diy/
Base Ingredient: Gelatin*
Replacement Chart:
|
Gelatin |
Agar Agar |
|
|
Flakes |
2.5 tsp (about 1 packet) (≈10.655 g) |
1 tbsp (≈12.786 g) |
|
Powder |
2.5 tsp (about 1 packet) (≈10.655 g) |
1 tsp (≈4.262 g) |
Materials:
- Hot Plate (I will use a stovetop)
- Pot(s)
- Scale
- Measuring Jug (100 ml) (≈ 6.763 tbsp)
- Measuring Jug (500 ml) (≈ 33.814 tbsp)
- Spoons
- Mold for desired Shape
- Thermometer
- Eggbeater
- Cups
- Aluminum Foil
*Quantities will be as much as needed, and will vary with each experiment.
Ingredients:
- Glycerol 12 g (≈3.381 tsp)
- Gelatine* 48 g (Powder) (≈4.509 tbsp)
- Water 240 ml (≈16.231 tbsp)
- Food Color (Optional)
*Agar Agar Powder: ≈ 5.411 tbsp (≈ 57.608 g) Agar Agar Flakes: ≈ 1.804 tbsp (≈ 11.524 g)
Instructions: (Instructional images can be found on the website).
- Create Mold: Prepare mold from cardboard or other material. Make sure the form has no holes or weak parts to prevent leaking of the liquid bioplastic. You can also create more complex shapes, depending on the thickness of your final form though, the material can take very long to dry fully.
- Prepare Work Area: Clean your surface and turn on a hot plate.
- Water: Pour 240 ml of cold water into your pot.
- Gelatine: Measure 48g of Gelatine Powder using a food scale and add it to the water.
- Glycerol: Measure 12g of Glycerol using a food scale and add it to the mixture. The amounts can be adjusted as long as the ratio remains roughly the same. Less Glycerol will result in a more brittle but harder material, more Glycerol will create a more flexible and soft sheet.
- Stir and Heat: Stir mixed ingredients until there are no clumps and it is as dispersed as it’s going to get. Heat mixture to 95° C or to when it starts to froth. Continue stirring mixture while heating. Keep measuring the temperature and remove the heat once it’s at the right temperature or when it starts to froth. Keep stirring for another few minutes. Remove excess froth with a spoon and make sure there are no clumps in the mixture.
- Pour liquid into mold: Once the mixture is ready and no clumps remain, pour it directly into the previously prepared mold. Place aluminum foil underneath mold and maybe grease mold first with vegetable oil (depending on your shape and material). Spread the liquid equally throughout the surface.
- Wait and Dry: The drying period strongly depends on the thickness of the final product but also on room temperature and humidity. It may take up to several days until the sheet is fully dry. Once the sheet is fully dry it can be removed from the mold carefully using a scalpel or thin knife.
Recipe #10:
URL:
https://class.textile-academy.org/tutorials/BIOPLASTIC-RECIPE.pdf
Base Ingredient: Gelatin*
Replacement Chart:
|
Gelatin |
Agar Agar |
|
|
Flakes |
2.5 tsp (about 1 packet) (≈10.655 g) |
1 tbsp (≈12.786 g) |
|
Powder |
2.5 tsp (about 1 packet) (≈10.655 g) |
1 tsp (≈4.262 g) |
Materials:
- Balance
- Heater
- Pan
- Spoon
- Mold
*Quantities will be as much as needed, and will vary with each experiment.
Ingredients:
- Cold Water (240 ml) (16.231 tbsp)
- Gelatin Powder* (48 g) (13.526 tsp)
- Glycerol (12 g) (3.381 tsp)
*Agar Agar Powder: ≈ 5.41 tsp (≈ 19.199 g), Agar Agar Flakes: ≈ 5.41 tbsp (≈ 34.558 g)
Instructions:
- First mix the cold water and the gelatin powder in the pan without heating.
- Gradually, the mixture turns into a granular yellow pale paste.
- Then start heating the preparation while stirring slowly so that there are no lumps.
- Once the preparation has become liquid and homogeneous add the glycerin into the mixture.
- Continue mixing and heating until you begin to see a whitish deposit on the surface of your mixture. If you want a transparent matter you have to remove completely this white foam with a spoon. Otherwise, you can keep it inside the mixture, it will dry on the surface and create a fluffy part. You can also make more foam by adding air inside your mix.
- Now pour your mixture into the mold or the prepared surface. It's preferable to take a glass or aluminum mold to cast its bioplastic because a wooden or cardboard surface will probably stick and damage the desired shape of the bioplastic.
Variables
Weight Experiment:
Controlled:
- Approximate volume of the sheets.
- Scale
- Environmental factors
Independent/Manipulated:
- The bioplastic
Dependent/Responding:
- Average weight
Density Experiment:
Controlled:
- Volume
- Calculation methods
- Weight experiment
Independent/Manipulated:
- Bioplastic
Dependent/Responding:
- Density
Buoyant Force Experiment:
Controlled:
- Calculation method
- Mean of acquiring data
Independent/Manipulated:
- Bioplastic
Dependent/Responding:
- Buoyant force
Solubility in Water Experiment:
Controlled:
- Type of mason jar
- Tools used to make the measurements
- Time spent in water
- Water and its contents.
Independent/Manipulated:
- The type of plastic/bioplastic
Dependent/Responding:
- Weight (trying to recreate mass) loss during the experiment
Melting Point Experiment:
Controlled:
- Amount of water
- Heating rate
Independent/Manipulated:
- Bioplastic
Dependent/Responding:
- Melting point
Flexibility Experiment:
Controlled:
- Protractor
- Quality of the sheet (high)
Independent/Manipulated:
- Bioplastic
Dependent/Responding:
- Flexibility
Weight it Can Support Experiment:
Controlled:
- Amount of weight added at a time
Independent/Manipulated:
- Bioplastic
Dependent/Responding:
- Supported weight
Opacity Experiment:
Controlled:
- Intensity of the flashlight
- Scale
- Thickness of the sheet.
Independent/Manipulated:
- The bioplastic sheet
Dependent/Responding
- Opacity level
Burn or Melt Experiment:
Controlled:
- Time spent under flame
- Intensity of the flame
Independent/Manipulated:
- Bioplastic
Dependent/Responding:
- Whether it burns or melts
Procedure
Weight Experiment:
- Trim any excess plastic away from the sheet.
- Count the number of sheets being used.
- Weigh the collection of each individual recipe.
- Divide the total weight by the number of sheets in the collection.
Density Experiment:
- Weight experiment, to get the average weight (in grams).
- Calculate the volume of a single sheet (in cm^3).
- Divide the weight by the volume.
Buoyant Force Experiment:
- Density experiment
- Calculate the volume of a sheet (should be done in the density experiment)
- Plug the values into the formula; Fb= ρgV
- Assuming that 100% of the sheet will displace the water
Solubility Experiment:
- Fill a glass mason jar with (amount will be determined when I arrive back a t home) of water.
- Leave the mason jar undisturbed, and out in the open, until it reaches room temperature. Use a candy thermometer to determine the temperature of the water.
- Weigh the bioplastic sheet.
- Place a singular bioplastic sheet in the water for half of an hour.
- Every five minutes, gently stir the water with a spoon.
- After half of an hour, remove the plastic sheet.
- Leave it out to dry until sufficiently dry as to not affect the measurement.
- Weigh the bioplastic sheet.
Melting Point Experiment:
- Fill a pot with three cups of water
- Place the bioplastic sheet in the pot
- Slowly start to heat the pot recording the temperature
- Watch for when the sheet starts to melt and record the temperature
Price per Gram Experiment:
- Calculate the $/g or ml rate of price for all of the ingredients.
- Use this to calculate how much the ingredients will cost per batch.
- After making the recipes, measure the yield (how much, in grams, how much each recipe makes.
- Use this to calculate the $/g rate per recipe.
- Finish the equation by adding the materials cost as a constant term.
*All final result should be in the format of:
($/g)(Price Rate) g(Variable) +$(Materials)=$(Total
Flexibility Experiment:
First and second axis (long side and short side folding):
- Find the center point of the sheet
- Place the center line/point at the 0° marker of a protractor
- Pull the far side up as far as possible
- Record the amount of degrees it makes it to.
Third axis (twisting the short end):
- Find the center line in the other direction
- Place the sheet down on a table with only the very end attached to the table, and the rest suspended in the air
- Place the end hanging off of the table at the 0° marker of a protractor
- Twist that end as far as possible
- Record the degrees
Weight it can Support Experiment:
- Place the sheet over a glass jar of a diameter similar to the length of the sheet
- Make a paper container of some sort
- Make an approximate weight for the container
- Place the container on top of the sheet
- Start to place paperclips in the container until the sheet breaks
- Collect the paper clips and multiply it by one for their weight in grams
- Add this to the container weight
Opacity Experiment:
- Holding up a sheet of the bioplastics, shine a flashlight through the sheet.
- Record whether it is transparent, translucent, or opaque.
Burn or Melt Experiment:
- Place each recipe sheet in a fire resistant pan
- Expose each sheet individually to a flame from a lighter for 7 seconds
- Watch to see if it has lit on fire, or started to melt
Observations
Analysis
Conclusion
Application
Sources Of Error
Weight Experiment:
- Imperfection in the sheets
- Drying time (water in the sheets)
Density Experiment:
- Imperfection in volume (such as thermal dilation)
Buoyant Experiment:
- Imperfections in volume
- A different percentage of the volume displacing the water
Solubility Experiment:
- Inconsistency in stirring
- Imperfections in the bioplastic sheet
- Potential water absorption of the sheet
- Inconsistency of the dissolving of the sheet into the solvent (water) through time
Melting Point Experiment:
- Impurities in the substance
Price per Gram Experiment:
- Potentially Problematic Equation Format
- Potential Incorrect Calculations
Flexibility Experiment:
- Weaknesses in the sheets
- Inconsistent application of force
Weight it can Support Experiment:
- Other objects supporting the weight
Opacity Experiment:
- Coloring agents
Burn or Melt Experiment:
- Surface are changing chemical reactions
- Imperfection in the mixtures